
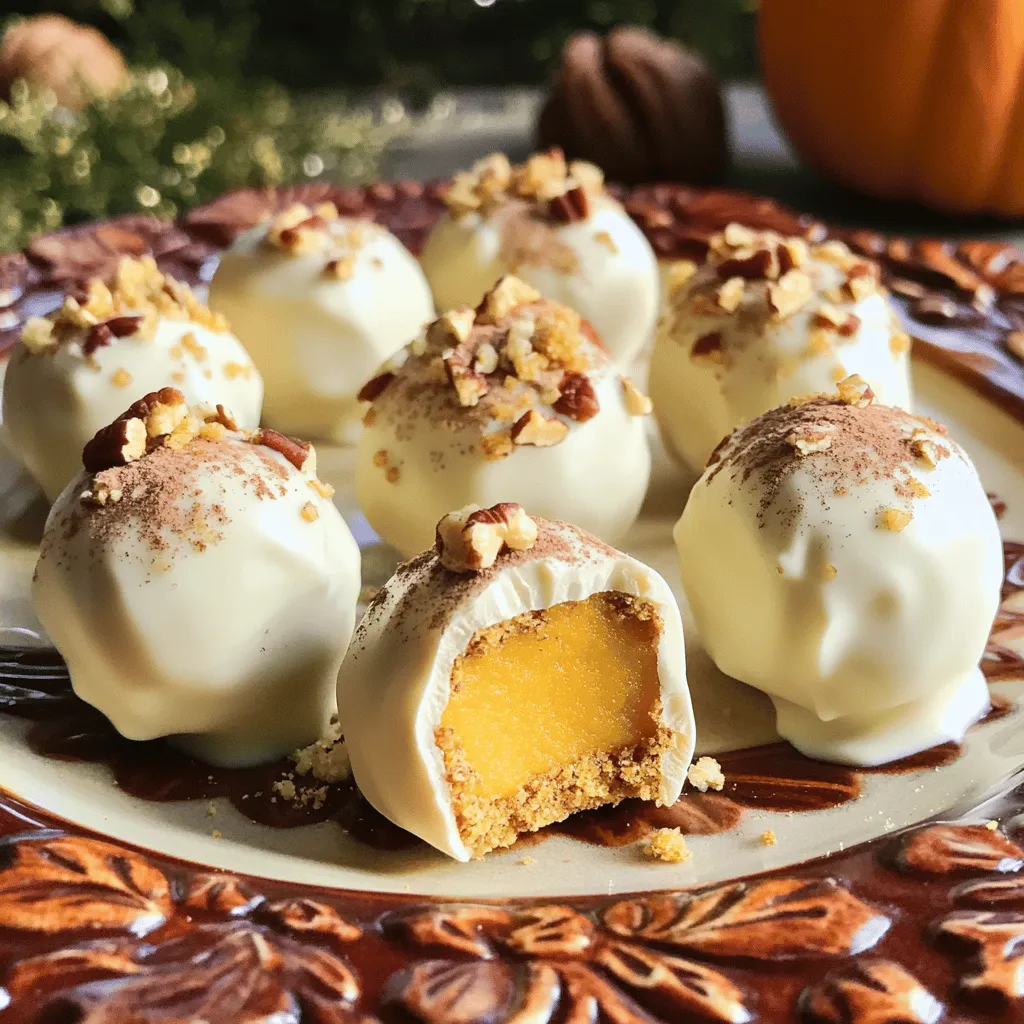
Ready for a sweet treat that’s easy and fun? These No-Bake White Chocolate Pumpkin Truffles are perfect for any occasion! You only need a few simple ingredients and minimal time to whip them up. Whether it’s fall, a holiday, or just because, these truffles are sure to please. Let’s dive into the steps to make these delicious bites!
Ingredients
Essential Ingredients for White Chocolate Pumpkin Truffles
– 1 cup pumpkin puree
– 1 cup graham cracker crumbs
– 1/2 teaspoon ground cinnamon
– 1/4 teaspoon ground nutmeg
– 1/4 teaspoon ground ginger
– 1/2 cup powdered sugar
– 8 ounces white chocolate, finely chopped
– 1 tablespoon coconut oil
– 1/4 cup crushed pecans or walnuts (for rolling)
These ingredients create a rich and flavorful base for your truffles. The pumpkin puree gives a nice creaminess. The graham cracker crumbs add texture and sweetness. The spices like cinnamon, nutmeg, and ginger bring warmth and depth. Together, they make a perfect fall treat.
Optional Ingredients for Added Flavor
– A pinch of sea salt
– Sprinkles or colored sugar for decoration
– 1 teaspoon vanilla extract
Adding a pinch of sea salt can enhance the sweet flavors. Sprinkles or colored sugar can make your truffles look festive. A dash of vanilla extract adds another layer of flavor. These options let you customize your truffles to your liking.
Equipment Needed
– Large mixing bowl
– Spatula or wooden spoon
– Parchment-lined baking sheet
– Small cookie scoop or your hands
– Microwave-safe bowl
– Fork for dipping
Having the right tools makes this recipe easy. A large bowl helps mix everything smoothly. The parchment-lined baking sheet prevents sticking. A small cookie scoop helps shape uniform truffles. These tools ensure you create perfect treats every time.
Step-by-Step Instructions
Mixing the Base
To start, gather your large mixing bowl. Add 1 cup of pumpkin puree. Next, pour in 1 cup of graham cracker crumbs. Now, sprinkle in 1/2 teaspoon of ground cinnamon and 1/4 teaspoon each of ground nutmeg and ground ginger. Finally, add 1/2 cup of powdered sugar. Mix well using a spatula or wooden spoon. Keep stirring until a smooth dough forms. This base will be the heart of your truffles.
Chilling the Mixture
Once your mixture is smooth, it’s time to chill. Cover the bowl with plastic wrap or a lid. Place it in the refrigerator for 20 to 30 minutes. This step firms up the mixture, making it easier to shape later. Chilling helps the flavors blend, too.
Shaping the Truffles
After chilling, take out the mixture. Use a small cookie scoop or your hands to grab some dough. Roll each portion into balls about 1 inch wide. Place the formed truffles on a parchment-lined baking sheet. This will keep them from sticking and make cleanup easier.
Melting the White Chocolate
Now, let’s melt the white chocolate. In a microwave-safe bowl, combine 8 ounces of finely chopped white chocolate with 1 tablespoon of coconut oil. Microwave the bowl in 30-second intervals. Stir after each interval. Keep going until the chocolate is fully melted and smooth. Be careful not to overheat, as this can ruin the texture.
Dipping and Coating the Truffles
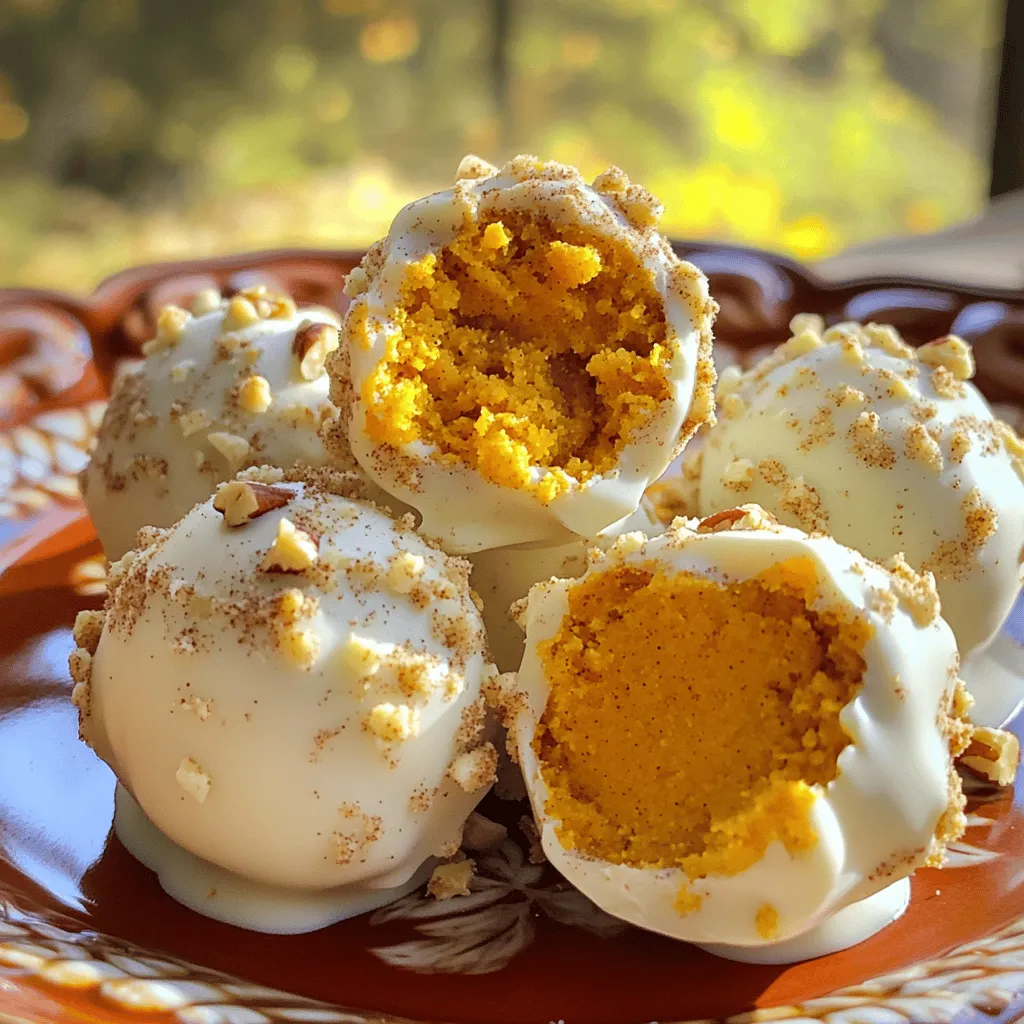
Take each truffle and dip it into the melted white chocolate. Use a fork to coat it evenly. Let the excess chocolate drip back into the bowl. Repeat this for each truffle. The shiny layer of chocolate makes them look great and adds sweetness.
Setting the Truffles
Once dipped, roll each truffle in crushed pecans or walnuts. This adds flavor and crunch. Place the coated truffles back onto the parchment-lined baking sheet. Return them to the fridge to set for at least 1 hour. This step hardens the chocolate and gives a nice bite.
Tips & Tricks
Best Practices for Mixing and Chilling
Start by mixing the pumpkin puree and graham cracker crumbs well. Use a spatula or wooden spoon to blend them together. The key is to ensure no dry spots remain. After mixing, cover the bowl tightly. Chill the mixture in the fridge for 20 to 30 minutes. This step helps the dough firm up, making it easier to roll into balls.
How to Achieve a Smooth Chocolate Coating
When melting the white chocolate, chop it finely for even melting. Combine it with coconut oil in a microwave-safe bowl. Heat in 30-second bursts, stirring each time. This method helps prevent overheating, which can lead to clumping. Once melted, dip each truffle carefully. Use a fork for an even coat, and let the excess chocolate drip off.
Serving Suggestions and Presentation Tips
To impress your guests, arrange the truffles on a fancy plate. Drizzle extra melted white chocolate over them for flair. You can also toss in a few crushed nuts on top for added texture. For a fresh look, add a sprig of mint as a garnish. These small touches will make your truffles look as good as they taste!
Variations
Adding Different Flavorings
You can change the taste of your truffles by adding more flavors. Try adding a splash of vanilla extract for sweetness. You can also mix in a bit of maple syrup for a richer taste. Another option is to add a pinch of sea salt for a fun contrast with the sweetness.
Using Alternative Nuts for Coating
While pecans and walnuts are great, other nuts work well too. You can use crushed almonds for a nice crunch. Hazelnuts add a unique flavor that pairs well with pumpkin. If you want a sweeter taste, try using chopped macadamia nuts. Each nut brings its own twist to the truffles.
Adjusting Sweetness Levels
If you like less sweet treats, cut back on the powdered sugar. Start with half the amount and taste the mixture. You can always add more if needed. For those who want it sweeter, add a bit more sugar or even a drizzle of honey. This way, you can make the truffles just right for your taste buds.
Storage Info
How to Store Leftover Truffles
To store leftover truffles, place them in an airtight container. You can layer them with parchment paper to prevent sticking. Keep the container in the fridge. This method keeps them fresh and tasty for days. If you follow this step, your truffles will maintain their great flavor and texture.
Freezing Truffles for Longer Storage
If you want to store truffles for a longer time, freezing is best. First, place the truffles on a baking sheet. Freeze them until firm, about 1 hour. Once solid, transfer them to a freezer-safe bag or container. You can freeze them for up to three months. When you’re ready to eat, let them thaw in the fridge overnight.
Shelf Life of No-Bake Truffles
No-bake truffles can last for about one week in the fridge. They may lose some texture over time, but the taste remains great. If stored well, the flavor stays rich and enjoyable. Always check for any signs of spoilage before eating, especially if they have been in the fridge for longer than a week.
FAQs
Can I use different types of chocolate?
Yes, you can use dark or milk chocolate instead of white chocolate. Each type gives a unique taste. Dark chocolate offers a rich flavor, while milk chocolate adds sweetness. Just remember to adjust the melting process. Dark chocolate may need more time to melt, so check it closely.
How long do the truffles need to set?
The truffles need at least 1 hour to set in the fridge. This time allows the chocolate to harden. If you want a firmer truffle, you can chill them longer. Just be sure to cover them well to avoid drying out.
Are these truffles gluten-free?
Yes, these truffles can be gluten-free! Just use gluten-free graham cracker crumbs. Check the labels to ensure no gluten is present. This way, everyone can enjoy this tasty treat without worry.
What can I use instead of pumpkin puree?
If you don’t have pumpkin puree, try using sweet potato puree or mashed banana. Both options will give a nice flavor and texture. Just keep in mind that the taste will change slightly, but they will still be delicious.
Can I make these truffles ahead of time?
Absolutely! You can make these truffles a few days in advance. Store them in an airtight container in the fridge. This way, you can enjoy them fresh without any last-minute work.
White chocolate pumpkin truffles combine rich flavors with simple steps. We covered essential and optional ingredients, along with necessary tools. The step-by-step guide helps you mix, chill, shape, and coat your truffles flawlessly. Tips ensure smooth coatings, and serving ideas make them shine. Feel free to experiment with variations and easily store any extras. These truffles are fun and tasty, perfect for sharing. Enjoy making your own batch that impresses every time!
