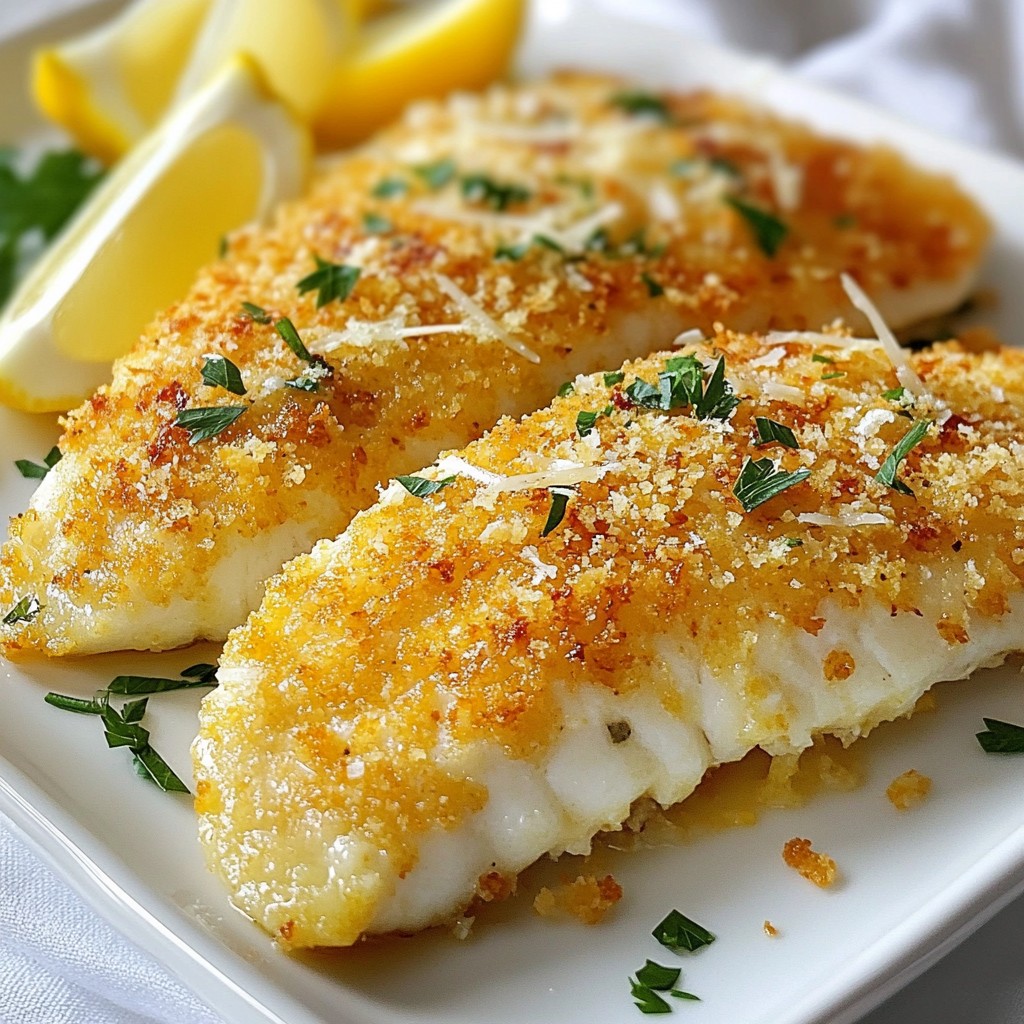
Are you craving a dish that's both quick to make and packed with flavor? Baked Parmesan Crusted Tilapia is the answer! This tasty meal combines the light, flaky goodness of tilapia with a crispy, cheesy coating. Perfect for busy weeknights or special occasions, it's easy to prep and even easier to love. Read on to learn how to create this dish that's sure to impress your family and friends!
Why I Love This Recipe
- Quick to Prepare: This recipe takes only 10 minutes of prep time, making it a fantastic option for busy weeknights or last-minute dinners.
- Flavorful Crust: The combination of Parmesan cheese and panko breadcrumbs creates a crunchy, flavorful crust that elevates the mild taste of tilapia.
- Healthy Option: Tilapia is a lean source of protein and when baked instead of fried, it becomes a healthier meal choice without sacrificing flavor.
- Versatile Serving: This dish pairs beautifully with various sides, from fresh salads to roasted vegetables, making it adaptable to any meal.
Ingredients
Main Ingredients
- 4 tilapia fillets
- 1/2 cup freshly grated Parmesan cheese
- 1/2 cup panko breadcrumbs
- 2 tablespoons unsalted butter, melted
- 1 tablespoon extra virgin olive oil
Seasonings
- 1 teaspoon garlic powder
- 1 teaspoon smoked paprika
- Salt and freshly cracked black pepper to taste
Garnishes
- Fresh lemon wedges
- Chopped fresh parsley
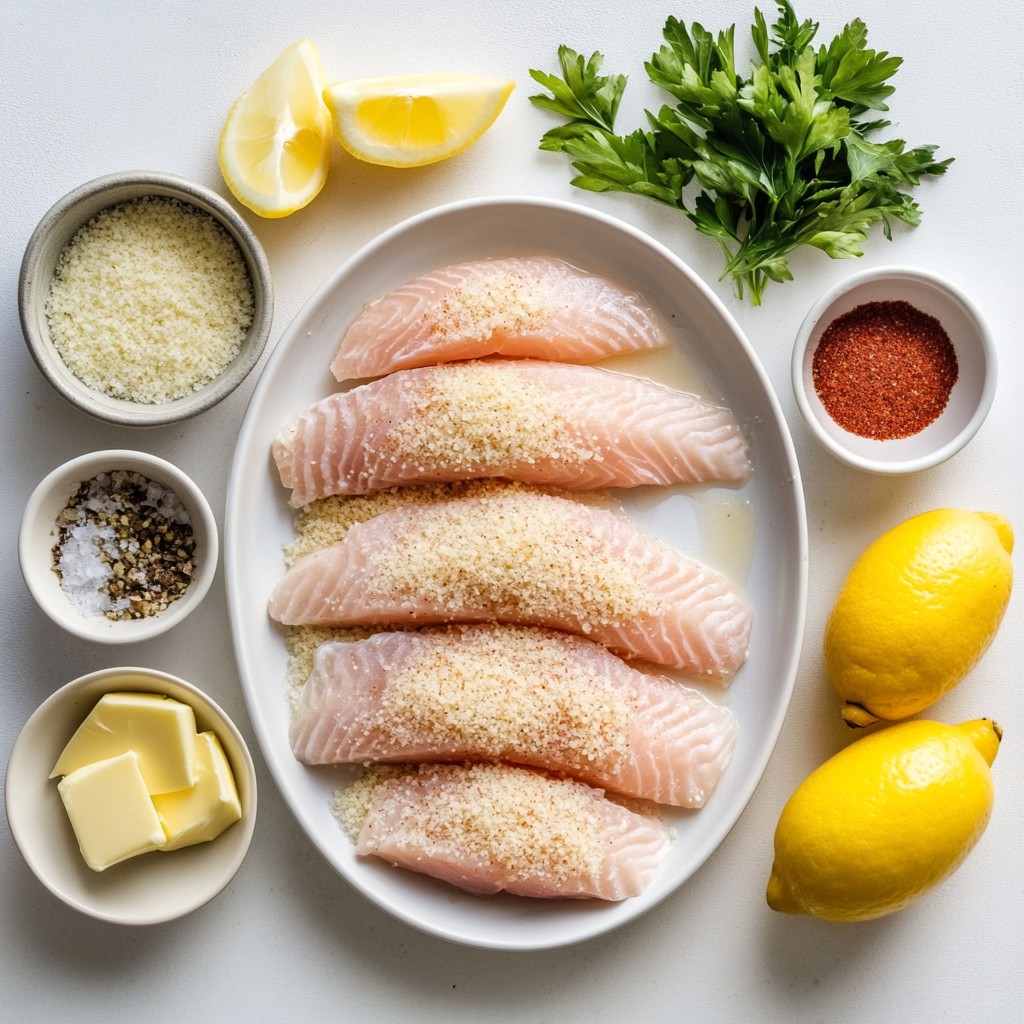
When preparing Baked Parmesan Crusted Tilapia, start with fresh tilapia fillets. These fillets are mild, flaky, and perfect for this dish. Next, use freshly grated Parmesan cheese. It adds a rich, nutty flavor that melts beautifully. I prefer panko breadcrumbs for their light, crunchy texture. They help create a crispy topping that contrasts well with the tender fish. Don't forget the unsalted butter. It binds the mixture and adds moisture.
For seasonings, garlic powder gives a savory depth. Smoked paprika adds a hint of warmth and color. Always season your fish with salt and freshly cracked black pepper. This enhances the natural flavors of the tilapia.
To finish, gather some fresh lemon wedges. They add a bright, zesty touch when served. Chopped fresh parsley also makes a lovely garnish. It adds color and a fresh taste to your dish. With these ingredients, you set the stage for a delightfully tasty meal.
Step-by-Step Instructions
Preparation Steps
1. Preheat your oven to 400°F (200°C). This step is key for even cooking.
2. Line a baking sheet with parchment paper. This helps with easy cleanup later.
3. In a medium bowl, mix together the grated Parmesan cheese and panko breadcrumbs.
4. Add the melted butter, olive oil, garlic powder, smoked paprika, salt, and pepper. Stir until it looks like wet sand.
Fish Preparation
1. Take your tilapia fillets and pat them dry with paper towels. This keeps the fish from being soggy.
2. Season both sides of the fillets with salt and freshly cracked black pepper. This adds great flavor.
Baking Process
1. Place the seasoned tilapia fillets on the lined baking sheet.
2. Evenly spread the Parmesan breadcrumb mixture over each fillet. Press down gently so it sticks well.
3. Put the baking sheet in the oven and bake for 12-15 minutes. Look for a golden crust and flaky fish.
4. Once done, carefully take them out of the oven. Let them rest for a couple of minutes to set the crust.
5. Serve warm, topped with chopped parsley and fresh lemon wedges for a bright touch.
Tips & Tricks
Cooking Tips
- Make sure your tilapia fillets are dry. This helps the crust stick better.
- Adjust the baking time based on how thick your fillets are. Thicker pieces need more time.
Presentation Tips
- For a stunning look, arrange the tilapia on a bright platter.
- Garnish with fresh parsley and lemon. This adds color and flavor.
Flavor Enhancements
- Feel free to try more spices. Adding chili powder or herbs can change the taste.
- Drizzle some lemon juice before serving. It gives a fresh, zesty kick.
Pro Tips
- Tip for Crispy Crust: Ensure the panko breadcrumbs are evenly coated with butter and oil for a perfectly crunchy texture that holds up during baking.
- Tip for Flavor Infusion: Marinate the tilapia fillets in lemon juice and herbs for 15-30 minutes before coating them to enhance the flavor profile.
- Tip for Even Cooking: Make sure the fillets are of even thickness to ensure they bake uniformly. If needed, gently pound thicker areas to flatten them.
- Tip for Serving: Pair the baked tilapia with a light salad or steamed vegetables for a balanced meal, and don't forget to drizzle some extra lemon juice on top!
Variations
Ingredient Swaps
You can easily swap the fish in this recipe. Try using cod, haddock, or even salmon. Each fish brings its own flavor. You can also change the cheese. Instead of Parmesan, use Pecorino Romano or mozzarella for a different taste.
Flavor Variations
Want a kick? Add chili flakes to the breadcrumb mix for a spicy twist. You can also mix in dried herbs like thyme or basil. These herbs will add a fresh taste to the crust.
Serving Suggestions
This dish pairs well with many side dishes. Serve it with steamed vegetables or fluffy rice for a balanced meal. You can also try different sauces like tartar sauce or a spicy aioli. These sauces will enhance the flavors of the tilapia and make your meal even more enjoyable.
Storage Info
Refrigeration
To store your leftovers, let the tilapia cool to room temperature. Place the fillets in an airtight container. Make sure to separate layers with parchment paper to avoid sticking. Store in the fridge for up to three days. This keeps your fish fresh and tasty for later meals.
Reheating
To reheat, the best method is using an oven. Preheat the oven to 350°F (175°C). Place the fillets on a baking sheet lined with parchment paper. Heat for about 10 minutes. This method helps keep the crust crispy and the fish moist. Avoid using the microwave, as it can make the fish rubbery.
Freezing
If you want to freeze your tilapia, wrap each fillet tightly in plastic wrap. Then, place them in a freezer-safe bag. Remove as much air as possible before sealing. You can freeze the tilapia for up to two months. When ready to eat, thaw in the fridge overnight before reheating. This keeps your fish flavorful and safe to eat.
FAQs
What is the best side dish to serve with Baked Parmesan Crusted Tilapia?
I love pairing Baked Parmesan Crusted Tilapia with light and fresh sides. Here are some great options:
- Steamed broccoli: This adds color and nutrients.
- Garlic mashed potatoes: Creamy potatoes balance the crispy fish.
- Rice pilaf: A flavorful base that soaks up the lemon juice.
- Mixed green salad: Crisp greens with a tangy dressing brighten the meal.
- Roasted asparagus: A tasty and elegant side that complements the fish.
Can I use frozen tilapia fillets?
Yes, you can use frozen tilapia fillets! Just make sure to thaw them first. Here’s how:
- Thaw overnight in the fridge for best results.
- If you’re in a hurry, you can run them under cold water for about 15-20 minutes.
- Pat them dry after thawing to get a nice crust.
How do I know when tilapia is fully cooked?
You can check if tilapia is cooked by looking for a few signs:
- The fish should be opaque and not translucent.
- It will flake easily with a fork when cooked.
- The internal temperature should reach 145°F (63°C) for safety.
Always use a food thermometer if you’re unsure. Enjoy your meal knowing it’s cooked perfectly!
In this article, we covered everything you need for Baked Parmesan Crusted Tilapia. You learned about key ingredients, step-by-step instructions, tips for cooking and presentation, and ways to vary the dish. You also gained insights on storing leftovers and reheating. Remember, this dish is simple and packed with flavor. Use fresh ingredients for the best result. Try different spices or fish to make it your own. Enjoy cooking and sharing this delightful dish!