Are you ready to make mealtime fun and cheesy? In this post, I will share a simple recipe for Cheesy Kids Mini Egg Muffins. These tasty muffins are not only easy to whip up, but they're also perfect for little hands. Packed with protein and flavor, your kids will love them! Let’s dive into the tasty ingredients and step-by-step guide to bring these delightful bites to your kitchen!
Why I Love This Recipe
- Kid-Friendly: These mini egg muffins are not only delicious but also fun for kids to eat, making them a perfect snack or breakfast option.
- Customizable: You can easily mix and match the vegetables and cheese according to your family's preferences, adding a personal touch to each batch.
- Quick and Easy: With a prep time of just 10 minutes, these muffins are a breeze to whip up, making them great for busy mornings.
- Healthy Option: Packed with protein and nutrients from the eggs and vegetables, these muffins are a wholesome choice for both kids and adults.
Ingredients
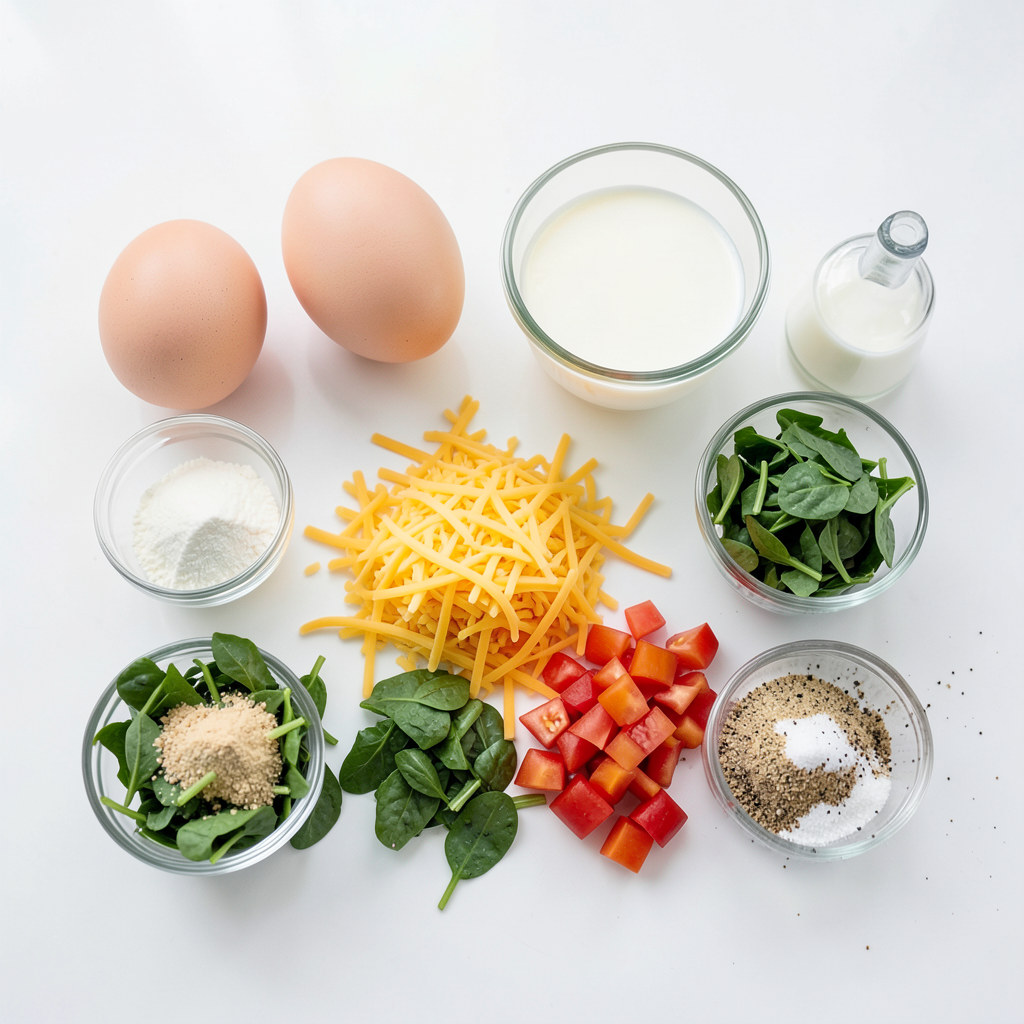
List of Ingredients
- 6 large eggs
- 1 cup shredded cheddar cheese
- 1/2 cup milk
- 1/2 cup diced bell peppers (any color)
- 1/4 cup chopped spinach (optional)
- 1/4 cup diced tomatoes (fresh or canned)
- 1/4 teaspoon garlic powder
- 1/4 teaspoon onion powder
- Salt and pepper to taste
- Cooking spray or muffin liners
Optional Ingredients for Variation
- Use mozzarella or feta cheese for a different taste.
- Add cooked bacon or sausage for extra flavor.
- Swap in zucchini or carrots for added crunch.
Kitchen Supplies Needed
- Muffin tin
- Mixing bowl
- Whisk or fork
- Measuring cups and spoons
- Cooking spray or muffin liners
- Oven mitts for safety
Gather all these ingredients and supplies before you start. This will make the process smooth and fun. Enjoy making these cheesy kids mini egg muffins!
Step-by-Step Instructions
Preheat and Prepare Muffin Tin
First, heat your oven to 350°F (175°C). This step is key for even baking. Next, spray a muffin tin with cooking spray. You can also use muffin liners. This keeps the muffins from sticking.
Combine Eggs and Milk
In a big bowl, crack 6 large eggs. Whisk them well until they are smooth. Then, add 1/2 cup of milk. Mix until creamy and combined. This makes the muffins fluffy.
Mix in Cheddar and Vegetables
Now, it’s time to add flavor. Stir in 1 cup of shredded cheddar cheese. Then add 1/2 cup of diced bell peppers. You can choose any color you like. If you want, add 1/4 cup of chopped spinach too. Next, mix in 1/4 cup of diced tomatoes. Sprinkle in 1/4 teaspoon of garlic powder and 1/4 teaspoon of onion powder. Add salt and pepper to taste. Mix it all until evenly combined.
Pour Mixture and Bake Muffins
Carefully pour the egg mixture into the muffin tin. Fill each cup about 3/4 full. This allows room for the muffins to rise. Bake for 15 to 18 minutes. They are done when they puff up and turn golden brown. To check, insert a toothpick in the center of a muffin. If it comes out clean, they are ready! Let the muffins cool for a few minutes in the tin. Then, transfer them to a wire rack to cool completely.
Tips & Tricks
Making the Perfect Mini Egg Muffins
To make the perfect mini egg muffins, start with fresh eggs. Fresh eggs whip better and create fluffier muffins. Use a large bowl to mix your eggs and milk. Whisk them until they blend smoothly. This step is key to a creamy texture.
When adding cheese and veggies, chop them into small pieces. This helps them cook evenly. Mix in the cheese and veggies gently. You want them well-distributed but not over-mixed. Fill your muffin tin about three-quarters full. This allows room for them to rise.
Bake until they are golden brown. Check with a toothpick to ensure they are cooked through.
Substitutions for Dietary Needs
If you need to make substitutions, there are many options. For a dairy-free version, use almond milk instead of regular milk. You can swap the cheese for a dairy-free cheese. This way, everyone can enjoy the muffins.
If you have egg allergies, try flax eggs. Mix one tablespoon of ground flaxseed with three tablespoons of water. Let it sit for a few minutes to thicken.
For gluten-free needs, make sure your cheese and veggies are gluten-free. You can also use gluten-free muffin liners. This way, everyone can join the fun!
How to Get Kids Involved in the Cooking Process
Cooking with kids can be a blast! Let them crack the eggs into the bowl. This is a fun way to teach them how to cook. They can also help measure the cheese and veggies.
Kids love to stir! Let them mix the ingredients together. This gives them a sense of ownership.
You can even let them choose which veggies to add. This way, they feel excited to eat what they made. Cooking together creates great memories and helps them learn.
Pro Tips
- Use Fresh Ingredients: Always opt for fresh vegetables and high-quality cheese for the best flavor in your mini egg muffins.
- Customize Your Add-ins: Feel free to add other veggies like mushrooms or zucchini, or even cooked bacon for extra protein and flavor.
- Store Properly: Keep leftovers in an airtight container in the refrigerator for up to 3 days. Reheat in the microwave for a quick snack.
- Make Them Ahead: These muffins freeze well! Bake a batch and freeze them for a convenient breakfast or snack on busy days.
Variations
Cheese Variations (e.g., Mozzarella, Feta)
You can switch up the cheese for fun! Mozzarella makes these muffins extra gooey. Feta adds a salty punch. Experiment with other cheeses too, like Swiss or pepper jack. Each cheese brings a new flavor twist. Just remember to keep the amount around one cup. This keeps the muffins fluffy and cheesy.
Vegetable Additions for Extra Nutrition
Want to add more veggies? Try zucchini, carrots, or broccoli! They boost nutrition and add color. Make sure to chop them small so they mix well. You can also use frozen veggies. Just thaw and drain them first. This way, your muffins stay moist and tasty.
Freezing and Reheating Tips
Freezing is a great way to save these muffins! Let them cool completely before freezing. Place them in a freezer bag or container. They can last up to three months. When you're ready to eat, just reheat in the microwave. About 30 seconds should do the trick. You can also bake them at 350°F for 10-15 minutes. Enjoy warm and cheesy goodness anytime!
Storage Info
Best Practices for Storing Muffins
To store your cheesy mini egg muffins, let them cool first. Then, place them in an airtight container. You can use a plastic bag too. If you want, separate layers with parchment paper. This keeps them from sticking together.
How Long They Last in the Fridge or Freezer
In the fridge, these muffins last about five days. If you freeze them, they stay good for up to three months. Just make sure to wrap them well. Freezing keeps them fresh and tasty for later.
Reheating Instructions
To reheat, take the muffins out of the fridge or freezer. If frozen, let them thaw first. You can warm them in the microwave for about 30 seconds. For a crispier texture, use an oven at 350°F for about 10 minutes. Enjoy them warm for the best flavor!
FAQs
Can I make these mini muffins ahead of time?
Yes, you can make these mini muffins ahead of time. Bake them, then cool completely. Store them in an airtight container in the fridge for up to five days. You can also freeze them for up to three months. Just thaw them in the fridge overnight before serving.
What can I use instead of eggs?
You can use several substitutes for eggs. Here are some options:
- 1/4 cup applesauce
- 1/4 cup mashed banana
- 1/4 cup yogurt
- 1 tablespoon flaxseed meal mixed with 2.5 tablespoons water
These options will help bind the muffins just like eggs do.
How do I know when the muffins are done baking?
Check the muffins after 15 minutes. They should puff up and turn golden brown. Insert a toothpick in the center. If it comes out clean, the muffins are done. If not, bake for a few more minutes and check again.
You now know how to make tasty mini egg muffins. We covered ingredients, step-by-step instructions, and handy tips. Remember to be creative with variations and involve kids in the process. Proper storage keeps your muffins fresh for longer. With this knowledge, you can enjoy or share these quick meals anytime. Happy cooking!