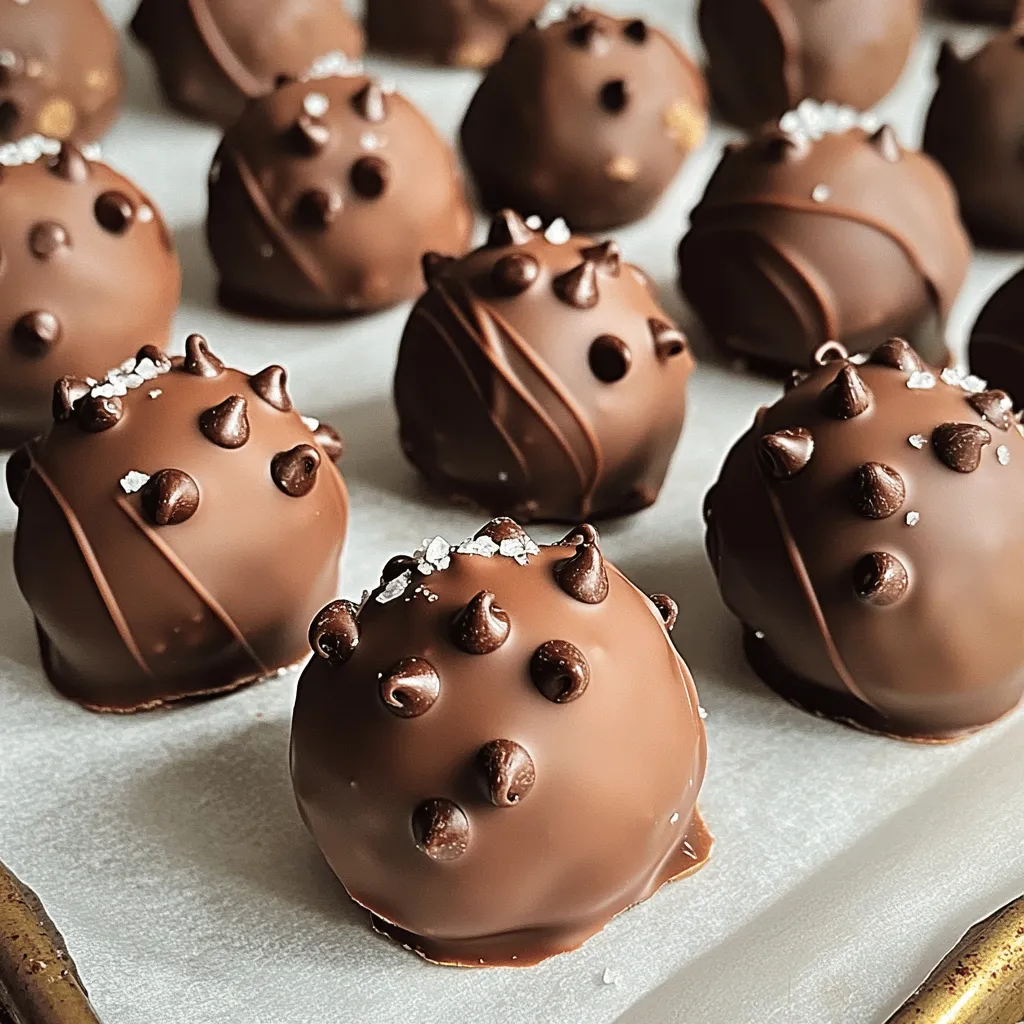
If you love chocolate chip cookies, wait until you try these Chocolate Chip Cookie Dough Truffles! Imagine creamy, soft cookie dough, wrapped in rich dark chocolate. I’ll guide you step-by-step through making this delightful treat that’s perfect for any occasion. Whether you want to impress friends or enjoy a sweet bite yourself, these truffles are a must-try. Let’s dive into the delicious world of cookie dough truffles now!The flour adds structure. Butter gives richness. The sugars add sweetness and creaminess. Chocolate chips create that classic cookie dough flavor. The dark chocolate coating adds a perfect finish.
You can also customize your truffles with optional add-ins. Think about using nuts, dried fruit, or even different types of chocolate. This makes each batch unique and fun.
Step-by-Step Instructions
Preparation Overview
To start, gather all your ingredients. You will need flour, baking soda, salt, butter, brown sugar, granulated sugar, vanilla extract, milk, mini chocolate chips, dark chocolate chips, and coconut oil. First, whisk the flour, baking soda, and salt in a bowl. Set this aside. In a large bowl, beat the softened butter with both sugars until it gets creamy. Add in the vanilla and milk, mixing until smooth.
Chilling the Dough
After combining the wet and dry ingredients, fold in the mini chocolate chips. It’s important not to overmix. Once combined, wrap the bowl tightly with plastic wrap. Place it in the fridge for about 30 minutes. Chilling makes the dough firm, helping you shape it into truffles later on. This step is key for the perfect texture.
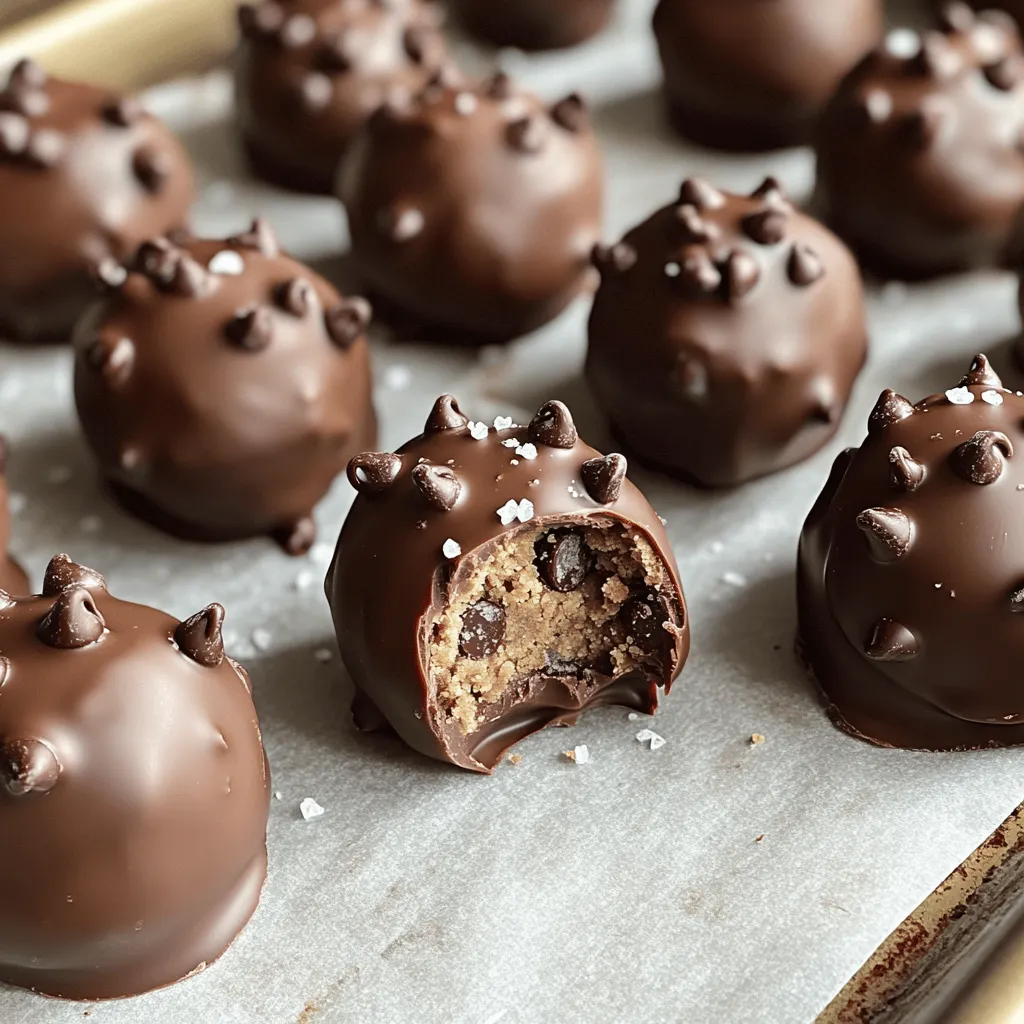
Coating Process
Once your dough is chilled, scoop out small portions. Roll each portion into a ball and place them on a parchment-lined baking sheet. Now, melt the dark chocolate chips with coconut oil in the microwave. Stir every 30 seconds until it’s smooth. Carefully dip each cookie dough ball in the melted chocolate. Let any excess chocolate drip off before placing it back on the sheet. Finally, refrigerate the truffles for 15 minutes or until the chocolate hardens.
Tips & Tricks
Perfecting the Dough Consistency
To get the best dough for your truffles, you need the right texture. After you mix your butter and sugars, the dough should feel soft, but not sticky. If it’s too wet, add a bit more flour. If it’s too dry, add a splash of milk. Chilling the dough is a must. This step helps it firm up, making it easier to shape. The dough should hold its shape but still be slightly soft when you roll it into balls.
Melting Chocolate: Best Practices
Melting chocolate requires patience. Use a microwave-safe bowl for your dark chocolate chips. Heat in short bursts, about 30 seconds each time. Stir between each burst to check the texture. If you see some lumps, keep stirring. The heat will melt them. Adding coconut oil helps the chocolate coat better. It makes the chocolate smooth and shiny. Be careful not to overheat the chocolate, as it can burn easily.
Presentation Ideas
Presentation makes your truffles stand out. Place them in a decorative box or on a nice platter. Drizzle any leftover melted chocolate over the top for a fancy touch. You can also sprinkle a bit of sea salt or mini chocolate chips on top. This adds color and extra flavor. For a festive look, consider using seasonal decorations like colored sprinkles or edible glitter.
Variations
Flavor Enhancements
You can make your truffles even more fun. Try adding nut butters like peanut or almond. These nut butters add creaminess and a rich taste.
You can also switch up the chocolate. Use milk chocolate for a sweeter bite. Dark chocolate gives a rich, bold flavor. You can even mix in white chocolate for a sweet twist.
Vegan and Gluten-Free Options
Want vegan truffles? Swap the butter for coconut oil or vegan butter. Use a plant-based milk like almond or soy. You can also use gluten-free flour to keep the recipe safe for those with gluten issues.
Seasonal Twists
Change the flavors with the seasons. In fall, add pumpkin spice to the dough for a cozy taste. For winter, try peppermint extract for a festive touch. You can even roll them in crushed nuts or sprinkles for a colorful look. These twists make each batch unique!
Storage Info
Best Practices for Storing Truffles
To keep your chocolate chip cookie dough truffles fresh, store them in an airtight container. Make sure to separate layers with parchment paper. This will prevent them from sticking together. You can keep them at room temperature for a short time, but the fridge is better for longer storage. Avoid direct sunlight and heat, as these can make the chocolate melt or lose its shape.
How Long Do They Last?
When stored properly, your truffles can last up to one week in the fridge. If you choose to keep them at room temperature, aim to eat them within three days for the best flavor and texture. Always check for signs of spoilage before eating. If they look or smell odd, it’s best to toss them out.
Freezing Instructions
Freezing is a great option if you want to keep your truffles for longer. Place them in a single layer on a baking sheet and freeze for about an hour. Once frozen, transfer them to a freezer-safe bag or container. They can last up to three months in the freezer. When you’re ready to eat them, let the truffles thaw in the fridge overnight. Enjoy them chilled for a delightful treat!
FAQs
Can I use regular chocolate chips instead of dark chocolate?
Yes, you can use regular chocolate chips. They will change the taste a bit. Dark chocolate gives a rich flavor. If you prefer sweeter truffles, go for milk chocolate. Your choice will depend on what you like best.
How do I know when the chocolate coating is set?
You can tell the coating is set when it feels firm to the touch. It should not be sticky or soft. This usually takes about 15 minutes in the fridge. If you’re unsure, gently press the chocolate with your finger. If it stays firm, you’re ready to enjoy!
Can I make these truffles ahead of time?
Yes, you can make these truffles ahead of time. They store well in the fridge. You can keep them for up to a week in an airtight container. Just let them sit out for a few minutes before serving. This way, they will taste fresh and delicious!
This blog post covered how to make delicious chocolate truffles. We discussed essential ingredients like flour, butter, and chocolate. You learned step-by-step instructions for preparing, chilling, and coating the dough. We also shared tips to perfect your truffles and fun variations to try. Finally, storage practices ensure your treats stay fresh.
Now, go ahead and make these truffles! Enjoy the process and the tasty results.