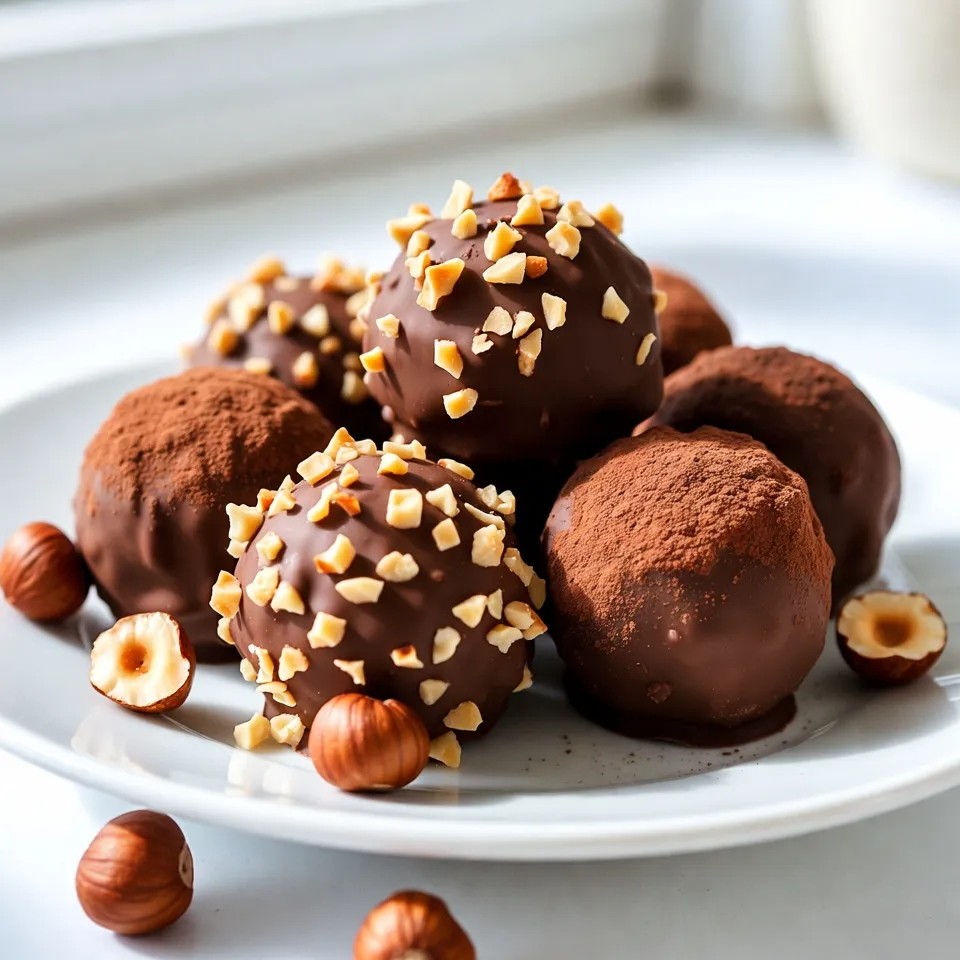
Are you ready to indulge in a treat that’s rich and creamy? Chocolate Hazelnut Truffles are a perfect delight for any occasion. With just a few simple ingredients, you can create a dessert that wows. I’ll guide you step-by-step to ensure your truffles turn out perfect every time. Learn about ingredient quality, tips for success, and fun variations. Let’s get started on this delicious journey together!
Why I Love This Recipe
- Indulgent Flavor: The rich combination of dark chocolate and hazelnut creates a luxurious taste that melts in your mouth.
- Simple Ingredients: With just a few high-quality ingredients, you can create something truly special without fuss.
- Perfect for Gifting: These truffles are an elegant treat, making them a wonderful gift for any occasion.
- Customizable Coatings: Experiment with different coatings like cocoa powder or chopped nuts for a personal touch.
Ingredients
List of Ingredients
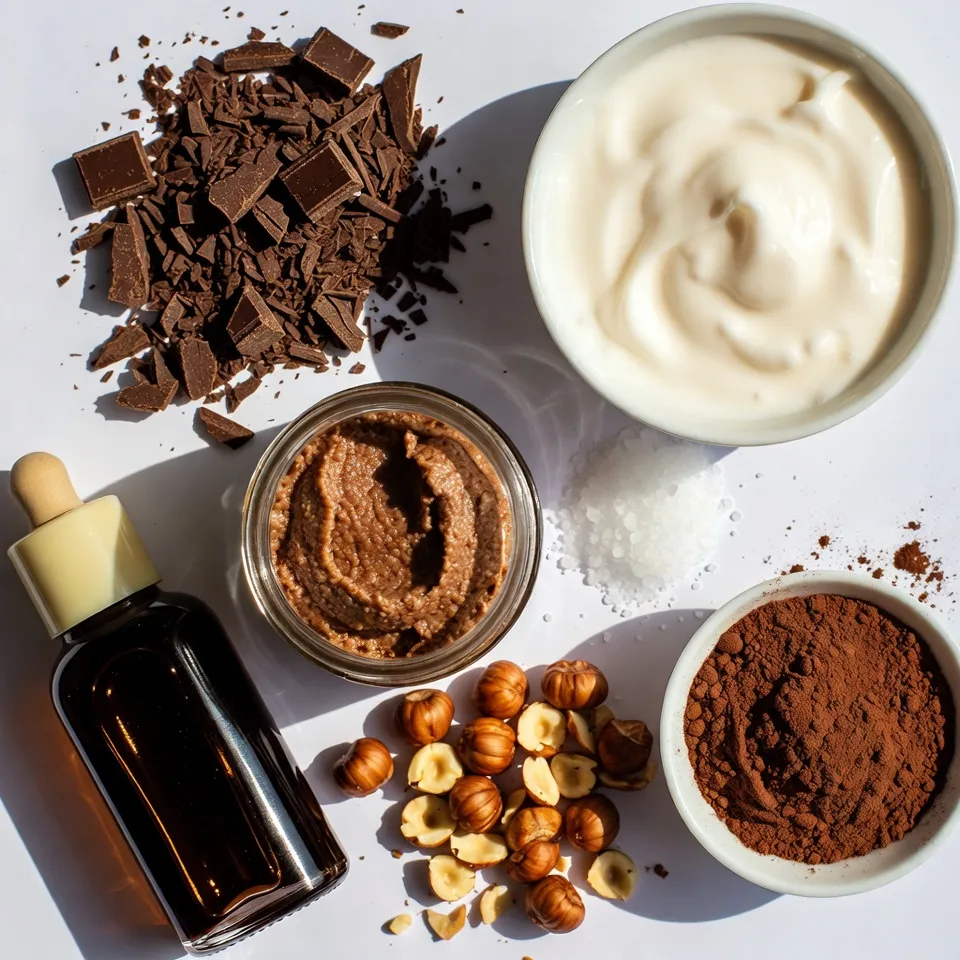
– 200g dark chocolate (70% cocoa), finely chopped
– 100ml heavy cream
– 2 tablespoons hazelnut paste
– 1 teaspoon pure vanilla extract
– 1/2 cup finely chopped, toasted hazelnuts
– Unsweetened cocoa powder, for dusting
– A pinch of flaky sea salt
Ingredient Substitutions
You can swap dark chocolate for milk chocolate if you prefer a sweeter taste. Use coconut cream instead of heavy cream for a dairy-free option. If hazelnut paste is hard to find, almond paste works well. For those who can’t have vanilla, try using almond extract.
Importance of Ingredient Quality
Using high-quality dark chocolate makes your truffles taste rich and smooth. Look for chocolate with at least 70% cocoa content. Fresh heavy cream adds creaminess and flavor. Always use fresh hazelnuts for a crunchy texture. Remember, the better your ingredients, the better your truffles will be!
Step-by-Step Instructions
Overview of the Preparation Process
Making chocolate hazelnut truffles is simple and fun. You start by melting chocolate and cream. Then, mix in hazelnut paste and vanilla. Chill the mixture, scoop it into balls, and roll them in nuts or cocoa. It is all about layering flavors and textures.
Detailed Steps to Make Chocolate Hazelnut Truffles
1. Chop the chocolate: Use a knife to cut 200g of dark chocolate into small pieces.
2. Heat the cream: Pour 100ml of heavy cream into a small pan. Heat it until it gently simmers.
3. Combine cream and chocolate: Pour the hot cream over the chopped chocolate. Let it sit for 2 minutes.
4. Add flavors: After waiting, mix in 2 tablespoons of hazelnut paste, 1 teaspoon of vanilla extract, and a pinch of flaky sea salt. Stir well until smooth.
5. Chill the mixture: Cover the bowl with plastic wrap. Place it in the fridge for about 1 hour until firm.
6. Scoop and roll: Use a melon baller or spoon to scoop the chilled mixture. Roll each scoop into a ball with your hands.
7. Coat the truffles: Roll the truffles in 1/2 cup of finely chopped toasted hazelnuts or cocoa powder. Make sure they are evenly coated.
8. Set the truffles: Place the finished truffles on a baking sheet lined with parchment paper.
9. Final chill: Refrigerate the truffles again for 30 minutes to set completely.
Tips for Ensuring Successful Melting and Mixing
– Chop evenly: Make sure the chocolate pieces are the same size for even melting.
– Watch the cream: Keep an eye on the cream while heating. It should not boil over.
– Mix gently: Stir the chocolate mixture slowly to avoid adding too much air.
– Chill well: Make sure you chill the mixture long enough for easy scooping.
– Use clean hands: When rolling the truffles, use clean, dry hands for the best results.
Follow these steps and tips, and you will create delicious chocolate hazelnut truffles!
Tips & Tricks
Common Mistakes to Avoid
When making chocolate hazelnut truffles, avoid a few common slip-ups. First, don’t let the cream boil. Boiling can hurt the chocolate’s texture. Always watch the cream closely. Second, when mixing, don’t rush. Take your time to stir gently. This helps create a smooth and shiny finish. Lastly, use a scale. Accurate measurements lead to better results.
Storage Tips for Freshness
To keep your truffles fresh, store them in an airtight container. Place parchment paper between layers to avoid sticking. Keep them in the fridge, where they last about two weeks. If you want to keep them longer, consider freezing them. Just make sure to wrap each truffle well in plastic wrap before freezing. They can stay good for up to three months.
How to Achieve the Perfect Texture
Achieving the right texture is key for tasty truffles. After mixing, let the mixture chill until it’s firm, but not too hard. If it’s too soft, the truffles will not hold shape. If it’s too hard, you can’t scoop it. Use a melon baller or spoon for even portions. Also, rolling them in your hands will help create a smooth finish. If your hands get too warm, take breaks to cool down.
Pro Tips
- Chill for Best Texture: Ensure the chocolate mixture is well chilled before rolling into truffles. This not only makes it easier to handle but also ensures a smoother texture.
- Quality Chocolate Matters: Use high-quality dark chocolate for the best flavor. The higher the cocoa content, the richer the truffles will be.
- Experiment with Coatings: While hazelnuts and cocoa powder are classic choices, feel free to roll your truffles in shredded coconut, crushed cookies, or even sprinkles for a fun twist!
- Storage Tips: Store your truffles in an airtight container in the refrigerator for up to two weeks. Bring them to room temperature before serving for the best taste.
Variations
Flavor Combinations
You can play with flavors in chocolate hazelnut truffles. Try adding zest from an orange. It adds a bright, fresh taste. You can also mix in espresso for a rich coffee kick. A hint of sea salt can enhance all the flavors too. Another great idea is to use almond or coconut extracts. Each change makes the truffles unique and fun.
Dietary Variations
If you want vegan truffles, swap out the heavy cream. Use coconut cream instead for a creamy texture. Make sure your chocolate is dairy-free. Hazelnut paste should also be vegan-friendly. These small swaps keep the taste rich while fitting different diets.
Alternative Coatings
Coatings can change the look and taste of your truffles. Instead of just cocoa powder, roll them in crushed nuts. Finely chopped almonds or pecans work well. You can also use shredded coconut for a tropical touch. For a playful look, try colorful sprinkles. Each choice adds a fun twist to your truffles, making them a delight to share.
Storage Info
Best Practices for Storing Truffles
To keep your chocolate hazelnut truffles fresh, store them in an airtight container. Line the container with parchment paper to avoid sticking. Keep them in a cool, dry place away from sunlight. If it’s warm, the fridge is a good choice. Avoid keeping them near strong-smelling foods. This helps keep their flavor intact.
Shelf Life of Chocolate Hazelnut Truffles
When stored correctly, these truffles can last up to two weeks. If you keep them in the fridge, they may stay fresh for about three weeks. Just remember that their texture can change over time. They may become firmer if chilled for too long. Enjoy them while they are creamy and soft!
How to Freeze for Longer Storage
If you want to keep truffles for longer, freezing is a great option. Place each truffle on a baking sheet lined with parchment paper. Freeze them for about an hour until they are firm. Then, transfer them to an airtight container or freezer bag. Label it with the date. They can last for up to three months in the freezer. When you want to enjoy them, thaw at room temperature for a few hours before serving.
FAQs
Can I make these truffles in advance?
Yes, you can make these truffles ahead of time. They keep well in the fridge for up to a week. Just store them in an airtight container. This way, you can enjoy them later or serve them at a party.
What kind of chocolate is best for truffles?
I recommend using dark chocolate with at least 70% cocoa. This gives the truffles a rich flavor and smooth texture. You can also use milk chocolate if you prefer a sweeter taste. Just remember, higher cocoa content means more intense flavor.
Are hazelnuts safe for those with nut allergies?
No, hazelnuts are not safe for people with nut allergies. They belong to the tree nut family. If you need a nut-free option, try using seeds like sunflower seeds or coconut. Just ensure to adjust the recipe accordingly for flavor and texture.
You now have all you need to make delicious chocolate hazelnut truffles. We covered key ingredients, how to prepare them step-by-step, and tips for success. You learned how to avoid common mistakes and explore fun variations.
Remember, using quality ingredients makes a difference. Store your truffles well to keep them fresh. Don’t hesitate to try different flavors or coatings to make them your own. Enjoy your sweet creatio