Chocolate Peanut Butter Cheesecake Cups Simple Delight

WANT TO SAVE THIS RECIPE?

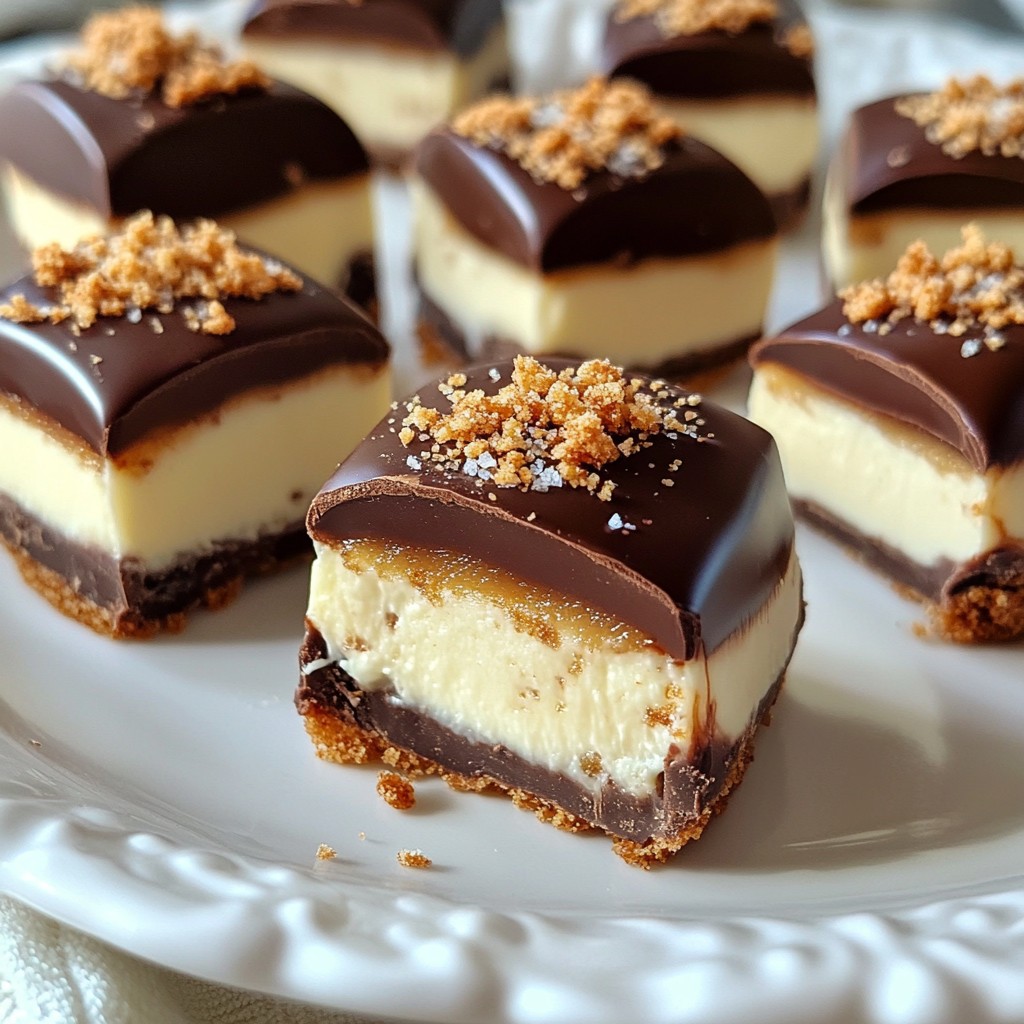
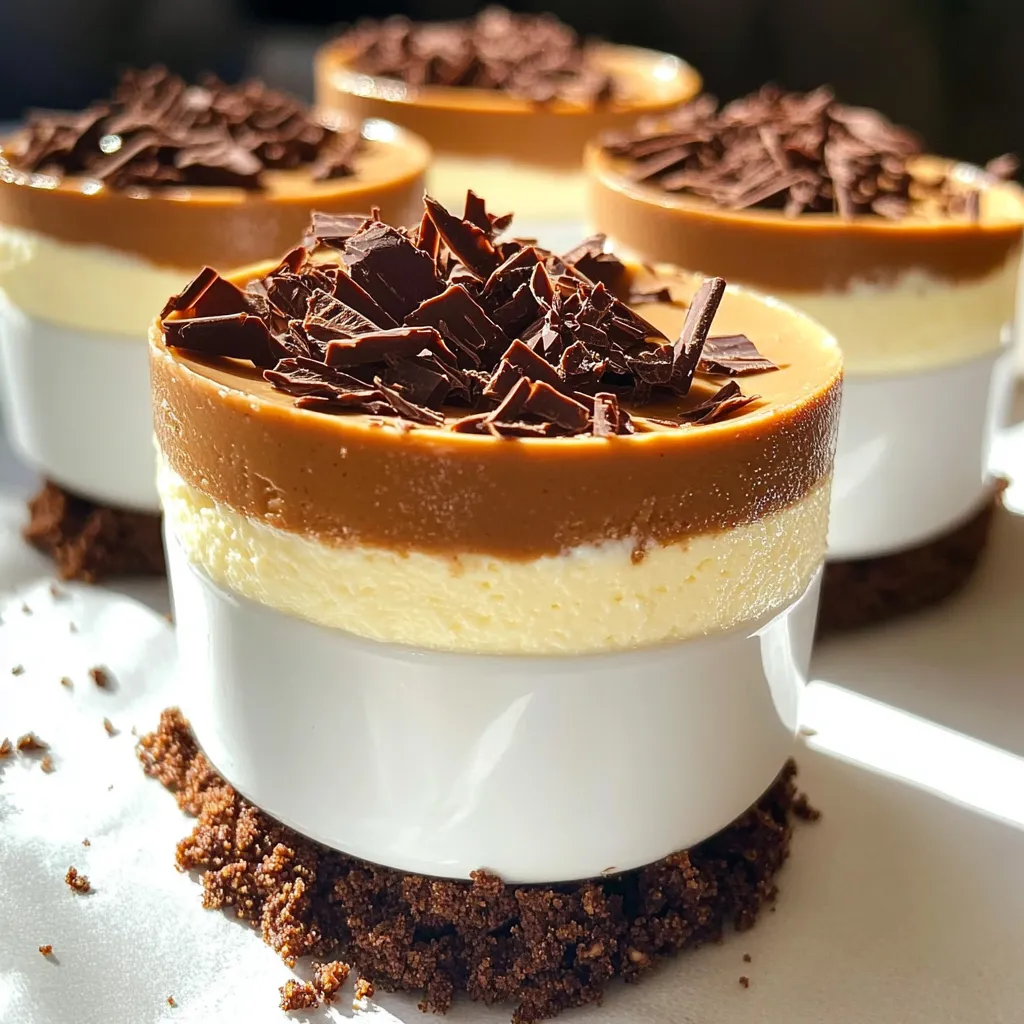
Get ready to indulge in a sweet treat that’s as easy as it is delicious! These no-bake Chocolate Peanut Butter Cheesecake Cups combine creamy peanut butter and rich chocolate in a delightful bite-sized dessert. With simple ingredients and quick steps, you’ll impress friends and family in no time. Let’s dive into this simple delight that’s perfect for any occasion or just a treat for yourself!

- 1 cup chocolate cookie crumbs - 4 tablespoons unsalted butter, melted - 1 cup cream cheese, softened to room temperature - ½ cup creamy peanut butter - ½ cup powdered sugar - 1 teaspoon pure vanilla extract - 1 cup whipped cream (or your choice of whipped topping) These main ingredients create a rich and creamy dessert. The chocolate cookie crumbs give a nice crunch, while the melted butter helps to bind them. Cream cheese and peanut butter blend for a smooth filling. Powdered sugar adds sweetness and vanilla brings a nice flavor. Whipped cream lightens the mixture, making it airy. - Chocolate shavings - Chocolate chips Garnish options add a fun touch to your dessert. Chocolate shavings add elegance. Chocolate chips give extra sweetness and texture. You can mix and match to fit your style. These small details make your cheesecake cups look and taste amazing. First, grab a medium bowl. Mix 1 cup of chocolate cookie crumbs with 4 tablespoons of melted butter. Stir until the crumbs are well-coated. Next, take your mixture and divide it evenly among 8 small dessert cups or muffin liners. Use your fingers or a spoon to press the mixture firmly into each cup. This creates a solid base for your cheesecake. In a separate bowl, beat 1 cup of softened cream cheese and ½ cup of creamy peanut butter. Use an electric mixer for a smooth blend. Mix until there are no lumps. Now, add ½ cup of powdered sugar and 1 teaspoon of pure vanilla extract to your cream cheese mix. Keep mixing until everything is creamy and well combined. Take 1 cup of whipped cream or your choice of whipped topping. Gently fold it into the peanut butter mixture. Use a spatula and be careful not to deflate the whipped cream. You want it light and fluffy. Now, spoon the cheesecake filling into each dessert cup. Layer it evenly on top of the cookie crust. Smooth the tops with a spatula for a nice finish. Place the dessert cups in the refrigerator. Let them chill for at least 4 hours. This helps the cheesecake set up nicely. The longer they chill, the better they taste! To get a creamy cheesecake filling, start with softened cream cheese. It blends better and keeps the texture smooth. Mix in your creamy peanut butter until everything is well-combined. This step is key. Folding in whipped cream is crucial. Use a spatula and gently lift the whipped cream into the peanut butter mixture. This keeps the mix light and fluffy. If you stir too hard, you will lose that airy texture. Make these cheesecake cups ahead of time for the best taste. Chill them for at least four hours. This helps the flavors meld, and the cups set perfectly. You can even make them a day before serving. For serving, place the cheesecake cups on a pretty platter. It makes a nice display. Add a dollop of whipped cream on the side for extra flair. Top each cup with chocolate shavings or chips. This adds a tasty touch and makes them look great. {{image_4}} You can change the flavor of your cheesecake cups easily. Try adding different extracts. Almond or hazelnut extract can give a fun twist. Just a little drop can change the taste a lot. You can also mix in other nut butters. Crunchy peanut butter adds a nice texture. Almond butter gives a lighter flavor. Get creative and mix flavors that you love! If you need vegan options, you can swap out some ingredients. Use vegan cream cheese instead of regular cream cheese. For the whipped cream, choose a plant-based version. You can also find vegan powdered sugar. For a gluten-free crust, look for gluten-free chocolate cookies. This will keep the taste great while fitting your diet. You can easily adjust the serving size for your needs. If you're hosting a big party, double the recipe. This will give you plenty of cups to share. For smaller gatherings, you can make half the recipe. This way, you still get to enjoy these treats without leftovers. Just keep in mind that the chilling time stays the same. To keep your chocolate peanut butter cheesecake cups fresh, store them in the refrigerator. Use a sealed container or cover the cups with plastic wrap. This will help prevent moisture from ruining their texture. Place the cups in the fridge for up to five days. If you want to store them for longer, you can freeze them. First, let the cheesecake cups set fully in the fridge. Then, wrap them tightly in plastic wrap or foil. Place them in a freezer-safe container. They can last in the freezer for up to three months. When you want to enjoy them, move them to the fridge overnight to thaw. These cheesecake cups are safe to eat for five days in the fridge. If frozen, they stay good for about three months. Always check for any signs of spoilage before eating. If they smell off or look strange, it’s best to toss them. Enjoy your treats while they are fresh for the best taste! Yes, you can use different cookies. Popular choices are graham crackers or Oreos. You can also try vanilla wafers for a lighter taste. Just crush them well and mix with melted butter. This gives you a great base for your cheesecake cups. Making whipped cream is easy! Start with chilled heavy cream. Pour 1 cup into a bowl. Use a mixer on medium speed and whip until soft peaks form. Add sugar to taste and a splash of vanilla. Continue mixing until firm peaks form. This makes your cheesecake light and fluffy. To remove the cups, gently pull the sides of the liner away from the filling. If they stick, use a small knife to loosen the edges. This helps keep your cheesecake cups looking pretty. Patience is key for a clean release. Yes, you can make these cheesecakes vegan! For the crust, use vegan cookies. Swap cream cheese for vegan cream cheese. Use maple syrup instead of powdered sugar. Finally, for the whipped cream, try coconut cream or a store-bought vegan whipped topping. Your guests will love the taste! In this post, we explored how to create tasty cheesecake cups with simple ingredients like chocolate cookie crumbs, cream cheese, and creamy peanut butter. We shared step-by-step instructions, helpful tips, and variations to make it your own. These cups are not only easy to make but adaptable for many diets. Remember to store them properly for the best taste. I hope you feel inspired to give this recipe a try and enjoy every creamy, chocolatey bite.

Ingredients

Main Ingredients

– 1 cup chocolate cookie crumbs

– 4 tablespoons unsalted butter, melted

– 1 cup cream cheese, softened to room temperature

– ½ cup creamy peanut butter

– ½ cup powdered sugar

– 1 teaspoon pure vanilla extract

– 1 cup whipped cream (or your choice of whipped topping)

These main ingredients create a rich and creamy dessert. The chocolate cookie crumbs give a nice crunch, while the melted butter helps to bind them. Cream cheese and peanut butter blend for a smooth filling. Powdered sugar adds sweetness and vanilla brings a nice flavor. Whipped cream lightens the mixture, making it airy.

Garnish Options

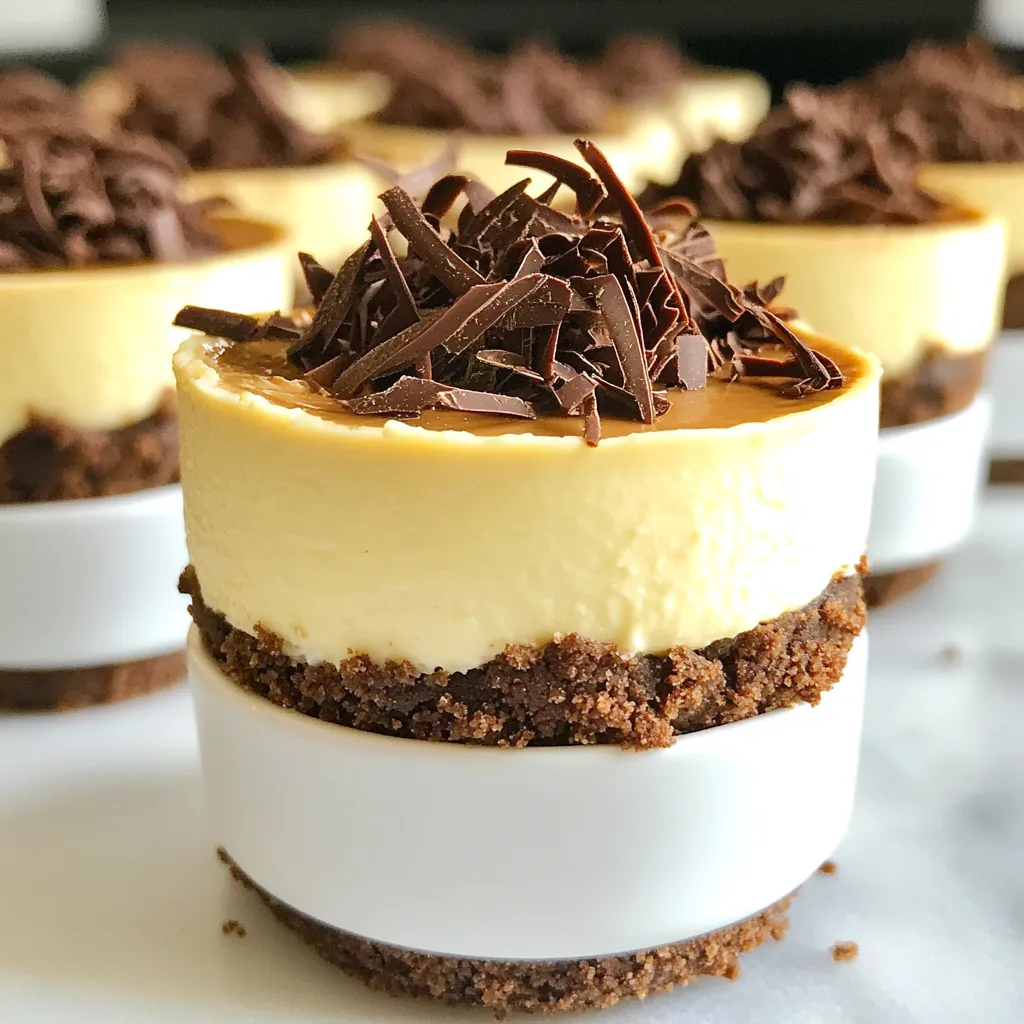
– Chocolate shavings

– Chocolate chips

Garnish options add a fun touch to your dessert. Chocolate shavings add elegance. Chocolate chips give extra sweetness and texture. You can mix and match to fit your style. These small details make your cheesecake cups look and taste amazing.

Step-by-Step Instructions

Preparing the Crust

First, grab a medium bowl. Mix 1 cup of chocolate cookie crumbs with 4 tablespoons of melted butter. Stir until the crumbs are well-coated.

Next, take your mixture and divide it evenly among 8 small dessert cups or muffin liners. Use your fingers or a spoon to press the mixture firmly into each cup. This creates a solid base for your cheesecake.

Making the Cheesecake Filling

In a separate bowl, beat 1 cup of softened cream cheese and ½ cup of creamy peanut butter. Use an electric mixer for a smooth blend. Mix until there are no lumps.

Now, add ½ cup of powdered sugar and 1 teaspoon of pure vanilla extract to your cream cheese mix. Keep mixing until everything is creamy and well combined.

Combining and Assembling

Take 1 cup of whipped cream or your choice of whipped topping. Gently fold it into the peanut butter mixture. Use a spatula and be careful not to deflate the whipped cream. You want it light and fluffy.

Now, spoon the cheesecake filling into each dessert cup. Layer it evenly on top of the cookie crust. Smooth the tops with a spatula for a nice finish.

Chilling and Setting

Place the dessert cups in the refrigerator. Let them chill for at least 4 hours. This helps the cheesecake set up nicely. The longer they chill, the better they taste!

Tips & Tricks

Achieving the Perfect Texture

To get a creamy cheesecake filling, start with softened cream cheese. It blends better and keeps the texture smooth. Mix in your creamy peanut butter until everything is well-combined. This step is key.

Folding in whipped cream is crucial. Use a spatula and gently lift the whipped cream into the peanut butter mixture. This keeps the mix light and fluffy. If you stir too hard, you will lose that airy texture.

Making Ahead of Time

Make these cheesecake cups ahead of time for the best taste. Chill them for at least four hours. This helps the flavors meld, and the cups set perfectly. You can even make them a day before serving.

Presentation Ideas

For serving, place the cheesecake cups on a pretty platter. It makes a nice display. Add a dollop of whipped cream on the side for extra flair. Top each cup with chocolate shavings or chips. This adds a tasty touch and makes them look great.

Variations

Flavor Variations

You can change the flavor of your cheesecake cups easily. Try adding different extracts. Almond or hazelnut extract can give a fun twist. Just a little drop can change the taste a lot. You can also mix in other nut butters. Crunchy peanut butter adds a nice texture. Almond butter gives a lighter flavor. Get creative and mix flavors that you love!

Dietary Adjustments

If you need vegan options, you can swap out some ingredients. Use vegan cream cheese instead of regular cream cheese. For the whipped cream, choose a plant-based version. You can also find vegan powdered sugar. For a gluten-free crust, look for gluten-free chocolate cookies. This will keep the taste great while fitting your diet.

Serving Size Adjustments

You can easily adjust the serving size for your needs. If you’re hosting a big party, double the recipe. This will give you plenty of cups to share. For smaller gatherings, you can make half the recipe. This way, you still get to enjoy these treats without leftovers. Just keep in mind that the chilling time stays the same.

Storage Info

Best Storage Practices

To keep your chocolate peanut butter cheesecake cups fresh, store them in the refrigerator. Use a sealed container or cover the cups with plastic wrap. This will help prevent moisture from ruining their texture. Place the cups in the fridge for up to five days.

If you want to store them for longer, you can freeze them. First, let the cheesecake cups set fully in the fridge. Then, wrap them tightly in plastic wrap or foil. Place them in a freezer-safe container. They can last in the freezer for up to three months. When you want to enjoy them, move them to the fridge overnight to thaw.

Shelf Life

These cheesecake cups are safe to eat for five days in the fridge. If frozen, they stay good for about three months. Always check for any signs of spoilage before eating. If they smell off or look strange, it’s best to toss them. Enjoy your treats while they are fresh for the best taste!

FAQs

Can I use different cookies for the crust?

Yes, you can use different cookies. Popular choices are graham crackers or Oreos. You can also try vanilla wafers for a lighter taste. Just crush them well and mix with melted butter. This gives you a great base for your cheesecake cups.

How do I make homemade whipped cream?

Making whipped cream is easy! Start with chilled heavy cream. Pour 1 cup into a bowl. Use a mixer on medium speed and whip until soft peaks form. Add sugar to taste and a splash of vanilla. Continue mixing until firm peaks form. This makes your cheesecake light and fluffy.

What is the best way to remove the cheesecake cups from liners?

To remove the cups, gently pull the sides of the liner away from the filling. If they stick, use a small knife to loosen the edges. This helps keep your cheesecake cups looking pretty. Patience is key for a clean release.

Can I make these cheesecakes vegan?

Yes, you can make these cheesecakes vegan! For the crust, use vegan cookies. Swap cream cheese for vegan cream cheese. Use maple syrup instead of powdered sugar. Finally, for the whipped cream, try coconut cream or a store-bought vegan whipped topping. Your guests will love the taste!

In this post, we explored how to create tasty cheesecake cups with simple ingredients like chocolate cookie crumbs, cream cheese, and creamy peanut butter. We shared step-by-step instructions, helpful tips, and variations to make it your own. These cups are not only easy to make but adaptable for many diets. Remember to store them properly for the best taste. I hope you feel inspired to give this recipe a try and enjoy every creamy, chocolatey bite.

- 1 cup chocolate cookie crumbs - 4 tablespoons unsalted butter, melted - 1 cup cream cheese, softened to room temperature - ½ cup creamy peanut butter - ½ cup powdered sugar - 1 teaspoon pure vanilla extract - 1 cup whipped cream (or your choice of whipped topping) These main ingredients create a rich and creamy dessert. The chocolate cookie crumbs give a nice crunch, while the melted butter helps to bind them. Cream cheese and peanut butter blend for a smooth filling. Powdered sugar adds sweetness and vanilla brings a nice flavor. Whipped cream lightens the mixture, making it airy. - Chocolate shavings - Chocolate chips Garnish options add a fun touch to your dessert. Chocolate shavings add elegance. Chocolate chips give extra sweetness and texture. You can mix and match to fit your style. These small details make your cheesecake cups look and taste amazing. First, grab a medium bowl. Mix 1 cup of chocolate cookie crumbs with 4 tablespoons of melted butter. Stir until the crumbs are well-coated. Next, take your mixture and divide it evenly among 8 small dessert cups or muffin liners. Use your fingers or a spoon to press the mixture firmly into each cup. This creates a solid base for your cheesecake. In a separate bowl, beat 1 cup of softened cream cheese and ½ cup of creamy peanut butter. Use an electric mixer for a smooth blend. Mix until there are no lumps. Now, add ½ cup of powdered sugar and 1 teaspoon of pure vanilla extract to your cream cheese mix. Keep mixing until everything is creamy and well combined. Take 1 cup of whipped cream or your choice of whipped topping. Gently fold it into the peanut butter mixture. Use a spatula and be careful not to deflate the whipped cream. You want it light and fluffy. Now, spoon the cheesecake filling into each dessert cup. Layer it evenly on top of the cookie crust. Smooth the tops with a spatula for a nice finish. Place the dessert cups in the refrigerator. Let them chill for at least 4 hours. This helps the cheesecake set up nicely. The longer they chill, the better they taste! To get a creamy cheesecake filling, start with softened cream cheese. It blends better and keeps the texture smooth. Mix in your creamy peanut butter until everything is well-combined. This step is key. Folding in whipped cream is crucial. Use a spatula and gently lift the whipped cream into the peanut butter mixture. This keeps the mix light and fluffy. If you stir too hard, you will lose that airy texture. Make these cheesecake cups ahead of time for the best taste. Chill them for at least four hours. This helps the flavors meld, and the cups set perfectly. You can even make them a day before serving. For serving, place the cheesecake cups on a pretty platter. It makes a nice display. Add a dollop of whipped cream on the side for extra flair. Top each cup with chocolate shavings or chips. This adds a tasty touch and makes them look great. {{image_4}} You can change the flavor of your cheesecake cups easily. Try adding different extracts. Almond or hazelnut extract can give a fun twist. Just a little drop can change the taste a lot. You can also mix in other nut butters. Crunchy peanut butter adds a nice texture. Almond butter gives a lighter flavor. Get creative and mix flavors that you love! If you need vegan options, you can swap out some ingredients. Use vegan cream cheese instead of regular cream cheese. For the whipped cream, choose a plant-based version. You can also find vegan powdered sugar. For a gluten-free crust, look for gluten-free chocolate cookies. This will keep the taste great while fitting your diet. You can easily adjust the serving size for your needs. If you're hosting a big party, double the recipe. This will give you plenty of cups to share. For smaller gatherings, you can make half the recipe. This way, you still get to enjoy these treats without leftovers. Just keep in mind that the chilling time stays the same. To keep your chocolate peanut butter cheesecake cups fresh, store them in the refrigerator. Use a sealed container or cover the cups with plastic wrap. This will help prevent moisture from ruining their texture. Place the cups in the fridge for up to five days. If you want to store them for longer, you can freeze them. First, let the cheesecake cups set fully in the fridge. Then, wrap them tightly in plastic wrap or foil. Place them in a freezer-safe container. They can last in the freezer for up to three months. When you want to enjoy them, move them to the fridge overnight to thaw. These cheesecake cups are safe to eat for five days in the fridge. If frozen, they stay good for about three months. Always check for any signs of spoilage before eating. If they smell off or look strange, it’s best to toss them. Enjoy your treats while they are fresh for the best taste! Yes, you can use different cookies. Popular choices are graham crackers or Oreos. You can also try vanilla wafers for a lighter taste. Just crush them well and mix with melted butter. This gives you a great base for your cheesecake cups. Making whipped cream is easy! Start with chilled heavy cream. Pour 1 cup into a bowl. Use a mixer on medium speed and whip until soft peaks form. Add sugar to taste and a splash of vanilla. Continue mixing until firm peaks form. This makes your cheesecake light and fluffy. To remove the cups, gently pull the sides of the liner away from the filling. If they stick, use a small knife to loosen the edges. This helps keep your cheesecake cups looking pretty. Patience is key for a clean release. Yes, you can make these cheesecakes vegan! For the crust, use vegan cookies. Swap cream cheese for vegan cream cheese. Use maple syrup instead of powdered sugar. Finally, for the whipped cream, try coconut cream or a store-bought vegan whipped topping. Your guests will love the taste! In this post, we explored how to create tasty cheesecake cups with simple ingredients like chocolate cookie crumbs, cream cheese, and creamy peanut butter. We shared step-by-step instructions, helpful tips, and variations to make it your own. These cups are not only easy to make but adaptable for many diets. Remember to store them properly for the best taste. I hope you feel inspired to give this recipe a try and enjoy every creamy, chocolatey bite.

Chocolate Peanut Butter Cheesecake Cups (No Bake)

Indulge in the rich and creamy goodness of Chocolate Peanut Butter Cheesecake Cups! These delightful desserts combine a crunchy chocolate cookie crust with a luscious peanut butter filling, topped with whipped cream and a sprinkle of chocolate shavings. Perfect for any occasion, they only take 15 minutes to prep! Click to explore this irresistible recipe and treat yourself and your loved ones today! #ChocolateDesserts #CheesecakeCups #PeanutButterLovers #EasyRecipes

Ingredients
  

1 cup chocolate cookie crumbs

4 tablespoons unsalted butter, melted

1 cup cream cheese, softened to room temperature

½ cup creamy peanut butter

½ cup powdered sugar

1 teaspoon pure vanilla extract

1 cup whipped cream (or your choice of whipped topping)

Chocolate shavings or chocolate chips for garnish

Instructions
 

In a medium-sized mixing bowl, combine the chocolate cookie crumbs with the melted butter. Stir well until all the crumbs are evenly coated with the butter.

    Divide the crumb mixture equally among 8 small dessert cups or muffin liners. Press down firmly in each cup to form a solid and even crust base.

      In a separate mixing bowl, use an electric mixer to beat together the softened cream cheese and creamy peanut butter. Continue mixing until the mixture is smooth and well-combined.

        Gradually add the powdered sugar and vanilla extract to the cream cheese mixture. Mix until the mixture is creamy and free of lumps, ensuring everything is thoroughly incorporated.

          Take your whipped cream (or whipped topping) and gently fold it into the peanut butter mixture. Use a spatula to combine until the mixture is light, airy, and fluffy without deflating the whipped cream.

            Spoon the peanut butter cheesecake filling into each dessert cup, layering it evenly on top of the cookie crust.

              Level the tops of the cheesecake mixture using a spatula for a smooth finish. Place the dessert cups in the refrigerator and let them chill for at least 4 hours, or until they are fully set.

                Just before serving, add a sprinkle of chocolate shavings or a few chocolate chips on top of each cheesecake cup for an extra decadent touch.

                  Prep Time: 15 minutes | Total Time: 4 hours 15 minutes | Servings: 8

                    - Presentation Tips: For a stylish presentation, consider placing the cheesecake cups on a decorative platter and serve with a dollop of additional whipped cream alongside each cup.

                      WANT TO SAVE THIS RECIPE?

                      Secret Link