Are you tired of the same old meals for picky eaters? Look no further! My Crispy Picky Eater Chicken Nuggets are here to save dinner time. With simple ingredients and quick steps, these nuggets are bound to be a hit with even the fussiest of eaters. In just a few easy steps, you’ll create delicious, golden nuggets that pair perfectly with fun dips. Let’s dive in and make mealtime exciting!
Why I Love This Recipe
- Kid-Friendly: These chicken nuggets are perfect for picky eaters, making mealtime enjoyable for everyone.
- Easy to Make: The step-by-step instructions make this recipe simple, even for novice cooks.
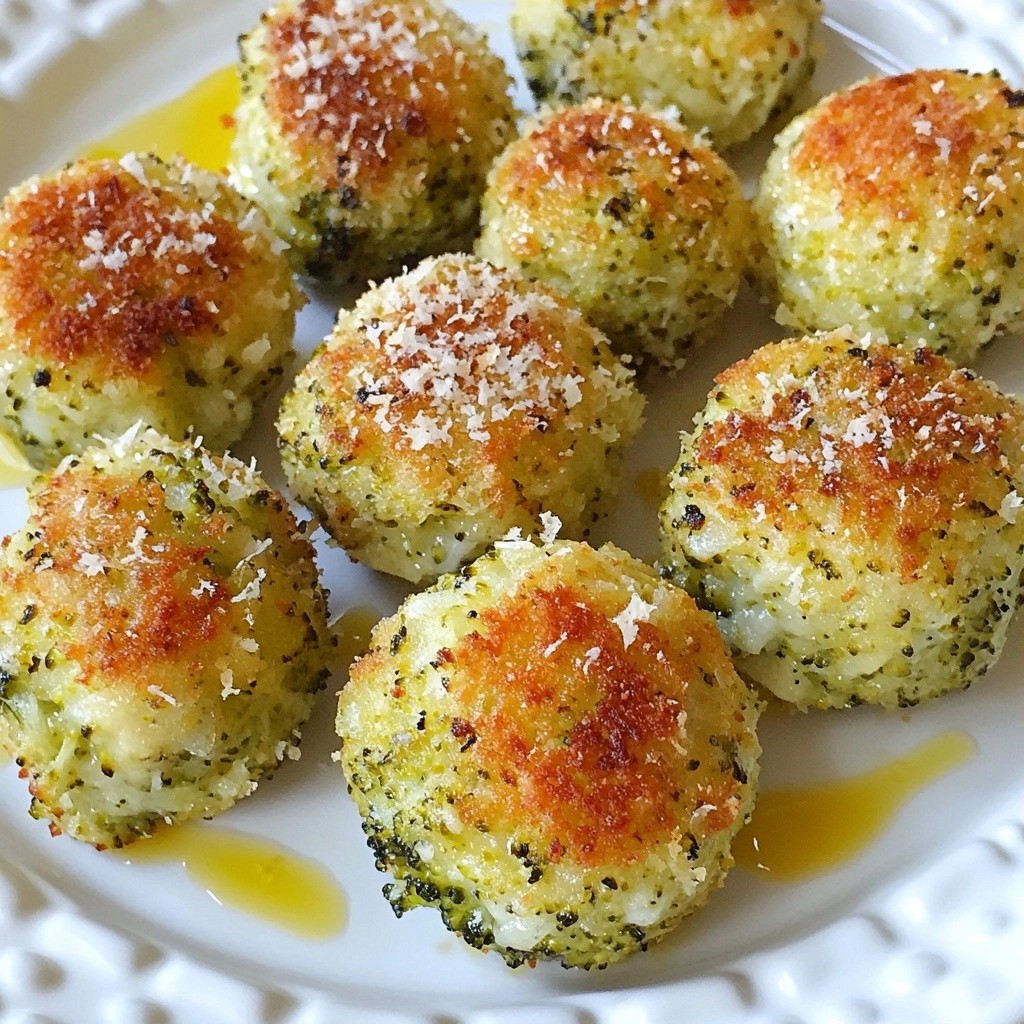
- Crispy Texture: The panko breadcrumbs provide an irresistible crunch that elevates the flavor.
- Customizable: You can easily modify the seasonings or serve with different dipping sauces to suit your taste.
Ingredients
Main Ingredients
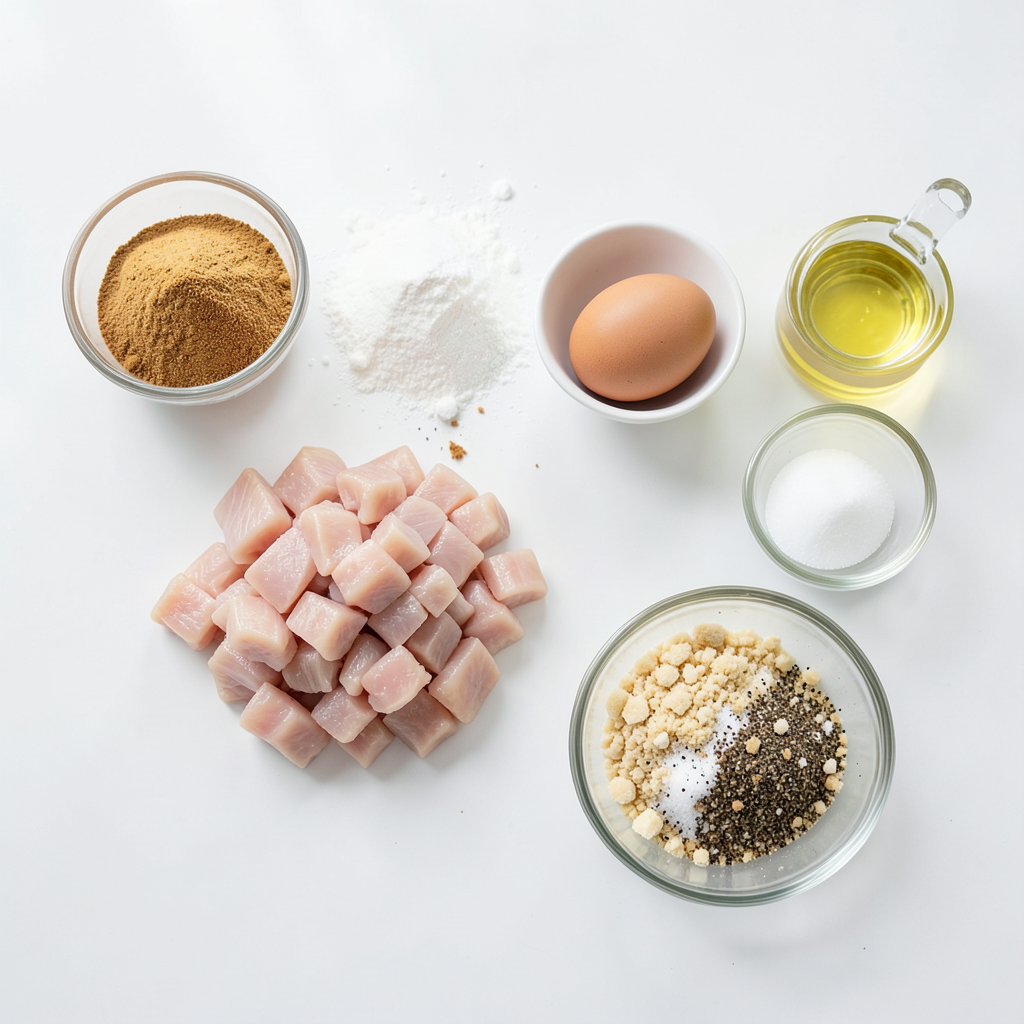
- 1 lb chicken breast, cut into bite-sized pieces
- 1 cup all-purpose flour
- 2 large eggs
- 1 cup panko breadcrumbs
- Vegetable oil, for frying
Seasoning Ingredients
- 1 teaspoon garlic powder
- 1 teaspoon onion powder
- 1 teaspoon smoked paprika
- Salt and pepper, to taste
Serving Suggestions
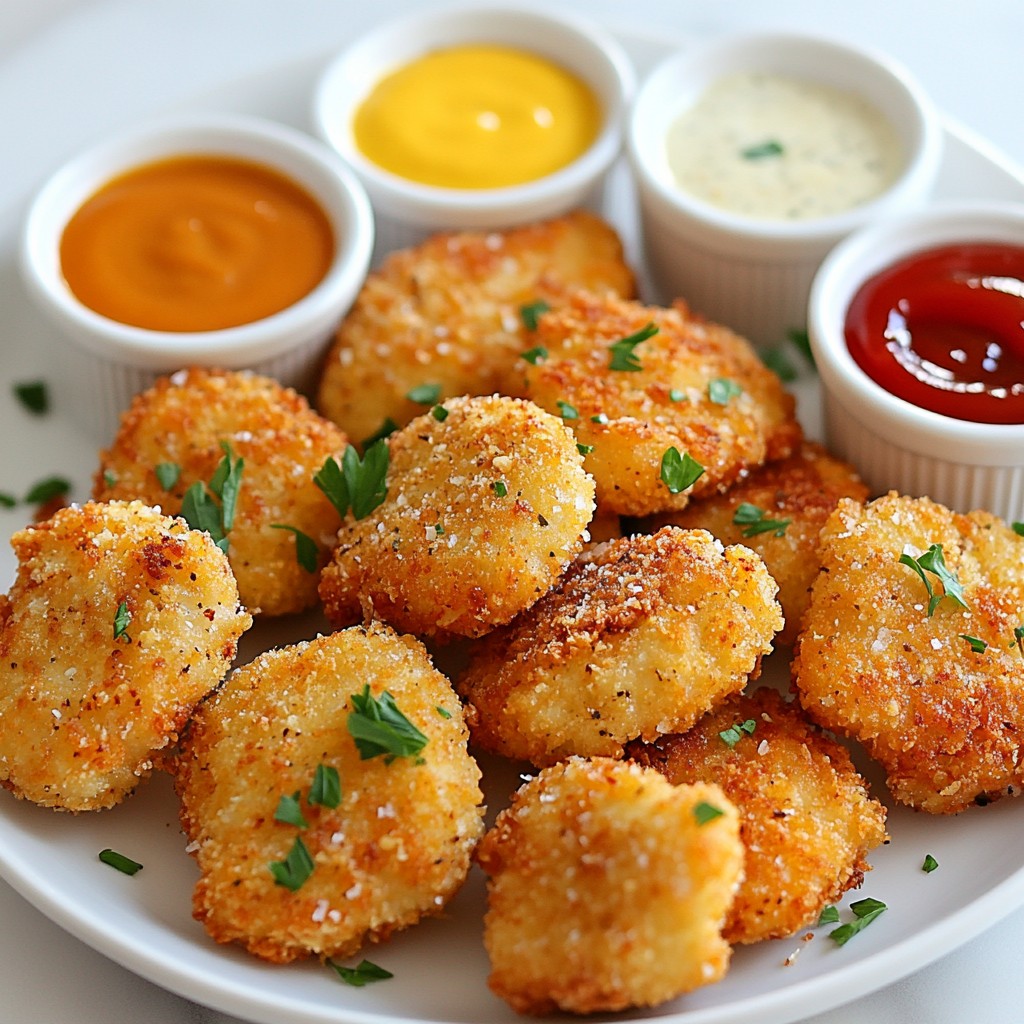
- Dipping sauces such as ketchup, honey mustard, and ranch dressing
- Optional garnishes like fresh parsley or paprika
The main ingredients in this recipe are simple. You need chicken breast cut into small pieces. This makes it easier for kids to eat. You will also use all-purpose flour, eggs, and panko breadcrumbs. Panko gives a nice crunch. Don’t forget the oil for frying, which helps get that golden color.
For seasoning, garlic powder, onion powder, and smoked paprika add flavor. You can adjust the salt and pepper to your taste. This mix makes the chicken nuggets tasty but not too strong for picky eaters.
When serving, think about fun dipping sauces. Ketchup, honey mustard, and ranch dressing are favorites. You can add a sprinkle of fresh parsley or paprika for a nice touch. This makes your dish look and taste even better!
Step-by-Step Instructions
Preparing the Chicken
First, take your chicken breast and cut it into small, bite-sized pieces. This helps them cook evenly. In a medium bowl, season the chicken pieces with salt and pepper. Make sure to coat them well. I like to toss the chicken around to get every piece seasoned. Set the bowl aside for a few minutes. This allows the flavors to develop and soak in.
Breading Station Setup
Now it's time to set up your breading station. You will need three shallow bowls. In the first bowl, mix together 1 cup of all-purpose flour, 1 teaspoon of garlic powder, 1 teaspoon of onion powder, and 1 teaspoon of smoked paprika. Stir it well so the spices are mixed evenly. In the second bowl, beat 2 large eggs until they are smooth. Keep the third bowl ready with 1 cup of panko breadcrumbs. This assembly line makes breading easy and quick!
Coating the Chicken
To coat the chicken, take one piece and start with the flour mixture. Dredge it well, then shake off any extra flour. Next, dip the floured chicken into the beaten eggs. Make sure it gets a light coating. Let the excess egg drip back into the bowl. Finally, roll the chicken in the panko breadcrumbs. Press gently to ensure full coverage. This step is key for that crispy texture. Repeat this process for all the chicken pieces.
Frying the Nuggets
Heat about 1/2 inch of vegetable oil in a large skillet over medium heat. To check if the oil is hot enough, sprinkle in a few breadcrumbs. If they sizzle right away, you’re ready! Carefully add the coated chicken pieces in batches. Avoid overcrowding the skillet. Fry each batch for about 4-5 minutes on each side. You want them golden brown and fully cooked through.
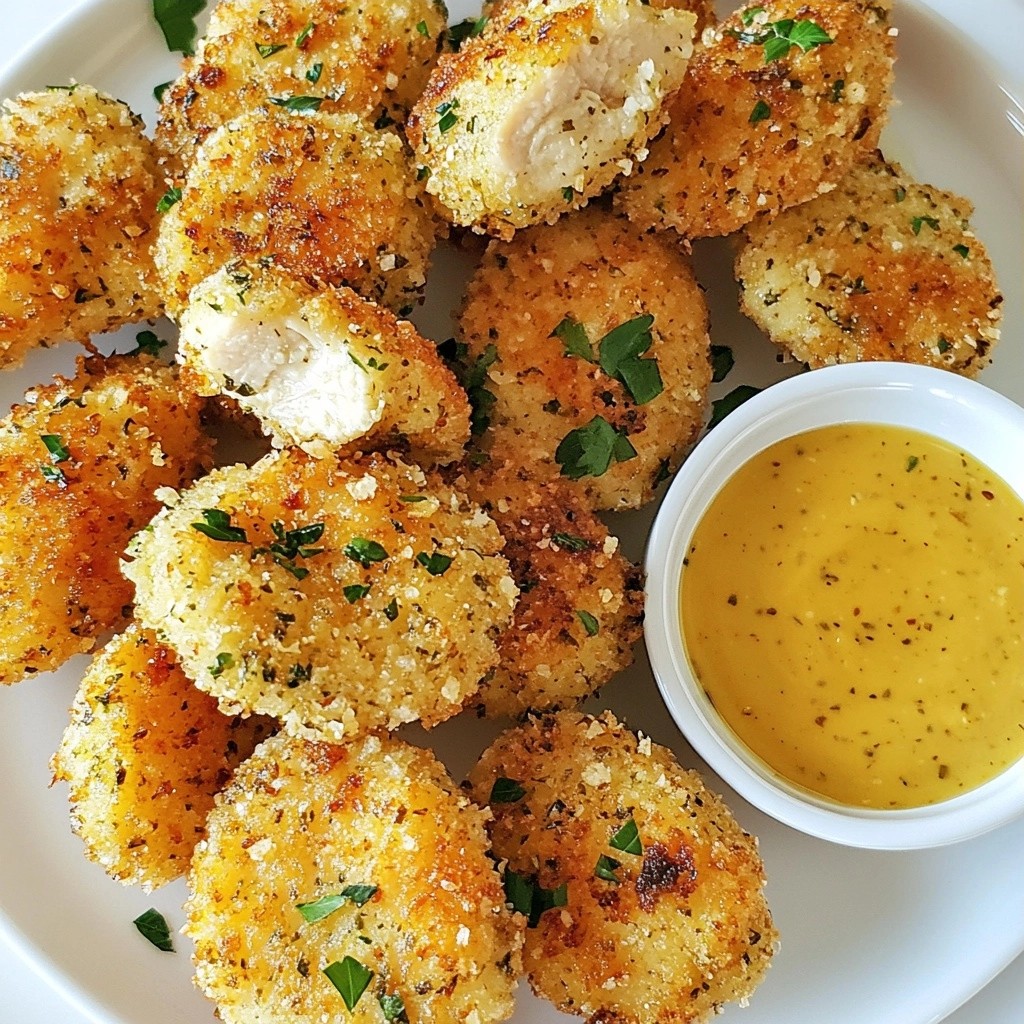
Draining and Serving
Once the nuggets are golden, use a slotted spatula to take them out. Place them on a plate lined with paper towels. This helps absorb any excess oil. For serving, arrange the chicken nuggets on a colorful plate. Pair them with small cups of ketchup, honey mustard, and ranch dressing. For a nice touch, sprinkle fresh parsley or a bit of paprika on top for color and flavor!
Tips & Tricks
Achieving Maximum Crispiness
- Choosing the right type of breadcrumbs: I love using panko breadcrumbs. They give a light and crispy texture. They are larger than regular breadcrumbs, which helps create that crunch we all love.
- Tips for frying without excess oil: Use just enough oil to cover the bottom of the pan. Heat it to medium. This way, the nuggets fry evenly without soaking up too much oil.
Cooking Alternatives
- Air frying options for a healthier method: Air fryers work great for nuggets! They use hot air to cook, giving you crispy bites with less oil. Just spray a little cooking oil on the nuggets before cooking for that extra crunch.
- Baking recommendations for less mess: You can bake these nuggets too! Preheat your oven to 400°F. Place the nuggets on a baking sheet lined with parchment paper. Bake for about 20 minutes, flipping halfway through. This method cuts down on mess and still gives a nice crisp.
Variations for Picky Eaters
- Substituting chicken with turkey or tofu: You can swap chicken for turkey if that’s what your family prefers. For a vegetarian option, try tofu. It absorbs flavors well and can be just as tasty.
- Adjusting seasonings based on preferences: Tailor the spices to your family's taste. If garlic or onion is too strong, reduce them or leave them out. You want to make these nuggets enjoyable for everyone!
Pro Tips
- Double Dredging: For an even crispier texture, consider double-dipping your chicken pieces in the egg and breadcrumbs. This extra layer helps create a thicker, crunchier crust.
- Oil Temperature: Maintaining the right oil temperature is crucial. If the oil is too hot, the nuggets will burn on the outside and remain raw inside. Use a thermometer to keep it around 350°F (175°C).
- Batch Frying: Fry the chicken nuggets in small batches to ensure they cook evenly and achieve that golden brown color without steaming.
- Cooling Rack: After frying, place the nuggets on a cooling rack instead of paper towels. This prevents them from becoming soggy by allowing air to circulate around them.
Variations
Flavor Enhancements
You can boost your chicken nuggets with fun flavors. Try adding herbs like thyme or basil to the breadcrumb mix. These herbs bring freshness and depth to your dish.
Cheese is another great addition. Grate some Parmesan or cheddar into the breadcrumbs. This adds a savory kick that kids love. The extra flavor makes these nuggets even more tempting.
Chicken Nugget Shapes
Kids love fun shapes! You can use cookie cutters to make stars, hearts, or animals. This simple trick makes the meal more exciting for picky eaters.
Even without cookie cutters, you can shape the nuggets into cute forms with your hands. Try making mini nuggets or larger ones for variety. The fun shapes can turn a regular meal into a special treat.
Serving Suggestions
Pair your nuggets with tasty sides. Classic fries are always a hit, but consider serving them with fresh veggies. Carrot sticks or cucumber slices add crunch and color.
Dipping sauces can elevate your nuggets. Beyond ketchup, try honey mustard or ranch dressing. You can even create a yogurt dip with herbs for a twist. These options keep the meal fresh and interesting.
Storage Info
Storing Leftovers
To keep your chicken nuggets fresh, cool them down first. Let them sit on a plate for about 15 minutes. This helps avoid steam that can make them soggy. Once cooled, place the nuggets in an airtight container. This keeps them from drying out and keeps the flavors intact. Store them in the fridge for up to three days.
Reheating Instructions
The best way to reheat nuggets is in the oven. Preheat your oven to 375°F (190°C). Place the nuggets on a baking sheet. Bake for about 10-12 minutes until they are hot and crispy. If you use the microwave, place them on a microwave-safe plate. Heat for about 30 seconds, but this may make them less crispy. To keep them crispy, consider using an air fryer if you have one.
Freezing Tips
You can freeze both uncooked and cooked nuggets. For uncooked nuggets, place them on a baking sheet in a single layer. Freeze them for about an hour, then transfer to a freezer bag. For cooked nuggets, let them cool and follow the same method. For thawing, leave them in the fridge overnight. This keeps the texture nice and tasty. Avoid thawing on the counter, as it may lead to moisture loss.
FAQs
Can I make chicken nuggets in advance?
Yes, you can prepare chicken nuggets ahead of time. To do this, bread the chicken pieces, but do not fry them right away. Instead, place the breaded nuggets on a baking sheet. Then, cover them with plastic wrap and freeze them for later use. This method keeps them fresh. You can fry them straight from the freezer. Just add a couple of extra minutes to the frying time. This makes meal prep easy and saves time on busy days.
What can I use if I don’t have panko breadcrumbs?
If you don't have panko, you can use regular breadcrumbs. They may not be as crispy, but they work well. You could crush cornflakes or crackers for a crunchy coating, too. Another option is using crushed nuts for a different flavor. Each of these alternatives can give you a nice texture for your chicken nuggets.
How do I keep my chicken nuggets from getting soggy?
To avoid sogginess, make sure your oil is hot before frying. If the oil is not hot enough, the nuggets will soak up oil. Fry them in small batches to keep the oil temperature steady. After frying, place the nuggets on paper towels. This helps absorb any extra oil. For serving, use a plate with a cooling rack to keep them crisp.
Can I use whole wheat flour?
Yes, you can use whole wheat flour instead of all-purpose flour. Whole wheat flour adds a nutty flavor and a bit more fiber. However, it may make the coating denser. If you want a lighter texture, mix whole wheat flour with a bit of all-purpose flour. This way, you can enjoy the health benefits while keeping your nuggets crispy.
Are homemade chicken nuggets healthier than store-bought?
Homemade chicken nuggets are generally healthier than store-bought ones. When you make them at home, you control the ingredients. You can choose fresh chicken and skip additives. Store-bought nuggets often contain preservatives and unhealthy fats. Plus, you can adjust seasonings to your taste. This means you can create a meal that fits your dietary needs and keeps everyone happy.
In this blog post, we explored how to make delicious homemade chicken nuggets. We covered the main ingredients, seasoning, and step-by-step instructions to prepare, bread, and fry your nuggets. I shared tips for crispiness and variations to please everyone. Remember, making chicken nuggets is simple and fun, and you can customize them to your taste. Enjoy your cooking, and share these yummy creations with family and friends!