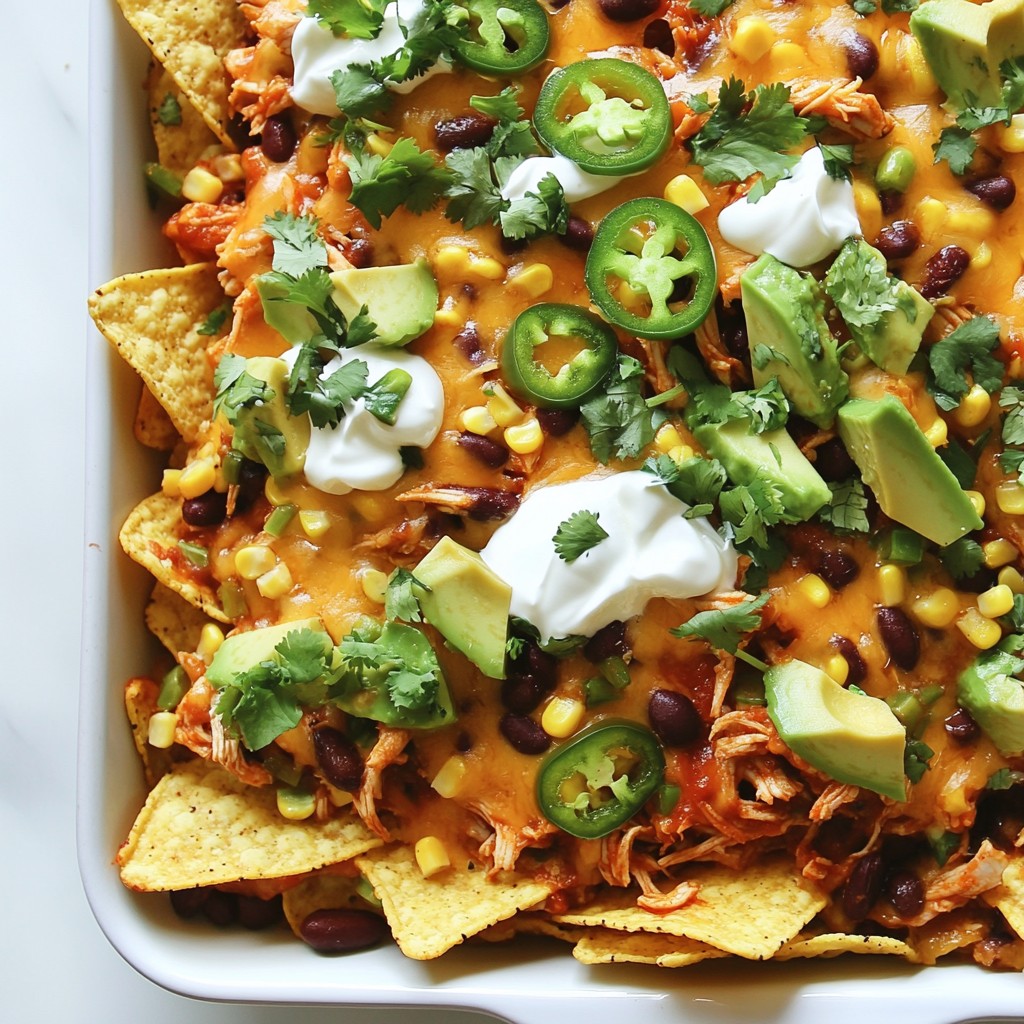
Are you ready to dominate game day with a dish that’s both fun and tasty? My Loaded BBQ Chicken Nachos are packed with flavor and simple to make. Perfect for sharing or enjoying solo, they deliver crispy chips, tender chicken, and melted cheese in every bite. Plus, I’ll share tips for easy swaps and fun variations. Let’s get cooking and impress your friends and family with this delicious recipe!
Why I Love This Recipe
- Delicious Flavor Fusion: The combination of savory BBQ chicken, creamy cheese, and fresh toppings creates a mouthwatering harmony of flavors that everyone will love.
- Quick and Easy Preparation: This recipe is perfect for busy weeknights or casual gatherings, as it takes only about 27 minutes from start to finish.
- Customizable Options: Whether you prefer it spicy with jalapeños or loaded with extra veggies, you can easily adjust the toppings to suit your taste.
- Perfect for Sharing: These nachos are ideal for parties or movie nights, allowing everyone to dig in and enjoy a fun and interactive dining experience.
Ingredients
List of Required Ingredients
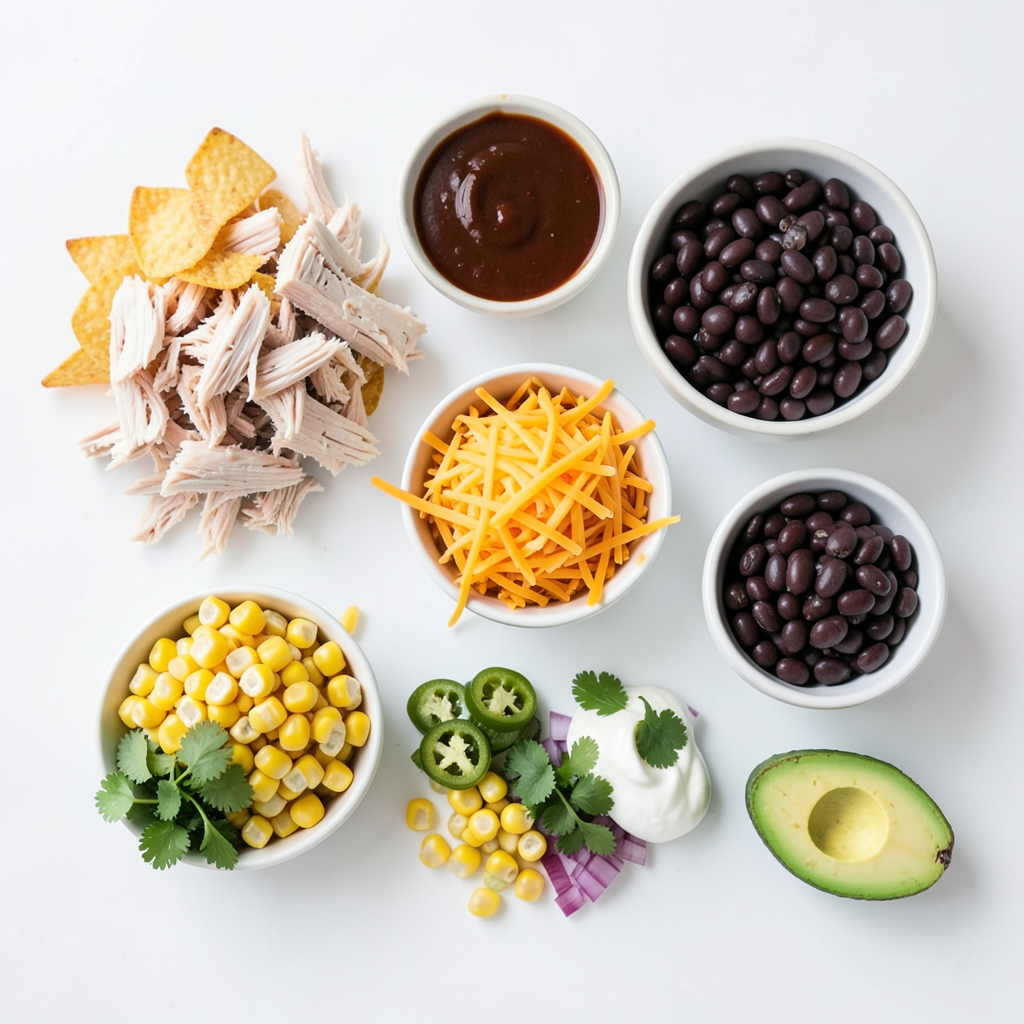
To make Loaded BBQ Chicken Nachos, you need:
- 2 cups cooked chicken, shredded
- 1 cup BBQ sauce (your favorite variety)
- 1 bag (12 oz) tortilla chips (preferably thick and sturdy)
- 2 cups shredded cheddar cheese (or a blend of your choice)
- 1 cup black beans, rinsed and drained
- 1 cup corn kernels (fresh, frozen, or canned)
- 1/2 cup red onion, finely diced
Optional Ingredients for Added Flavor
To enhance the flavor, consider adding:
- 1 jalapeño, thinly sliced (optional for heat)
- 1/2 cup sour cream (or Greek yogurt for a healthier option)
- 1/4 cup fresh cilantro, chopped
- 1 ripe avocado, diced (for topping)
Substitutions and Dietary Options
You can adjust ingredients for dietary needs:
- Use any cooked protein like turkey or tofu for a different taste.
- Swap cheese for a dairy-free option to make it vegan.
- For a low-carb option, use lettuce instead of tortilla chips.
These choices help make the dish fit your diet while keeping it delicious!
Step-by-Step Instructions
Preheating the Oven
First, you need to preheat your oven to 350°F (175°C). This step is key for melting the cheese and crisping the chips just right. A hot oven makes your nachos taste amazing!
Preparing the BBQ Chicken
Next, take 2 cups of cooked chicken. Shred it finely using two forks or your hands. In a mixing bowl, combine the shredded chicken with 1 cup of your favorite BBQ sauce. Mix well to coat each piece. The BBQ sauce adds flavor and moisture to the chicken.
Assembling the Nachos
Now, grab a large, rimmed baking sheet. Spread out 1 bag (12 oz) of tortilla chips in a single layer. This helps keep the chips crunchy. Spoon the BBQ chicken evenly over the chips. Then, sprinkle 1 cup of rinsed black beans and 1 cup of corn kernels on top. Finish by covering everything with 2 cups of shredded cheddar cheese. The cheese will turn gooey and delicious when baked.
Baking the Loaded Nachos
Place the loaded nachos in your preheated oven. Bake for 10-12 minutes. Keep an eye on them to avoid burning. You want the cheese to be bubbly and melted. Once done, take them out and let them cool for a minute. Top with 1/2 cup of sour cream, diced avocado, and chopped cilantro. Enjoy your warm, loaded BBQ chicken nachos right away!
Tips & Tricks
Ensuring Even Cheese Melt
To get that perfect cheese melt, use shredded cheese. Shredded cheese melts better than sliced cheese. Spread it evenly over the nachos. This helps every chip get covered. Bake them at 350°F for 10-12 minutes. Watch for bubbling cheese. This means it’s ready!
How to Customize Your Nachos
Feel free to make these nachos your own. You can add various toppings. Try diced tomatoes or olives for a new taste. You can swap black beans for pinto beans. Add extra jalapeños if you love heat. Want a twist? Use different BBQ sauces. Sweet, spicy, or tangy, choose what you like best!
Serving Suggestions for Maximum Enjoyment
Serve your nachos right from the baking sheet. This gives a fun, rustic look. For a colorful touch, use a large platter. Don’t forget to add lime wedges. They add a zesty kick when squeezed over the nachos. Enjoy them fresh, hot, and full of flavor!
Pro Tips
- Choose the Right Chips: Opt for thick and sturdy tortilla chips to hold all the toppings without getting soggy.
- Layer Wisely: For even melting, layer the cheese and toppings in stages instead of piling everything on top.
- Customize Your Heat: Adjust the amount of jalapeños based on your spice preference; you can also use pickled jalapeños for a tangy flavor.
- Keep an Eye on the Oven: Nachos can burn quickly; check them at the 8-minute mark to ensure the cheese melts perfectly without overcooking.
Variations
Vegetarian Loaded Nachos
You can easily make vegetarian loaded nachos. Replace the chicken with hearty grilled veggies or beans. Black beans work well here. You can also add roasted bell peppers or zucchini for more flavor. Use a rich BBQ sauce for depth. Top with plenty of cheese and fresh toppings like avocado and cilantro.
Spicy BBQ Chicken Nachos
If you love heat, try spicy BBQ chicken nachos. Start with the same chicken and BBQ sauce mix. Then, add sliced jalapeños before baking. You can also use a spicy BBQ sauce. Want more heat? Add crushed red pepper flakes on top. These changes will make your nachos fiery and fun.
Healthier Alternatives for Ingredients
For a healthier take, swap some ingredients. Use Greek yogurt instead of sour cream. This adds protein and reduces fat. You can also choose low-fat cheese or a dairy-free option. Instead of tortilla chips, consider baked veggie chips or even sweet potato slices. These swaps keep the taste while making your nachos lighter.
Storage Info
How to Store Leftovers
To store your Loaded BBQ Chicken Nachos, first let them cool down. Then, place any leftovers in an airtight container. Try to cover the nachos with foil to keep them fresh. Store them in the fridge for up to three days. If you have leftover toppings, like avocado or sour cream, keep those separate.
Reheating Instructions
When you’re ready to enjoy your nachos again, preheat your oven to 350°F (175°C). Place the nachos on a baking sheet. If needed, add a splash of BBQ sauce to help them stay moist. Bake for 10-12 minutes or until the cheese melts again. You can also reheat them in a microwave, but the oven keeps the chips crispy.
Best Practices for Maintaining Flavor and Texture
To keep the flavor and texture of your nachos, avoid storing them piled high. Spread them out in a single layer if possible. This helps prevent sogginess. If you plan to save your nachos, try not to add toppings like sour cream or avocado until you serve them again. This way, they stay fresh and tasty.
FAQs
How Can I Make BBQ Chicken Nachos in the Air Fryer?
Yes, you can make BBQ chicken nachos in an air fryer. Start by preheating your air fryer to 350°F. Next, follow the same steps for mixing the chicken with BBQ sauce. Layer the tortilla chips in the air fryer basket. Then, add the BBQ chicken, beans, corn, and cheese. Cook it for about 8 minutes. Keep an eye on it. The cheese should melt and the chips will get crispy.
Can I Prep the Ingredients in Advance?
Absolutely! You can prep the ingredients a day ahead. Shred the chicken and mix it with BBQ sauce. Store it in the fridge in an airtight container. You can also chop the veggies and keep them in separate containers. Just layer everything when you are ready to bake. This saves time and lets you enjoy the cooking more.
What Other Sauces Work Well for Nachos?
You can use a few different sauces for nachos. Besides BBQ sauce, try buffalo sauce for a spicy kick. Cheese sauce adds creaminess. Salsa is fresh and bright. For a twist, use a chipotle sauce for smoky flavor. Experiment with what you like best!
This blog post covered the key ingredients and clear steps to make BBQ chicken nachos. We explored tips for even melting cheese and how to customize your nachos. You learned about variations like vegetarian and spicy options, plus how to store leftovers properly.
In the end, loaded nachos are fun and versatile. They can fit many tastes and diets. Enjoy your nacho journey!