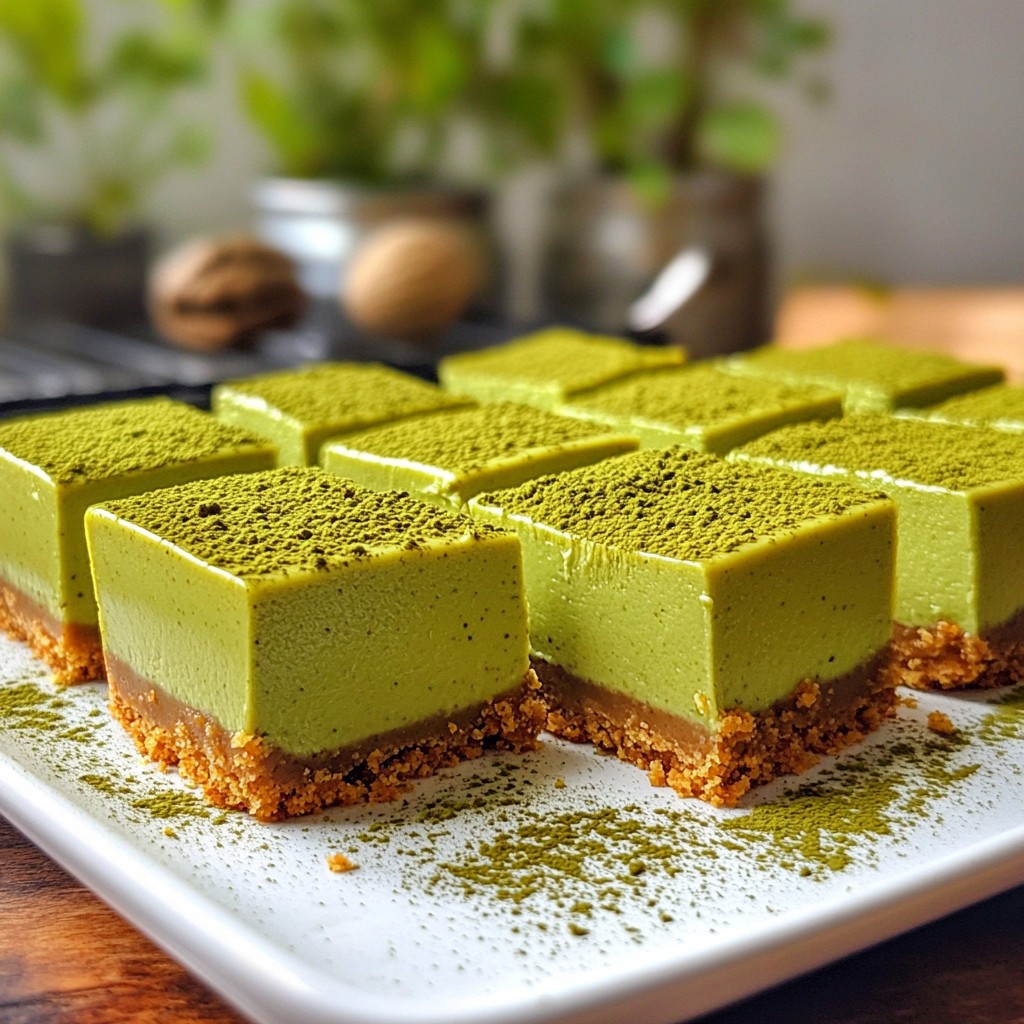
Are you ready to indulge in a creamy, vibrant treat? These Matcha Cheesecake Bars are not just easy to make—they're absolutely delightful. With just a handful of simple ingredients, you can whip up a dessert that's both unique and satisfying. In this recipe, I’ll guide you through every step, from creating the buttery graham cracker crust to the luscious matcha filling. Let’s dive in and create something special!
Why I Love This Recipe
- Delicious Flavor Combination: The earthy richness of matcha combined with the creamy texture of cheesecake creates a unique and delightful dessert experience.
- Simple Preparation: With straightforward steps and minimal ingredients, these matcha cheesecake bars are easy to whip up, making them perfect for both novice and experienced bakers.
- Visually Stunning: The vibrant green color of matcha gives these bars an elegant look, making them an impressive treat for any gathering or special occasion.
- Perfect for Sharing: These bars can easily be cut into squares, making them ideal for parties, potlucks, or simply sharing with friends and family.
Ingredients
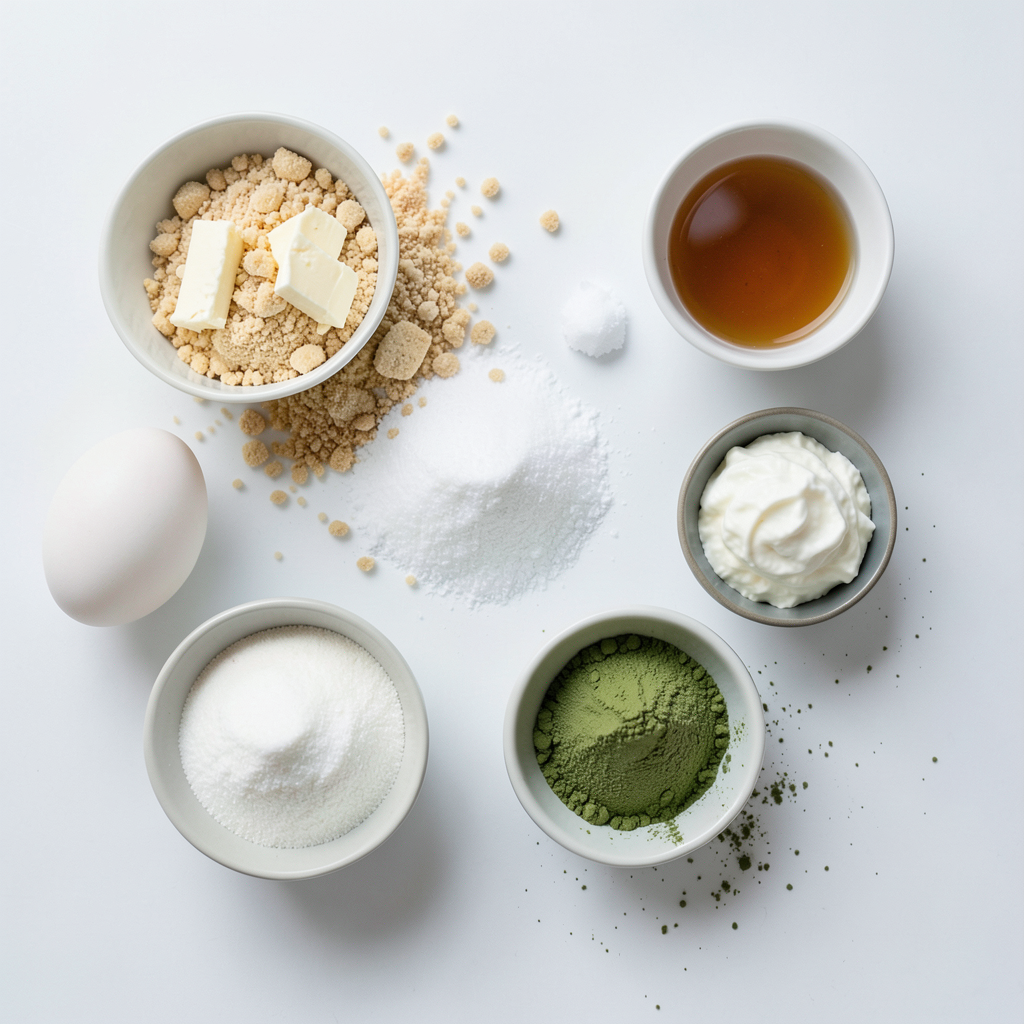
List of Essential Ingredients
- 1 ½ cups graham cracker crumbs
- ½ cup unsalted butter, melted
- 2 cups cream cheese, softened
- ½ cup granulated sugar
- 1 teaspoon pure vanilla extract
- 2 large eggs, room temperature
- 2 tablespoons matcha powder
- ½ cup sour cream, room temperature
- Pinch of sea salt
To make matcha cheesecake bars, you need simple and fresh ingredients. First, the graham cracker crumbs form a tasty crust. You will melt unsalted butter to bind them together. Cream cheese gives the bars their creamy texture. Granulated sugar adds sweetness, while pure vanilla extract enhances flavor.
Two large eggs help the cheesecake set just right. Matcha powder not only gives color but also adds a unique taste. Sour cream keeps the filling smooth and tangy. Lastly, a pinch of sea salt balances the sweetness.
Optional Garnishes
- Extra matcha powder for dusting
- Fresh berries
- Whipped cream
For a fun twist, you can garnish your bars. Dusting them with extra matcha powder makes them look pretty. Fresh berries add a burst of flavor and color. A dollop of whipped cream makes each bite even better. These simple touches elevate your matcha cheesecake bars to a new level.
Step-by-Step Instructions
Prepping the Baking Dish
First, preheat your oven to 325°F (160°C). Grab an 8x8-inch baking dish and line it with parchment paper. Make sure to leave some overhang on the sides. This helps you lift the bars out later.
Making the Graham Cracker Crust
In a medium bowl, mix 1 ½ cups of graham cracker crumbs with ½ cup of melted unsalted butter. Stir until the crumbs look wet. Press the mixture firmly into the bottom of the lined dish. Bake it in the oven for 10 minutes. Then, take it out and let it cool.
Creating the Matcha Cheesecake Filling
In a large bowl, use an electric mixer to beat 2 cups of softened cream cheese. Mix until it's smooth. Gradually add ½ cup of granulated sugar and 1 teaspoon of pure vanilla extract. Keep mixing until fluffy. Next, add in 2 large eggs, one at a time. Make sure to mix well after each egg.
Now, sift in 2 tablespoons of matcha powder to avoid clumps. Then, add ½ cup of sour cream and a pinch of sea salt. Mix on low speed until everything is smooth.
Baking and Cooling
Pour the green filling over the cooled crust. Use a spatula to spread it evenly. Place the baking dish back in the oven and bake for 30-35 minutes. The edges should be set, but the center can still jiggle a bit.
When done, turn off the oven and slightly open the door. Let the cheesecake cool inside for at least an hour. This helps reduce cracks. After that, transfer it to the fridge to chill for at least 2 hours, but overnight is best.
When you're ready to serve, lift the cheesecake out using the parchment. Cut it into squares and dust with extra matcha for a nice touch.
Tips & Tricks
Achieving the Perfect Texture
Using room temperature ingredients is key. When cream cheese, eggs, and sour cream are at room temperature, they blend better. This helps create a smooth and creamy filling. Cold ingredients can lead to lumps. Take them out of the fridge about 30 minutes before you start.
Preventing Cracks
To avoid cracks on top of your cheesecake, cooling is important. After baking, turn off the oven and crack the door. Let the cheesecake cool for an hour inside. This gradual cooling helps keep the surface intact. Once cooled, chill it in the fridge for at least two hours. Overnight is best for a perfect set.
Serving Suggestions
When ready to serve, dust the bars with extra matcha powder. This adds a nice touch. You can also pair them with fresh berries or a dollop of whipped cream. These toppings add color and flavor, making each bite more enjoyable.
Pro Tips
- Room Temperature Ingredients: Ensure your cream cheese and sour cream are at room temperature before mixing. This helps achieve a smooth and creamy texture without lumps.
- Matcha Quality Matters: Use high-quality culinary matcha for the best flavor and vibrant color. Lower quality matcha can produce a bitter taste and dull color in your cheesecake.
- Prevent Cracking: Cooling the cheesecake gradually in the oven with the door slightly ajar helps prevent cracks on the surface. Avoid sudden temperature changes.
- Chill Overnight: For the best flavor and texture, allow the cheesecake bars to chill overnight. This gives the flavors time to meld beautifully.
Variations
Vegan Matcha Cheesecake Bars
To make vegan matcha cheesecake bars, you can swap out a few ingredients. Use plant-based cream cheese instead of regular cream cheese. Coconut cream works well for a smooth texture. Replace the eggs with flax eggs. Just mix one tablespoon of ground flaxseed with three tablespoons of water. Let it sit for five minutes until it thickens. For sweetening, maple syrup or agave nectar can replace granulated sugar. This way, you get a creamy, rich dessert that everyone can enjoy!
Gluten-Free Options
If you need gluten-free matcha cheesecake bars, it's easy to adjust. Start with gluten-free graham cracker crumbs for the crust. You can find these at most stores. For the filling, ensure that your cream cheese and sour cream are gluten-free. Most brands are safe, but always check the labels. This way, everyone can enjoy a delicious dessert without worry!
Flavor Additions
Want to change the flavor? You can add a bit of chocolate! Stir in some mini chocolate chips into the filling for a sweet surprise. Another option is to use citrus zest. Lemon or orange zest adds a fresh kick. Just a teaspoon can brighten the flavor of the matcha. These simple additions make your bars even more exciting!
Storage Info
Best Practices for Refrigeration
To keep your matcha cheesecake bars fresh, store them in the fridge. Place the bars in an airtight container. If you don’t have one, cover them tightly with plastic wrap. This keeps them moist and prevents them from absorbing odors. You want to enjoy their great taste for days!
Freezing Instructions
If you want to save some for later, freezing is a great option. Here’s how to do it step by step:
1. Cool the cheesecake bars completely after baking.
2. Cut the bars into squares or rectangles.
3. Wrap each piece in plastic wrap. Make sure it is tight to avoid freezer burn.
4. Place the wrapped bars in a freezer-safe bag or container. Label it with the date.
5. Freeze for up to three months.
To thaw, simply move the bars to the fridge overnight. You can also let them sit at room temperature for about an hour before serving.
Shelf Life
In the fridge, the matcha cheesecake bars last about 5 to 7 days. If you freeze them, they stay fresh for up to three months. Always check for any changes in smell or texture before enjoying. This helps ensure you get the best flavor each time!
FAQs
Can I use a different type of crust?
Yes, you can! If you want a gluten-free option, try using almond flour or crushed nuts mixed with melted butter. A cookie crust made from Oreos or digestive biscuits works great too. Each crust adds its own flavor, so choose what you like best!
What can I substitute for cream cheese?
If you want a dairy-free option, use cashew cream or silken tofu. Both can give you a creamy texture. You can also try vegan cream cheese found in stores. Just make sure to blend it well for smooth results.
How can I adjust the sweetness?
You can easily change the sugar level. If you prefer less sweetness, use less sugar. Try starting with 1/3 cup instead of 1/2 cup. For more sweetness, add a tablespoon of honey or maple syrup. Taste as you mix!
Is matcha safe for children?
Yes, matcha is safe for children in small amounts. It offers health benefits like antioxidants. However, keep the portions small. One teaspoon in a recipe is just right. Always check if your child has any allergies before serving.
You’ve learned how to make delicious matcha cheesecake bars. From the essential ingredients to baking tips, each step is key. I emphasized the importance of texture and cooling to avoid cracks. You can also explore variations for dietary needs or flavors.
Make sure to store your bars properly to enjoy them longer. I hope this inspires you to try making these treats. They will impress your friends and family!