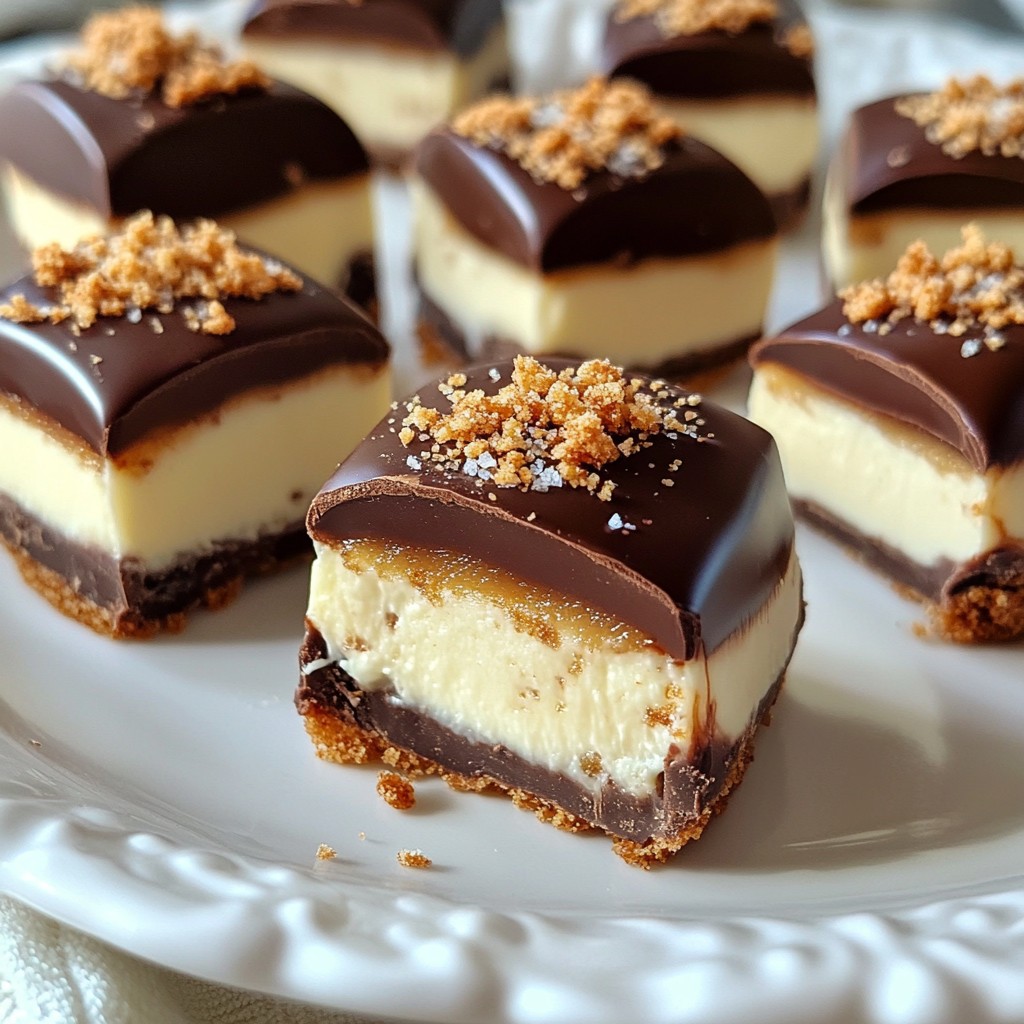
Craving a dessert that’s quick, easy, and oh-so-decadent? Look no further! These No Bake Chocolate Cheesecake Cups will satisfy your sweet tooth without all the fuss. In just a few simple steps, you can whip up creamy, chocolatey goodness that will impress family and friends. Let’s dive into this delightful treat that’s sure to become your new favorite dessert!
Why I Love This Recipe
- Decadent Flavor: This chocolate cheesecake is rich, creamy, and indulgent, making it the perfect dessert for chocolate lovers.
- No-Bake Convenience: With no baking required, this recipe saves time and ensures a hassle-free preparation.
- Beautiful Presentation: These cheesecake cups are not only delicious but also visually appealing, perfect for impressing guests.
- Easy to Customize: Feel free to get creative with toppings, add fresh fruits, or experiment with different flavors!
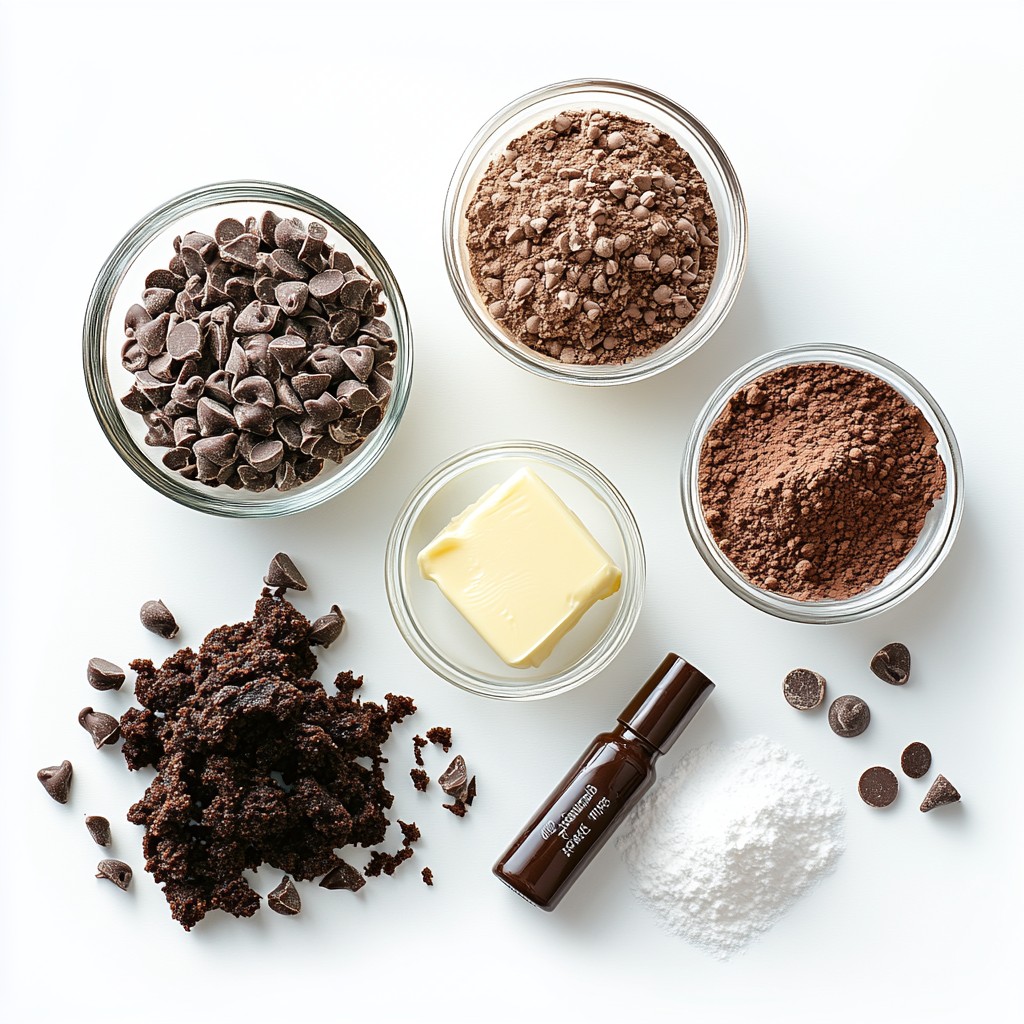
Ingredients
Here are the key ingredients you need to make no-bake chocolate cheesecake cups:
- 1 ½ cups chocolate cookie crumbs
- ½ cup unsalted butter, melted
- 8 oz cream cheese, softened to room temperature
- ½ cup powdered sugar
- 1 cup heavy whipping cream, chilled
- ½ cup cocoa powder, sifted
- 1 teaspoon pure vanilla extract
- A pinch of sea salt
- Optional garnishes like chocolate shavings or chocolate chips
Each ingredient plays a role in creating the cheesecake's rich flavor and smooth texture. The chocolate cookie crumbs form a delicious crust. The butter binds the crumbs together. Cream cheese adds creaminess, while powdered sugar sweetens the mix. Heavy whipping cream lightens the filling, making it airy. Cocoa powder intensifies the chocolate flavor. Vanilla extract adds warmth, and a pinch of salt balances the sweetness.
You can also get creative with the garnishes. Chocolate shavings or chips make the cups look fancy. Fresh mint leaves can add a pop of color. This simple list helps you create a dessert that looks and tastes amazing!
Step-by-Step Instructions
Preparing the Cookie Crust
- First, mix 1 ½ cups of chocolate cookie crumbs with ½ cup of melted unsalted butter.
- Combine until it looks like wet sand. Make sure all crumbs are coated.
- Next, distribute the mixture evenly into small cups or dessert glasses.
- Press the mixture down with your fingers or a spoon to form a solid crust.
- Place these cups in the fridge while you make the filling.
Making the Cheesecake Filling
- In a large bowl, beat 8 oz of softened cream cheese with ½ cup of powdered sugar.
- Mix until smooth and creamy. Ensure there are no lumps left.
- Now, add 1 cup of chilled heavy whipping cream, ½ cup of sifted cocoa powder, 1 teaspoon of pure vanilla extract, and a pinch of sea salt.
- Beat this mixture at medium speed until it thickens and forms soft peaks. This takes about 2-3 minutes.
Assembly and Setting
- Once the filling is ready, spoon or pipe it into the cups over the crust. Fill each cup to the top.
- Smooth the tops with a spatula or spoon to make them even.
- Garnish with chocolate shavings or chocolate chips for a nice finish.
- Cover each cup with plastic wrap. Return them to the fridge to set for at least 4 hours.
Tips & Tricks
Achieving the Best Texture
To get the best texture for your cheesecake cups, keep your ingredients at the right temperature. Make sure the cream cheese is soft before mixing. This helps avoid lumps. If the cream cheese is cold, it won't blend well. Use a mixer on medium speed to beat the cream cheese and powdered sugar until smooth. This step is key to a creamy filling.
Presentation Tips
When serving, arrange the cheesecake cups on a nice platter. Make sure they are cold for the best taste. For an elegant touch, add a fresh mint leaf on top of each cup. You can also sprinkle extra chocolate shavings or chocolate chips for fun. This not only looks great but adds more flavor.
Pro Tips
- Chill Your Bowl: Before whipping the heavy cream, chill your mixing bowl and beaters in the refrigerator for about 15 minutes. This will help the cream whip up faster and increase the volume for a fluffier texture.
- Use High-Quality Cocoa Powder: The flavor of your chocolate cheesecake greatly depends on the cocoa powder you use. Opt for a high-quality, unsweetened cocoa powder for a rich and indulgent taste.
- Don’t Skip the Sea Salt: Adding a pinch of sea salt enhances the sweetness of the cheesecake and balances the flavors. It’s a small but impactful ingredient that elevates your dessert.
- Let It Set: For the best texture and flavor, allow the cheesecake cups to chill in the refrigerator for at least 4 hours, or overnight if possible. This resting time helps the flavors meld and the filling to firm up perfectly.
Variations
Flavor Variations
You can change the flavor of your cheesecake cups easily. Adding different extracts can make a big difference. For example, mint extract gives a fresh twist. Almond extract adds a warm, nutty taste. Just one teaspoon of either will do.
You can also use flavored chocolate chips. Dark, white, or even caramel chocolate chips can enhance the taste. Mix them in with the cheesecake filling or use them as a topping. This way, you can create fun variations every time you make these cups.
Dietary Modifications
If you need gluten-free options, try using almond flour or gluten-free cookie crumbs. They work great for the crust. You won’t lose any taste, but you’ll make it safe for those with gluten issues.
For low-sugar versions, you can swap out powdered sugar for a sugar substitute. This keeps the sweetness without the added sugar. You can also use dairy-free cream cheese and coconut cream for a dairy-free option. These swaps keep your dessert tasty while accommodating different diets.
Storage Info
How to Store Cheesecake Cups
To keep your no-bake chocolate cheesecake cups fresh, store them in the fridge. They will stay good for about 4 to 5 days. Make sure to cover each cup with plastic wrap or a lid. This prevents the filling from absorbing any odors from your fridge. It's best to keep them sealed until you are ready to enjoy them.
Freezing Instructions
You can freeze these cheesecake cups if you want to save some for later. To do this, cover each cup with plastic wrap and then place them in a freezer-safe container. They can stay in the freezer for up to 2 months. When you are ready to eat them, move a cup to the fridge. Let it thaw overnight. This way, it will be ready to enjoy the next day.
FAQs
Can I use a different type of cookie for the crust?
Yes, you can use other cookies for the crust. Try graham crackers, Oreos, or vanilla wafers. The flavor will change, but it can still taste great. Just make sure to crush them well and mix with melted butter. This way, you can create your own twist on the classic chocolate cheesecake.
How long do these cheesecake cups last in the fridge?
These cheesecake cups last about five days in the fridge. Keep them covered to keep them fresh. If you notice any changes in texture or smell, it’s best to toss them out. Enjoy them within this time frame for the best taste.
Can I make these cheesecake cups in advance?
Yes, making these cheesecake cups in advance is a great idea. You can prepare them a day or two ahead of time. Just store them in the fridge until you're ready to serve. This makes them perfect for parties or special occasions.
What if I don’t have heavy whipping cream?
If you don’t have heavy whipping cream, you can use whipped topping as a substitute. You can also try using coconut cream for a dairy-free option. Just remember, the texture may differ, but they will still be delicious.
Can I use a hand mixer instead of an electric one?
Absolutely! A hand mixer works just fine for this recipe. It may take a bit longer to reach the right consistency, but it will still create a smooth filling. Just be patient and keep mixing until you get those soft peaks.
You learned how to make delicious cheesecake cups with a chocolate cookie crust. We covered each step, from preparing the crust to garnishing the finished dessert. I shared tips on achieving the best texture and creative ways to customize your cups. Remember, these cheesecake treats can fit different diets and can be stored or frozen for later. With simple steps and great flavors, you can impress anyone with this easy dessert. Give it a try; you won’t regret it!