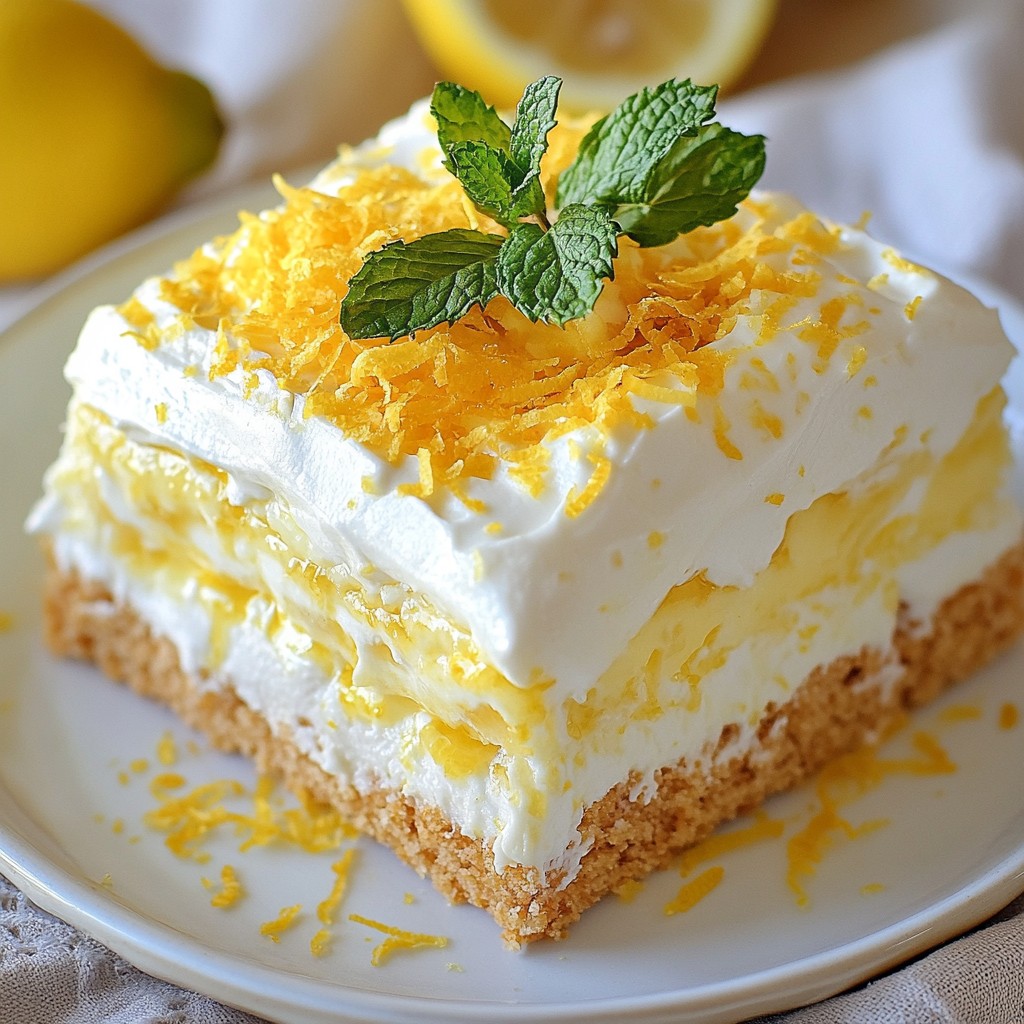
Looking for a light and refreshing dessert? You’ve come to the right place! This No-Bake Lemon Icebox Cake is the perfect sweet treat for hot days or special occasions. With just a handful of simple ingredients, you can whip up a delicious cake that requires no baking! Join me as I guide you through each step, from mixing the filling to chilling it just right. Let's get started on this delightful dessert!
Why I Love This Recipe
- Refreshing Flavor: This cake is the perfect balance of sweetness and tartness, making it a delightful dessert for any occasion.
- No Baking Required: With no need for an oven, this recipe is ideal for warm days when you want a cool treat without the heat.
- Easy to Make: With simple ingredients and straightforward steps, this cake can be whipped up in no time, perfect for both novice and experienced bakers.
- Stunning Presentation: The layers of lemon filling and garnishes create an eye-catching dessert that’s sure to impress your guests.
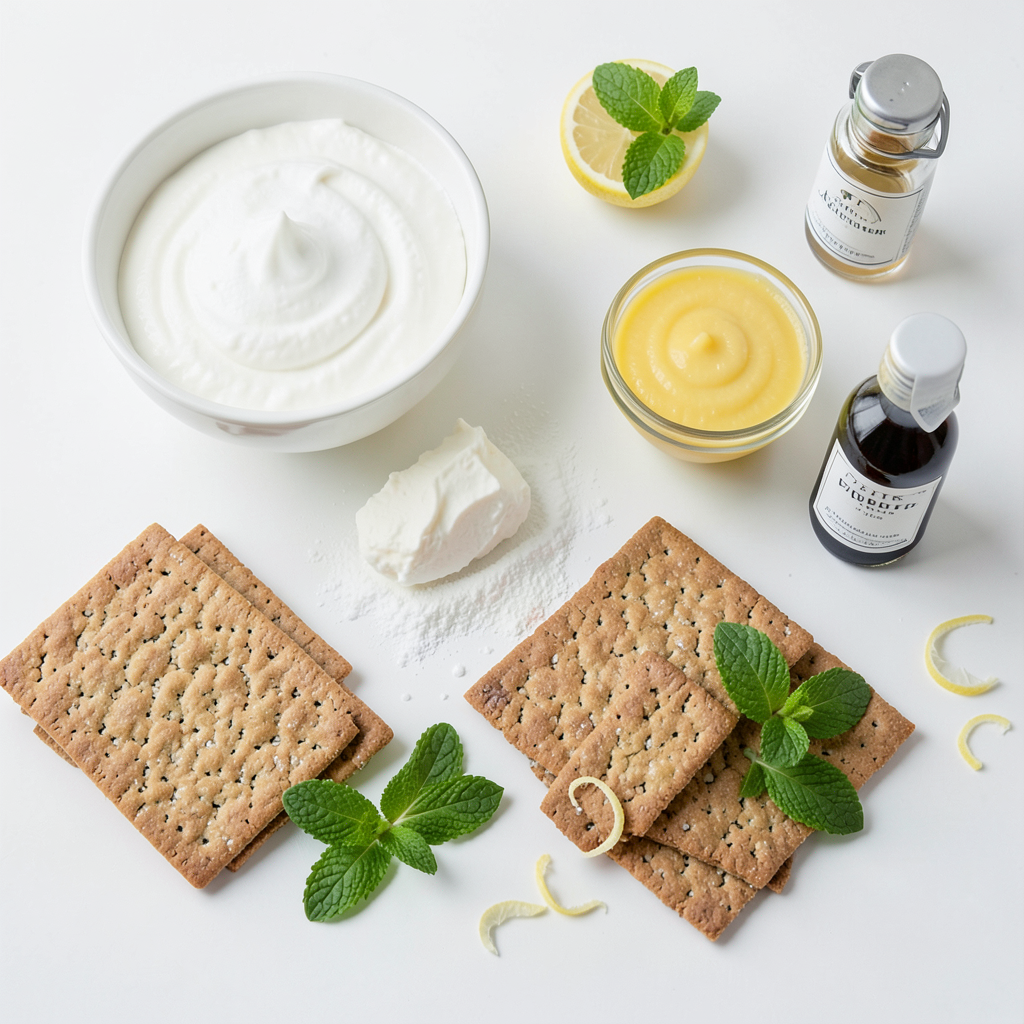
Ingredients
To make a No-Bake Lemon Icebox Cake, you need a few simple ingredients. Here’s what you will need:
- 1 cup heavy whipping cream
- 1/2 cup powdered sugar
- 8 ounces cream cheese, softened
- 1 cup lemon curd (store-bought or homemade)
- 1 teaspoon vanilla extract
- 12-15 graham cracker sheets
- Fresh mint leaves (for garnish)
- Zest of 1 lemon (for garnish)
These ingredients work together to create a light and refreshing dessert. The heavy whipping cream gives the cake its airy texture. Cream cheese adds a creamy base, while lemon curd provides that zesty flavor we love. The graham crackers add a crunchy layer that contrasts nicely with the soft filling. Fresh mint and lemon zest are perfect for garnishing, adding bright color and a lovely aroma.
Gather these ingredients, and you're ready to make a delicious lemon icebox cake!
Step-by-Step Instructions
Preparing the Whipped Cream
First, grab a medium mixing bowl. Add 1 cup of heavy whipping cream and 1/2 cup of powdered sugar. Use an electric mixer on medium-high speed. Whip until soft peaks form, which takes about 3-5 minutes. Set this aside.
Mixing the Lemon Filling
Next, take a large bowl and place 8 ounces of softened cream cheese inside. Beat in 1 cup of lemon curd and 1 teaspoon of vanilla extract. Mix until the mixture is smooth and free of lumps. This should take around 2-3 minutes.
Assembling the Cake
Now, it's time to layer the cake. In a rectangular baking dish, arrange a single layer of graham cracker sheets to cover the bottom. Spoon a generous amount of lemon filling over the crackers, spreading evenly. Repeat the layers: more graham crackers, then more lemon filling. Keep layering until you use all the filling. Make sure the top layer is the lemon filling.
Cover the dish tightly with plastic wrap. Chill in the fridge for at least 4 hours. For the best taste, let it chill overnight. This helps the cake set and the flavors meld beautifully.
Tips & Tricks
Perfecting the Whipped Cream
To make the best whipped cream, start with cold heavy cream. Use a mixing bowl that is also cold. This helps the cream whip faster. Use an electric mixer on medium-high speed. Whip until soft peaks form. This takes about 3-5 minutes. Don't over-whip, or it can turn into butter.
For the best results, I recommend a stand mixer. It whips cream quickly and evenly. If you use a hand mixer, be sure to keep an eye on it.
Chilling Guidelines
Chilling is key for this cake. It helps the layers set and flavors blend. I suggest chilling for at least 4 hours. However, overnight is best. The longer it chills, the better the taste. This makes the lemon flavor pop and the texture smooth.
Make sure to cover the cake tightly with plastic wrap. This keeps it fresh and prevents it from absorbing other fridge smells.
Presentation Tips
When it's time to serve, slice the cake into neat squares. This makes it easy to serve. Arrange the squares on a nice serving plate for a great look.
For a special touch, garnish with fresh mint leaves and lemon zest. You can also add thin lemon slices. This makes the cake look even more inviting. Serve it chilled for a refreshing treat on a hot day!
Pro Tips
- Chill Your Tools: Before whipping the cream, chill your mixing bowl and beaters in the freezer for about 10-15 minutes. This helps the cream whip up faster and achieve better volume.
- Homemade Lemon Curd: For a more intense lemon flavor, try making your own lemon curd. It’s easier than you think and elevates the taste of your icebox cake significantly.
- Layering Technique: When layering the graham crackers and lemon filling, make sure to use an even spread to ensure each slice has the perfect ratio of flavors in every bite.
- Garnishing for Appeal: For a stunning presentation, use a microplane to zest the lemon directly over the cake just before serving. This adds freshness and a pop of color, enhancing the dessert's visual appeal.
Variations
Flavor Variations
You can make your no-bake lemon icebox cake even more fun! Try adding fresh fruits like blueberries or raspberries. They bring a burst of color and flavor. You can also experiment with different curds. Lime or orange curd can give your cake a twist. Mixing flavors adds excitement to this simple dessert!
Alternative Bases
Switching up the base adds a new touch. Instead of graham crackers, try different cookies. Chocolate wafers or vanilla cookies can change the taste. If you need gluten-free options, look for gluten-free cookies. They work well and keep the cake light and tasty.
Mini Icebox Cakes
Want to impress your guests? Make mini icebox cakes! Use small cups or jars for fun, individual servings. They are perfect for parties and easy to grab. You can layer the filling and cookies just like the big cake. Garnish each cup with mint and zest for a cute look. Everyone will love these little treats!
Storage Info
Storing Leftovers
To keep your No-Bake Lemon Icebox Cake fresh, store it in the fridge. Place it in an airtight container. If you don't have one, cover the dish tightly with plastic wrap. Proper refrigeration helps maintain the cake's texture and flavor. Eat any leftovers within three days for the best taste.
Freezing Options
You can freeze this cake if you have extra slices. First, cut it into portions. Wrap each piece in plastic wrap. Then, place the wrapped slices in a freezer-safe bag. This helps prevent freezer burn. To enjoy later, remove a slice and let it thaw in the fridge for a few hours. You can also leave it at room temperature for about 30 minutes. Enjoy that bright lemon flavor again!
FAQs
What is a no-bake cake?
A no-bake cake is a dessert that does not need an oven. Instead, it relies on chilling in the fridge to set. This makes it quick and easy to prepare. You mix the ingredients and layer them, allowing flavors to meld. This style is great for hot days when you want a cool treat.
Can I use homemade lemon curd?
Yes, you can use homemade lemon curd. Making it fresh adds a personal touch and boosts flavor. If you have a family recipe, that works perfectly. Just make sure it's smooth and not too thick. Homemade curd can give your cake a unique taste that store-bought may not match.
How long can I keep the cake in the fridge?
You can keep the cake in the fridge for up to five days. For the best taste, eat it within three days. After that, the graham crackers may get soggy. Store it in an airtight container to keep it fresh longer. Enjoy this light dessert chilled for the best experience.
In this post, we explored how to make a delicious no-bake lemon icebox cake. We started with key ingredients like heavy whipping cream and lemon curd. Then, I shared step-by-step instructions for whipping cream and mixing the filling. I provided tips for better texture and presentation. You can try flavor variations and even create mini cakes for fun.
Remember to chill the cake well for the best taste. Enjoy this easy dessert and impress your friends!