Are you looking for a quick, tasty meal that your kids will love? I’ve got just the recipe for you! These savory chicken and cheese quesadillas are simple, fun to make, and packed with flavors that kids can’t resist. With just a few key ingredients and easy steps, you can whip up a delicious dish that is sure to please even the pickiest eaters. Let's get cooking!
Why I Love This Recipe
- Delicious Flavor Combination: The mix of cheesy goodness and tender chicken, paired with colorful bell peppers, makes each bite a fiesta for your taste buds.
- Quick and Easy: This recipe comes together in just 30 minutes, making it perfect for a weeknight dinner or a last-minute gathering.
- Customizable: You can easily adjust the filling ingredients to suit your preference, whether it's adding more veggies or trying different cheeses.
- Perfect for Sharing: Cuts into wedges, making it an ideal dish for sharing with friends and family, along with your favorite dips.
Ingredients
Key Ingredients for Cheesy Chicken Quesadillas
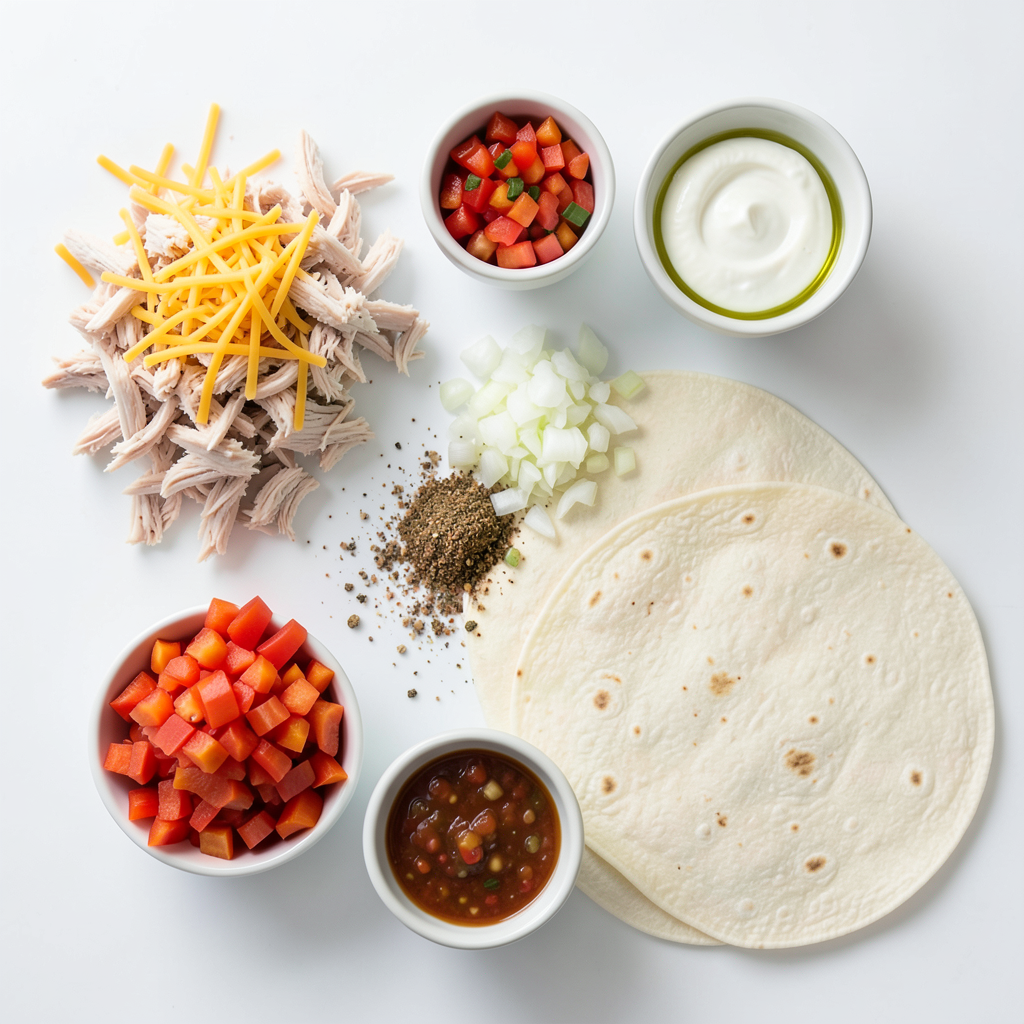
To make these quesadillas, you need a few key ingredients. Here’s what you will gather:
- 2 cups cooked chicken, shredded
- 1 cup shredded cheese (cheddar or a flavorful blend)
- 1/2 cup finely chopped bell peppers (use red, green, or yellow for color)
- 1/4 cup finely chopped onions
- 1 tablespoon taco seasoning (optional)
- 4 large flour tortillas
- 2 tablespoons olive oil (for frying)
These ingredients create a tasty and cheesy filling. The chicken adds protein, while the cheese binds everything together. The bell peppers and onions provide color and crunch.
Optional Add-Ins for Extra Flavor
You can make these quesadillas even better with some optional add-ins. Here are some ideas:
- Chopped spinach or kale for nutrition
- Sliced black olives for a salty kick
- Fresh herbs like cilantro or parsley for freshness
- Jalapeños for heat
Feel free to mix and match! These add-ins help you cater to your kids' tastes.
Suggested Dipping Sauces
Dipping sauces add fun to the meal. Here are some great options:
- 1/2 cup sour cream
- 1/4 cup salsa
- Guacamole for a creamy twist
- Ranch dressing for a kid-friendly choice
These sauces make each bite even more special. Kids love to dip, and it can make the meal more interactive.
Step-by-Step Instructions
Preparing the Filling
Start by shredding 2 cups of cooked chicken. You can use leftover chicken or rotisserie chicken for ease. In a large bowl, mix the chicken with 1 cup of shredded cheese. Cheddar works great, but feel free to use a cheese blend for more flavor. Next, chop 1/2 cup of bell peppers in different colors for a fun look. Add 1/4 cup of finely chopped onions for sweetness. If you want extra taste, sprinkle in 1 tablespoon of taco seasoning. Mix everything well until it is all combined.
Cooking the Quesadilla
Heat 1 tablespoon of olive oil in a large non-stick skillet over medium heat. Once the oil is warm, place one large tortilla in the skillet. On one half of the tortilla, spoon half of the chicken and cheese mixture. Fold the tortilla over the filling. Cook for about 3 to 4 minutes until the bottom is golden brown. You will see the cheese start to melt. Carefully flip the quesadilla using a spatula. Cook the other side for another 3 to 4 minutes until it is crispy and golden as well.
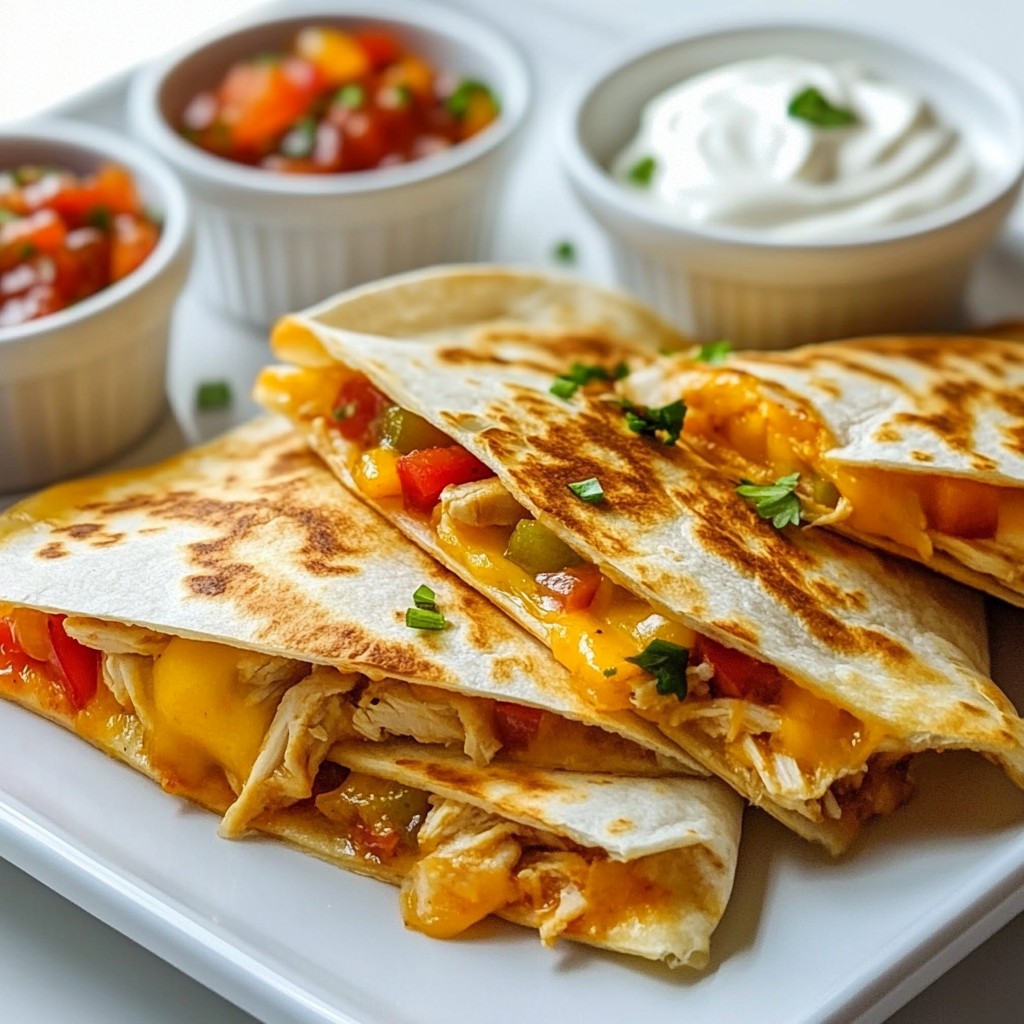
Cutting and Serving the Quesadilla
Once the quesadilla is done, transfer it to a cutting board. Let it cool for a minute so you don’t burn your fingers. Use a sharp knife to cut it into wedges for easy eating. You can repeat the cooking steps for the remaining tortillas and filling. To make it extra fun, arrange the quesadilla wedges on a bright plate. Serve them with small bowls of sour cream and salsa for dipping. Enjoy your meal!
Tips & Tricks
How to Make Quesadillas Kid-Friendly
To make quesadillas fun for kids, involve them in cooking. Let them help mix the filling. You can also use their favorite veggies, like corn or mushrooms. If they love cheese, add more! Use colorful bell peppers to make the dish bright and appealing. Kids enjoy food that looks good and tastes great.
Best Practices for a Crisp Quesadilla
For a crispy quesadilla, use a non-stick skillet. Heat the skillet to medium before adding oil. Make sure the oil is hot but not smoking. This helps the tortilla become golden brown. Flip the quesadilla gently to avoid spills. Cook each side for 3-4 minutes for the best crunch.
Presentation Tips for Serving
Presentation makes food exciting! Cut the quesadillas into wedges for easy handling. Arrange them on a colorful plate. Serve with small bowls of sour cream and salsa on the side. A sprinkle of fresh cilantro on top adds color and flavor. Your kids will love the look and taste!
Pro Tips
- Use Fresh Ingredients: Opt for fresh bell peppers and onions for a burst of flavor and color in your quesadillas.
- Experiment with Cheese: Try different cheese blends like pepper jack or mozzarella for varied tastes and textures.
- Keep It Crispy: Ensure your skillet is preheated before adding the tortillas to achieve that perfect crispy exterior.
- Garnish for Presentation: Add fresh cilantro or sliced jalapeños on top for an added flavor kick and visual appeal.
Variations
Different Cheese Options to Try
You can change the cheese in your quesadilla for fun. Cheddar is great, but try mozzarella for a stretchy texture. Pepper jack adds a spicy kick, while a blend of cheeses gives you rich flavors. You can even use cream cheese for a creamy filling. Each cheese adds something special to the dish.
Vegetarian Quesadilla Alternatives
If you want a vegetarian quesadilla, skip the chicken. Add black beans for protein, or try sautéed mushrooms for a meaty taste. Spinach or zucchini can add nice color and nutrients. Mix in your favorite veggies, like corn or jalapeños. This way, kids can enjoy a tasty meal without meat.
Flavor Enhancements with Spices and Herbs
Spices can make your quesadilla pop. Taco seasoning adds a zesty flavor that kids love. Try cumin or chili powder for warmth. Fresh herbs like cilantro or parsley add a fresh taste. For a twist, sprinkle some garlic powder or onion powder into the mix. These simple additions can turn a good quesadilla into a great one!
Storage Info
How to Store Leftover Quesadillas
To keep your leftover quesadillas fresh, let them cool first. Place them in an airtight container. Store them in the fridge for up to three days. If you want to keep them longer, freezing is a great option.
Reheating Tips to Maintain Crispiness
When you reheat quesadillas, aim for a crispy texture. Use a skillet over medium heat. Add a little oil to the pan to help with crispiness. Heat each side for about two to three minutes. This method keeps the cheese melted and the tortilla crunchy.
Freezing Instructions for Meal Prep
To freeze quesadillas, wrap each one in plastic wrap or foil. Place them in a freezer-safe bag. You can store them for up to three months. When ready to eat, thaw them in the fridge overnight before reheating. This keeps them tasty and fresh.
FAQs
What Can I Substitute for Chicken?
You can use many tasty options if you don’t have chicken. Try cooked turkey, beef, or pork. For a vegetarian choice, use black beans or lentils. You can also add mushrooms for a meaty texture. Just ensure the substitute is cooked and seasoned.
Can I Make Quesadillas Ahead of Time?
Yes, you can prepare quesadillas in advance. Make the chicken and cheese mix and store it in the fridge for a day. You can also cook the quesadillas and keep them warm in the oven at a low temperature. Cover them with foil to keep them soft.
How Do I Keep Quesadillas Warm for Serving?
To keep quesadillas warm, place them in an oven set to 200°F (93°C). Lay them on a baking sheet and cover with a clean kitchen towel. This method helps retain warmth without drying them out. Serve them with dips right away for the best taste.
In this post, we explored how to make delicious cheesy chicken quesadillas. We covered key ingredients, optional add-ins, and great dipping sauces. You learned step-by-step instructions for filling, cooking, and serving. I shared tips on making quesadillas kid-friendly, ensuring crispiness, and presenting them nicely. We even discussed variations with different cheeses and storage tips.
Now, you are ready to create tasty quesadillas that everyone will love. Enjoy experimenting and sharing them with family and friends!