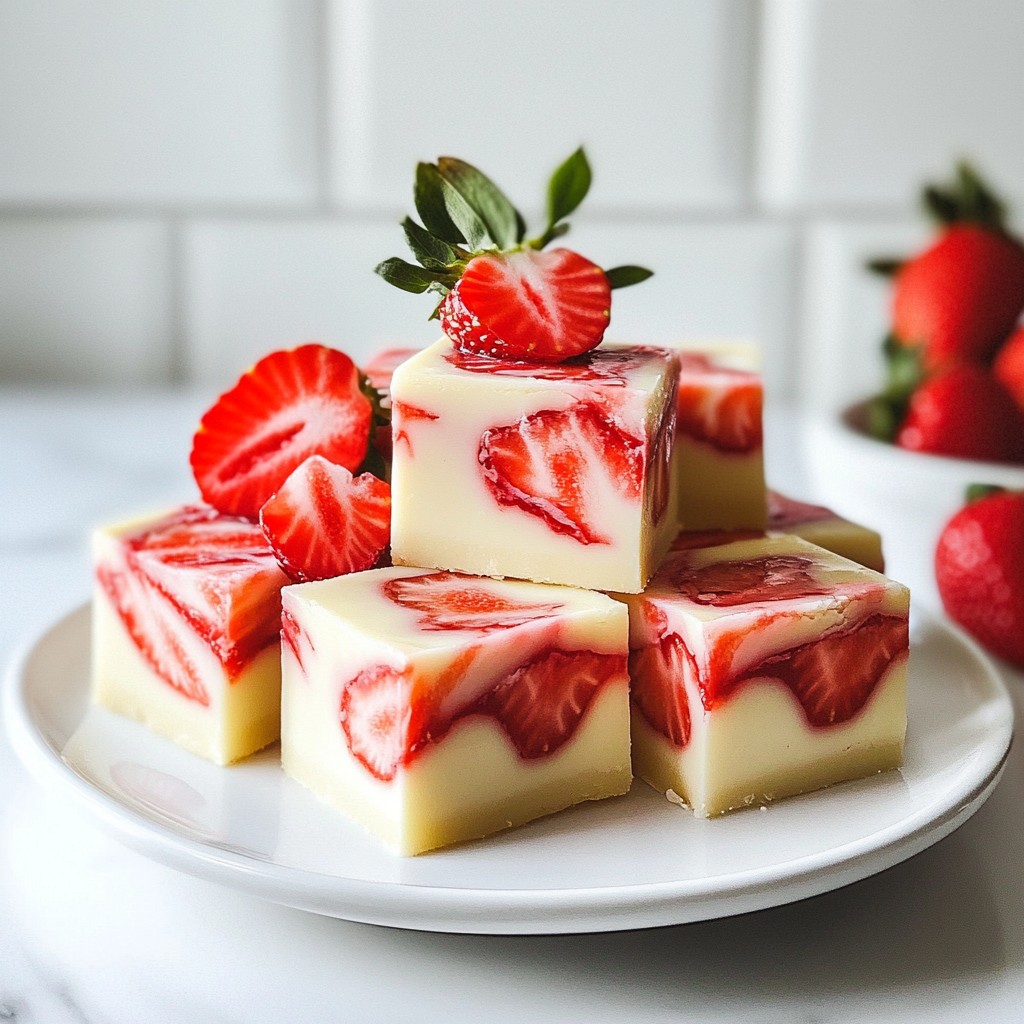
Looking for a sweet escape from the summer heat? Look no further! This Strawberry Lemonade Fudge is the perfect blend of fruity and creamy, making it an irresistible treat. With simple steps and easy ingredients, you can impress friends and family in no time. Let’s dive into this sweet adventure and make your summer gatherings even better. Grab your apron, and let’s get started!
Why I Love This Recipe
- Refreshing Flavor: The combination of strawberries and lemon creates a delightful balance of sweetness and tartness that is perfect for summer.
- Easy to Make: This fudge comes together quickly and requires minimal ingredients, making it a hassle-free treat.
- Beautiful Presentation: The vibrant colors of the strawberries against the creamy fudge make for a stunning dessert that impresses guests.
- Customizable: You can easily adapt this recipe by adding other fruits or toppings, making it versatile for different occasions.
Ingredients
List of Key Ingredients
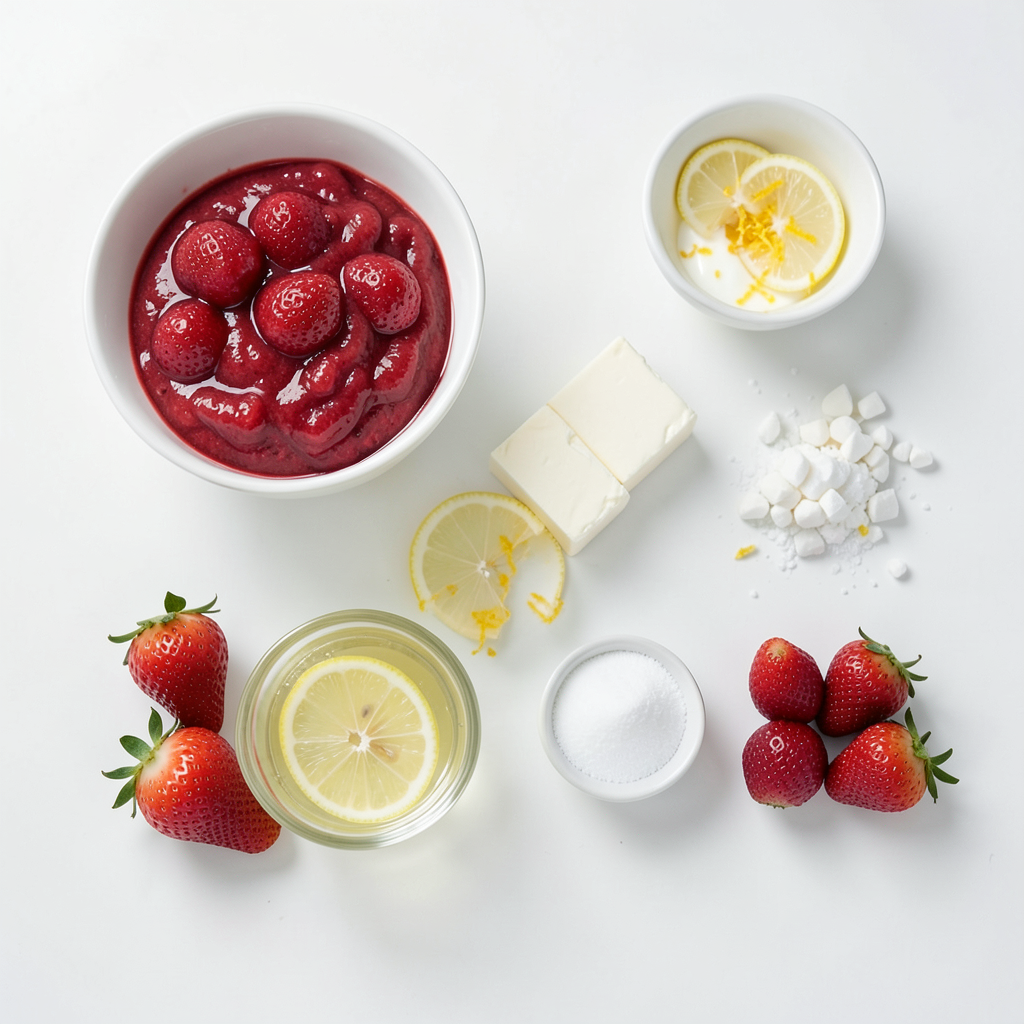
To make strawberry lemonade fudge, you need:
- 1 cup fresh strawberries, pureed
- 1 cup sweetened condensed milk
- 1/2 cup unsalted butter
- 3 cups white chocolate chips
- 1 teaspoon finely grated lemon zest
- 2 tablespoons freshly squeezed lemon juice
- 1/4 teaspoon salt
These ingredients blend together to create a creamy, sweet, and tangy fudge. The pureed strawberries give it a bright pink color and fruit flavor. The white chocolate adds sweetness, while the lemon zest and juice bring a refreshing kick.
Optional Garnishes
For extra flair, you can garnish your fudge with:
- Extra strawberry slices
- A drizzle of strawberry puree
These garnishes not only look great, but they also enhance the berry flavor. They make your fudge even more inviting for guests.
Substitute Ingredients
If you can't find certain ingredients, here are some easy swaps:
- You can use frozen strawberries instead of fresh ones. Just thaw and puree them.
- For a dairy-free option, try coconut cream instead of sweetened condensed milk.
- Use dark chocolate chips if you prefer a richer taste.
These substitutes keep your fudge delicious while accommodating different diets and preferences.
Step-by-Step Instructions
Preparing the Baking Dish
Start with an 8x8 inch baking dish. Line it with parchment paper, leaving some paper hanging over the edges. This will help you lift the fudge out later. Make sure the paper fits snugly.
Melting the Butter and Chocolate
Grab a medium saucepan and add the unsalted butter. Melt it over low heat, stirring often. You do not want it to brown. Once it melts, add the white chocolate chips. Stir until the chips melt completely and the mix looks smooth and glossy.
Combining the Condensed Milk Mixture
In a separate bowl, combine the sweetened condensed milk with the lemon zest, lemon juice, and salt. Whisk these ingredients until they mix well. This step adds a lovely tang to the fudge.
Folding in Strawberries
Now, gently fold in the pureed strawberries. Make sure to mix well but don’t overdo it. You want to keep the strawberry flavor throughout the fudge. The color should look beautiful and even.
Setting the Fudge
Pour the fudge mixture into your prepared baking dish. Use a spatula to spread it out evenly. If you saved some strawberry puree, drizzle it on top for a nice swirl. Place the dish in the refrigerator to chill for about four hours. Wait until the fudge is firm. After that, lift it out using the parchment paper. Slice it into squares for serving.
Tips & Tricks
Ensuring Smooth Texture
To get a smooth texture, melt the butter and white chocolate carefully. Use low heat and stir often. If you rush this step, the fudge may clump. Mix the sweetened condensed milk with lemon zest and juice well. This helps blend flavors and keeps the fudge creamy.
How to Achieve the Perfect Swirl
For the perfect swirl, set aside a bit of strawberry puree. After mixing the fudge, drizzle this on top. Use a knife or toothpick to swirl it gently. Don't overdo it; you want to see those pretty swirls. This adds a nice look and extra flavor.
Recommendations for Serving
Serve the fudge chilled for the best taste. Cut it into small squares for easy sharing. For a fun touch, add fresh strawberry slices on top. Arrange them on a colorful platter for a summer vibe. Enjoy them on a sunny day with friends or family!
Pro Tips
- Use Fresh Strawberries: For the best flavor, choose ripe, fresh strawberries that are in season. They will enhance the overall taste of your fudge.
- Let it Chill Completely: Ensure the fudge is fully chilled in the refrigerator for at least 4 hours. This will help it set properly and achieve the right texture.
- Customize with Citrus: Feel free to experiment with other citrus fruits like lime or orange zest for a unique twist on the traditional lemonade flavor.
- Perfect Slicing: For clean cuts, use a sharp knife and wipe it with a warm cloth between slices to avoid sticking.
Variations
Alternative Flavors (e.g., Raspberry, Lemon)
You can switch up the flavors of this fudge. For a raspberry twist, use pureed raspberries instead of strawberries. The tartness gives a fun kick. If you love lemon, try using lemon juice and zest only. This will give you a bright and zesty treat. You might also mix both fruits for a fun flavor combo!
Vegan/Friendly Options
Want a vegan version? Replace the white chocolate chips with dairy-free chocolate. Use coconut cream in place of sweetened condensed milk. You can also swap butter for coconut oil. This keeps the fudge rich and creamy while being plant-based. These swaps will keep your fudge tasty and satisfying without milk or eggs.
Different Presentation Ideas
How you serve your fudge can make it even more special. For a colorful display, arrange the fudge squares on a bright platter. Add some whole strawberries around the fudge. You can drizzle extra strawberry puree on top for a fancy look. Another idea is to layer the fudge in small jars. This makes for a fun serving method at parties. Each jar can be topped with a strawberry slice for a lovely touch!
Storage Info
How to Store Leftover Fudge
To keep your strawberry lemonade fudge fresh, place it in an airtight container. You can layer pieces of fudge with parchment paper to avoid sticking. Store it in the fridge for the best taste and texture. This helps preserve the sweet and tangy flavors. You can enjoy this treat cold or let it sit at room temperature for a few minutes before serving.
Freezing Instructions
If you want to save some fudge for later, freezing is a great option. First, cut the fudge into squares. Wrap each piece tightly in plastic wrap. Place the wrapped fudge in a freezer-safe bag or container. Make sure to label it with the date. You can freeze the fudge for up to three months. When you're ready to eat it, thaw the fudge in the fridge overnight. This keeps it tasty and fresh.
Shelf Life Tips
When stored properly, this fudge lasts about two weeks in the fridge. Check for any changes in smell or texture before eating. If you see any signs of spoilage, it's best to throw it away. For the best quality, try to eat the fudge within the first week. This ensures you get the full flavor and creamy texture.
FAQs
Can I use frozen strawberries?
Yes, you can use frozen strawberries. Just thaw them first. Drain any extra liquid. This helps keep the fudge from being too wet. Puree the strawberries as you would with fresh ones. The flavor will still be great!
How do I know when the fudge is set?
The fudge is set when it feels firm to the touch. You can also gently press the top with your finger. If it springs back, it’s ready! Chill it in the fridge for about four hours. This step ensures the fudge holds its shape.
Can I make this fudge ahead of time?
Absolutely! You can make this fudge up to a week in advance. Just store it in an airtight container in the fridge. This makes it a perfect treat for parties or gatherings. It will taste just as yummy even after a few days.
What other flavors work well with lemon and strawberry?
Many flavors pair well with lemon and strawberry. Consider using raspberry for a sweet twist. Lime adds a nice zing too. You could even try adding coconut for a tropical vibe. Be creative and mix flavors that you love!
This blog post covers everything you need to know about making delicious fudge. We talked about the key ingredients and optional garnishes, plus how to substitute if needed. You learned step-by-step instructions to prepare and set your fudge. We also shared tips for a smooth texture and fun variations to try. Storing your fudge correctly keeps it fresh for longer. I hope you feel ready to make this treat your own! Enjoy your fudge-making journey!