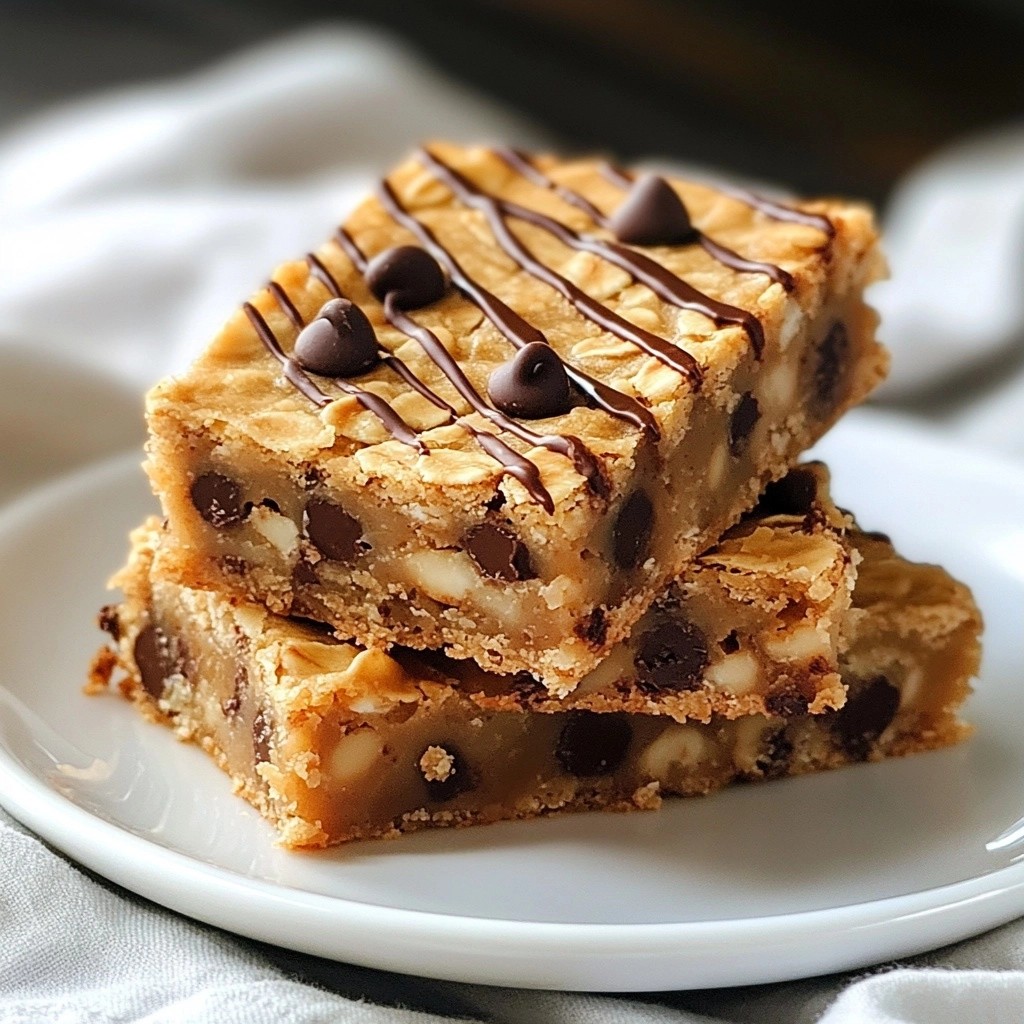
Are you ready to treat your kids to a fun snack? These Sweet Kids Chocolate Chip Oatmeal Bars are a tasty delight that kids love! With just a few simple ingredients, you can whip up a batch full of flavor and nutritious goodness. Whether you’re starting fresh or looking for ways to customize this recipe, I’ll guide you through each step. Let’s make snack time a hit!
Why I Love This Recipe
- Healthy Ingredients: This recipe incorporates rolled oats and whole wheat flour, making it a nutritious choice for kids and adults alike.
- Easy to Make:
- Customizable: You can easily add your kids' favorite ingredients like nuts or dried fruits, making it a versatile snack option.
- Perfect for On-the-Go: These bars are easy to transport and make a great grab-and-go snack for lunchboxes or after-school treats.
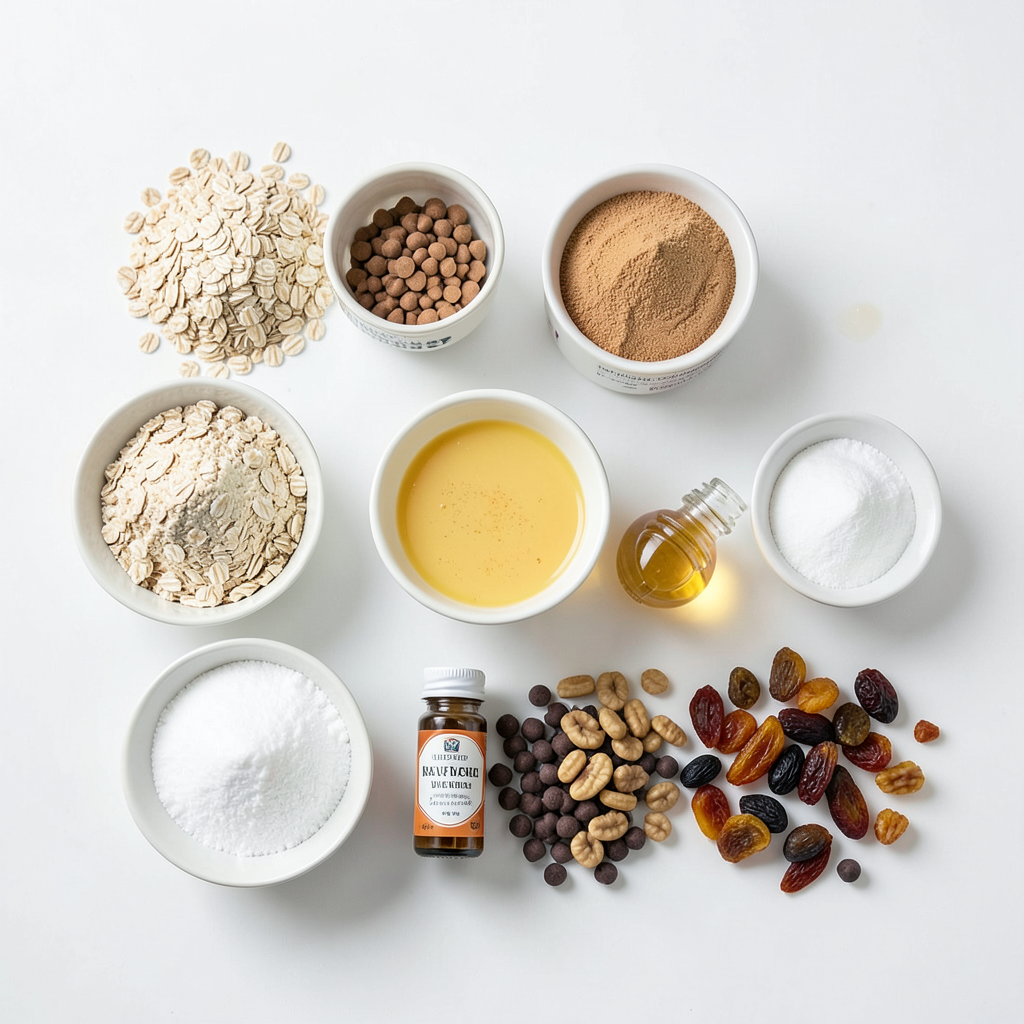
Ingredients
Key ingredients for Chocolate Chip Oatmeal Bars
For these tasty chocolate chip oatmeal bars, you need a few main items:
- 1 ½ cups rolled oats
- 1 cup whole wheat flour
- ½ cup packed brown sugar
- ½ teaspoon baking soda
- ½ teaspoon salt
- ½ cup unsweetened applesauce
- ½ cup honey or maple syrup
- 1 teaspoon vanilla extract
- ½ cup mini chocolate chips
These ingredients work together to create a chewy and sweet treat.
Optional ingredients for added flavor
You can enhance your bars with some fun extras:
- ¼ cup chopped nuts (like walnuts or almonds)
- ¼ cup dried fruits (like raisins or cranberries)
These additions add crunch and sweetness. Feel free to mix and match based on what you like!
Nutritional benefits of key ingredients
Each key ingredient brings something healthy to the table:
- Rolled oats are full of fiber. They help keep you full and support digestion.
- Whole wheat flour has more nutrients than white flour. It gives energy and keeps blood sugar stable.
- Brown sugar adds sweetness with a hint of molasses, but use it in moderation.
- Applesauce acts as a natural sweetener and adds moisture without extra fat.
- Honey or maple syrup provide natural sweetness and antioxidants.
These bars offer a balance of sweetness and nutrition. They are perfect for kids and adults alike!
Step-by-Step Instructions
Prepping your baking pan
First, set your oven to 350°F (175°C). Grab an 8x8 inch square baking pan. You can grease it lightly or line it with parchment paper. This helps you remove the bars easily after baking.
Mixing dry ingredients
In a big bowl, add 1 ½ cups of rolled oats, 1 cup of whole wheat flour, and ½ cup of packed brown sugar. Then, sprinkle in ½ teaspoon of baking soda and ½ teaspoon of salt. Mix these dry ingredients well. This step is key for even flavor and texture.
Combining wet ingredients
In another bowl, pour in ½ cup of unsweetened applesauce. Add ½ cup of honey or maple syrup and 1 teaspoon of vanilla extract. Whisk until smooth. This mixture brings sweetness and moisture to your bars.
Assembling the batter
Now, slowly add the wet mixture to the dry ingredients. Stir until they all blend together. Expect a thick and slightly sticky batter. Then, gently fold in ½ cup of mini chocolate chips. If you want, mix in ¼ cup of chopped nuts or dried fruits for extra flavor and texture.
Baking and cooling process
Transfer the batter to your prepared baking pan. Spread it evenly and press it down firmly. This helps the bars hold their shape. Bake for about 20-25 minutes. Look for a golden brown edge. Once done, take the pan out. Let it cool for 10 minutes before moving the bars to a wire rack. Allow them to cool completely before cutting into squares.
Tips & Tricks
How to ensure perfect texture
To get the best texture, use rolled oats. They give a chewy feel. Whole wheat flour adds fiber and keeps the bars soft. When mixing, don’t overwork the batter. This keeps the bars tender. Press the mixture firmly in the pan. A compact layer helps them hold together. Bake until the edges turn golden brown. This tells you they are done!
Kid-friendly presentation ideas
Make your bars fun to eat! Cut them into fun shapes using cookie cutters. Drizzle melted chocolate on top for a sweet touch. Serve them on a colorful plate to catch kids' eyes. You can also wrap each bar in parchment paper. This makes for a great lunchbox treat. Add stickers or fun notes for an extra surprise!
Substitutions for dietary needs
If you need gluten-free options, use gluten-free oats and flour. For a nut-free version, skip the nuts or use seeds. You can swap honey for maple syrup if needed. Applesauce can be replaced with mashed bananas for a different flavor. Keep in mind these changes may change the texture slightly. Adjust baking time if you make substitutions.
Pro Tips
- Storage Solution: To keep these bars fresh, store them in an airtight container at room temperature for up to a week, or freeze them for longer storage.
- Ingredient Swaps: Feel free to substitute the whole wheat flour with almond flour or gluten-free flour for a different texture and flavor that suits dietary needs.
- Custom Flavor: Experiment with add-ins like cinnamon or peanut butter to make these bars uniquely yours and add an extra layer of flavor.
- Perfect Portioning: For even squares, use a sharp knife and cut while the bars are still slightly warm; this will prevent them from crumbling.
Variations
Flavor variations with different add-ins
You can easily change the flavor of these oatmeal bars. Try adding different nuts like walnuts or almonds for crunch. You can also mix in dried fruits like cranberries or raisins for a sweet twist. If you want a fun surprise, add peanut butter or butterscotch chips instead of chocolate chips. Each option gives a unique taste and makes these bars special.
Gluten-free alternatives
To make gluten-free bars, swap the whole wheat flour for gluten-free flour blends. Look for blends that include oats, rice flour, or almond flour. Make sure your oats are certified gluten-free too. This way, everyone can enjoy these tasty treats without worry.
Vegan modifications
For a vegan version, replace the honey with maple syrup or agave nectar. Use a plant-based yogurt or applesauce instead of the unsweetened applesauce. You can also choose dairy-free chocolate chips for the same yummy flavor. These swaps keep the bars delicious while meeting vegan needs.
Storage Info
Best practices for storing oatmeal bars
To keep your Sweet Kids Chocolate Chip Oatmeal Bars fresh, store them in an airtight container. This helps maintain their chewy texture and flavor. If you have leftover bars, place parchment paper between layers. This prevents them from sticking together.
Freezing for later enjoyment
You can freeze these bars for future snacks. Cut them into squares and wrap each one in plastic wrap. Then, place the wrapped bars in a freezer-safe bag. They can last up to three months in the freezer. When you're ready to enjoy, just thaw at room temperature or heat in the microwave for a quick treat.
Shelf life and serving suggestions
These oatmeal bars stay fresh for about a week when stored properly. Serve them as a snack or a quick breakfast. They are also perfect for lunchboxes. For a fun touch, drizzle melted chocolate on top before serving. This makes them even more appealing to kids!
FAQs
Can I use other types of flour?
Yes, you can use other flours. Try almond flour or oat flour for a different taste. Each flour gives the bars a unique flavor and texture. Just watch the amount, as some flours absorb more liquid.
How do I make these bars nut-free?
To make these bars nut-free, simply leave out the nuts. You can replace them with seeds, like sunflower or pumpkin seeds. This keeps the crunch while making them safe for kids with nut allergies.
What are the best ways to cut and serve the bars?
To cut the bars, wait until they cool completely. Use a sharp knife for clean edges. Cut them into squares or rectangles. For a fun twist, serve them on a colorful plate. You can drizzle chocolate over the top for a treat.
How to customize the sweetness of the recipe?
You can adjust sweetness by changing the honey or maple syrup amount. For less sweetness, cut back on these sweeteners. If you want more sweetness, add chocolate chips or dried fruits. Taste your batter before baking to find your perfect level.
Can I make these bars ahead of time?
Yes, you can make these bars ahead of time. They store well in an airtight container. Just keep them at room temperature for a few days. You can also freeze them for longer storage. Just thaw before serving.
To sum up, we explored how to make delicious chocolate chip oatmeal bars. You learned about the main and optional ingredients, plus their health perks. I shared step-by-step instructions for baking and cooling your bars. You now have tips for texture, fun presentations, and dietary swaps. We also discussed flavor variations, storage tips, and answers to common questions. Baking these bars is fun and simple, making them a perfect treat for everyone. Enjoy experimenting with flavors and sharing your tasty results!