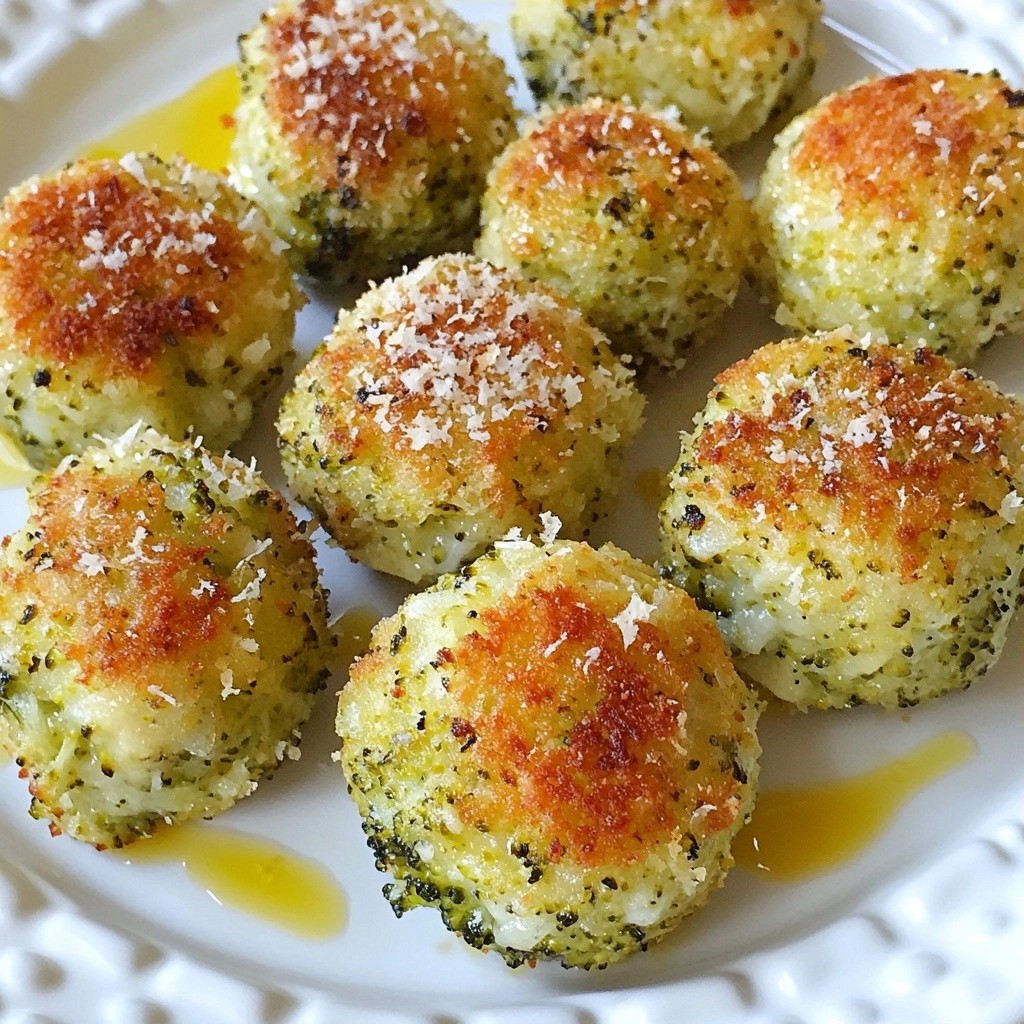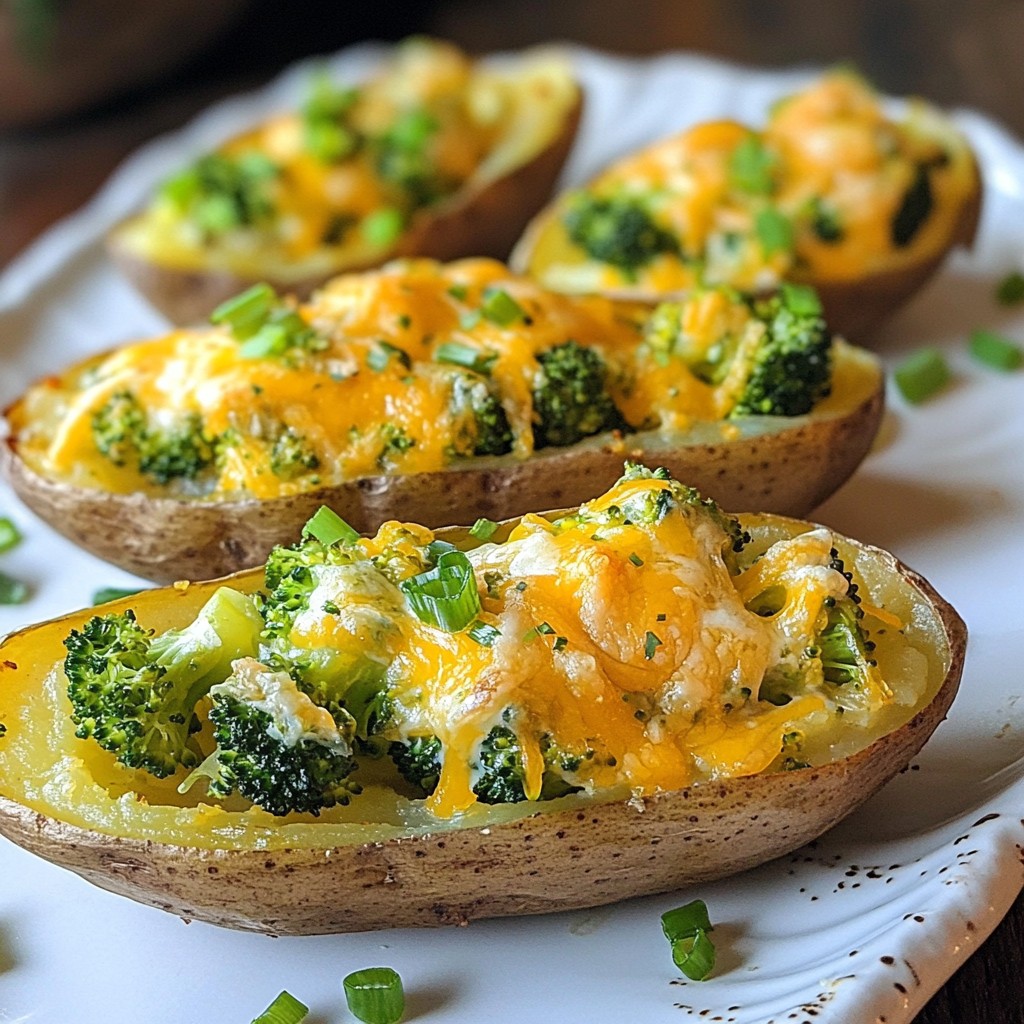
If you're looking for a fun and tasty family meal, you've come to the right place! These Broccoli Cheddar Potato Skins mix creamy cheese and fresh veggies for a treat everyone will love. Easy to make and packed with flavor, this dish is perfect for busy weeknights or weekend gatherings. Get ready to impress your loved ones with this delightful recipe that’s sure to become a new favorite at your table!
Why I Love This Recipe
- Delicious Flavor Combination: The combination of creamy cheddar cheese, fresh broccoli, and fluffy potato creates a mouthwatering experience that’s hard to resist.
- Healthy Twist: This recipe incorporates nutritious broccoli, making it a delightful way to enjoy a classic comfort food while sneaking in some veggies.
- Customizable: You can easily adjust the fillings to include your favorite ingredients, such as bacon bits or different kinds of cheese, to suit your tastes.
- Perfect for Sharing: These cheesy potato skins are great for parties or family gatherings, making them an ideal appetizer that everyone will love.
Ingredients
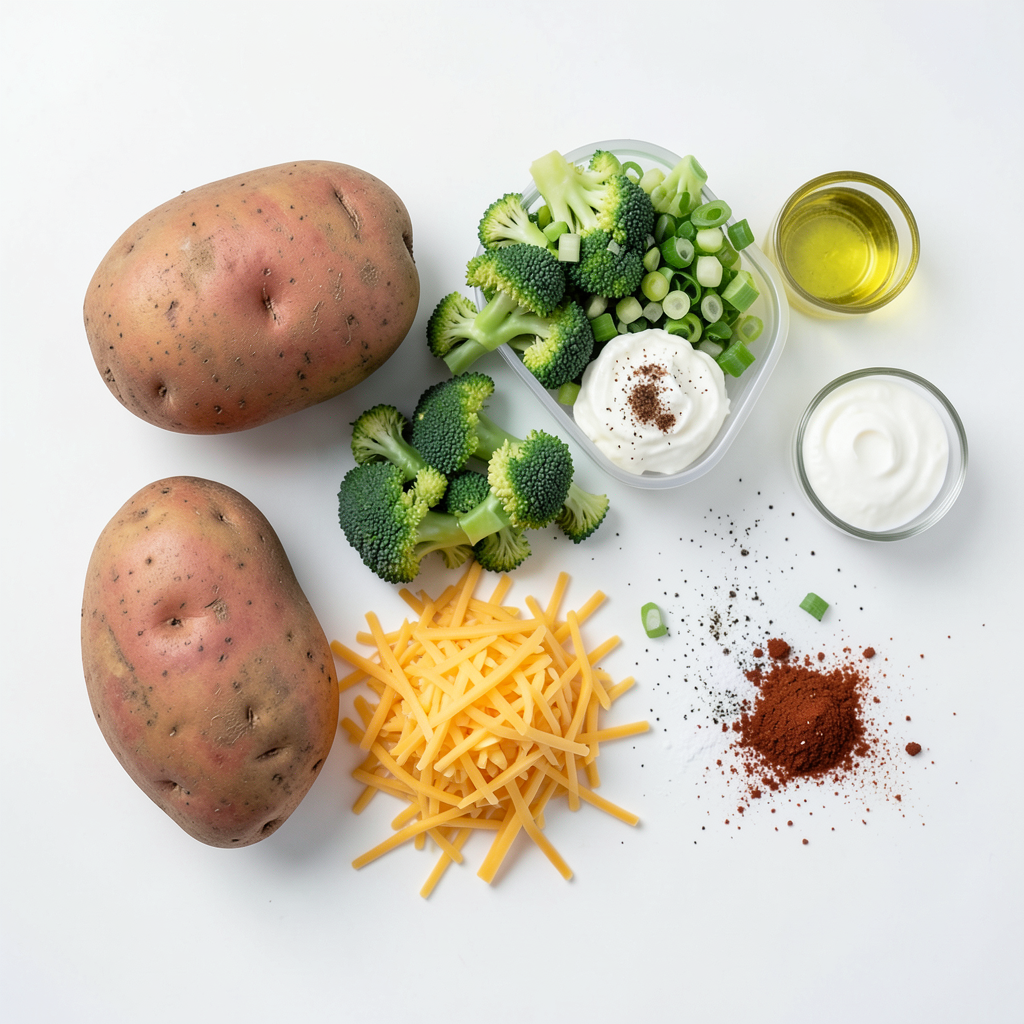
Main Ingredients List
- 4 large russet potatoes
- 2 cups fresh broccoli florets, steamed and finely chopped
- 1 cup shredded sharp cheddar cheese
- 1/2 cup sour cream
- 1/4 cup green onions, finely chopped
Seasoning and Oil
- 2 tablespoons extra virgin olive oil
- Salt and freshly ground black pepper, to taste
- 1 teaspoon garlic powder
- 1/2 teaspoon smoked paprika (optional)
When making broccoli cheddar potato skins, it's vital to gather fresh and quality ingredients. Start with large russet potatoes. They act as the perfect base for the filling. Broccoli adds a bright color and a healthy touch. Use fresh florets and steam them for the best taste. Sharp cheddar cheese provides that rich, gooey flavor we all love. Sour cream keeps the filling creamy and tangy. Finally, green onions add a fresh crunch and a pop of color.
For seasoning, extra virgin olive oil helps crisp the potato skins. Salt and pepper enhance the flavors, while garlic powder gives an extra kick. If you enjoy smoky flavors, add smoked paprika for depth.
Always measure your ingredients carefully. The right balance makes the best potato skins!
Step-by-Step Instructions
Preparing the Potatoes
- Preheat the oven to 400°F (200°C).
- Scrub and dry the russet potatoes.
- Prick each potato with a fork.
First, I start by preheating my oven to 400°F (200°C). This helps the potatoes cook evenly. I wash the russet potatoes under running water. A good scrub removes dirt and makes them clean. After rinsing, I dry them with a towel. This step is key to getting crispy skins.
Next, I prick each potato multiple times with a fork. I usually do about five to six pricks. This allows steam to escape while baking.
Baking the Potatoes
- Rub with olive oil and season with salt and pepper.
- Bake for 45 to 60 minutes until tender.
Once my potatoes are prepped, I rub them with olive oil. This helps add flavor and crispness. I sprinkle salt and pepper generously over them. Then, I place the potatoes on the oven rack or a baking sheet. I bake them for 45 to 60 minutes. I know they are done when they're tender and easy to pierce with a fork.
Assembling the Potato Skins
- Cool and cut the baked potatoes.
- Scoop out the inner flesh.
- Mix filling ingredients and stuff the skins.
After baking, I let the potatoes cool for about five minutes. This makes them safe to handle. I carefully cut each potato in half lengthwise. With a spoon, I scoop out the inner flesh. I leave about a 1/4 inch of potato in the skin for strength.
In a bowl, I mix the scooped potato with the broccoli, cheese, sour cream, green onions, garlic powder, and smoked paprika. I season this mix with salt and pepper. I stir it well until everything is combined. Then, I stuff each potato skin with this tasty filling. I press down gently to pack it in for a perfect bite.
Final Baking
- Bake for an additional 15 to 20 minutes until golden.
Now, I place the filled potato skins back on the baking sheet. I return them to the oven for another 15 to 20 minutes. I watch closely as they bake until the tops turn golden and crisp. This final bake adds that perfect crunch and makes them even more delicious.
Once they are done, I let the potato skins cool for a few minutes before serving.
Tips & Tricks
Ensuring Perfect Skins
To make the best potato skins, leave about 1/4 inch of potato in each skin. This helps them stay strong and hold the filling. When you scoop out the potato, be gentle. If you press too hard, you might break the skin. After filling, press the filling down firmly. This way, every bite is packed with flavor.
Flavor Enhancements
You can boost the flavor by adding fresh herbs or spices. Try mixing in some chopped parsley or basil. They add a bright taste. You can also swap out the cheddar cheese. Mozzarella gives a great stretch, while feta adds a tangy kick. Get creative and see what you like best!
Presentation Advice
For a beautiful presentation, serve the potato skins on a wooden platter. This makes the dish look rustic and inviting. After plating, sprinkle some green onions on top for color. You can also add a small bowl of sour cream on the side. This adds a nice touch and gives everyone a dip option.
Pro Tips
- Choose the Right Potatoes: Opt for large russet potatoes as they have a fluffy texture and sturdy skin, perfect for holding the cheesy filling.
- Steaming Broccoli: Steaming the broccoli instead of boiling retains its vibrant color and nutrients, enhancing both flavor and appearance.
- Cheese Variations: Experiment with different cheese types like gouda or pepper jack for a unique twist on the classic flavor.
- Serving Suggestions: Pair these potato skins with a fresh salad or a side of your favorite dipping sauce to create a well-rounded meal.
Variations
Vegetarian Options
You can easily make this dish more veggie-friendly. Replace the sour cream with Greek yogurt for a creamy twist. Greek yogurt adds tang and protein while lowering fat. You can also add other veggies to the mix. Bell peppers add color and crunch. Corn brings sweetness to balance the dish. Both options make it fun and tasty!
Cheese Alternatives
If you want a different cheese flavor, try mozzarella or feta cheese. Mozzarella melts beautifully, giving a gooey texture. Feta adds a salty kick, enhancing the overall taste. For those who avoid dairy, dairy-free cheese options are available. Look for brands that melt well, like cashew-based cheese. This way, everyone can enjoy the meal.
Spice Variants
To heat things up, consider adding jalapeños to the filling. They bring a nice kick and pair well with cheese. You can also experiment with other spices. Try adding chili powder for a smoky flavor or herbs like oregano for freshness. Don't be afraid to get creative with your spice choices!
Storage Info
Refrigeration Advice
To store leftover potato skins, let them cool first. Then, place them in an airtight container. This keeps them fresh and tasty. You can store them in the fridge for up to three days. If you want to reheat them, ensure they are in a single layer to maintain crispiness.
Freezing Guidelines
You can freeze both baked and unbaked potato skins. For baked skins, let them cool completely. Wrap each one tightly in plastic wrap and then place them in a freezer bag. For unbaked skins, stuff them like normal, then freeze them on a baking sheet before transferring to a freezer bag. This way, they won’t stick together.
To thaw, move the skins to the fridge overnight. For baked skins, reheat in the oven at 375°F (190°C) for about 15 minutes. For unbaked skins, bake them straight from the freezer for about 25-30 minutes. Enjoy them warm and crispy!
FAQs
Can I make these potato skins in advance?
Yes, you can make these potato skins ahead of time. Bake the potatoes and prepare the filling. Store them separately in the fridge. When ready to serve, stuff the skins and bake them. This way, you save time during busy meal times.
How do I reheat leftover potato skins without losing crispiness?
To reheat potato skins, use the oven. Preheat it to 350°F (175°C). Place the skins on a baking sheet. Heat for about 10 to 15 minutes. This keeps them crispy. Avoid the microwave, as it makes them soggy.
Is it possible to make a gluten-free version?
Absolutely! This recipe is naturally gluten-free. Just ensure that the ingredients you choose are gluten-free. Check the labels on the cheese and sour cream. They should be safe for those with gluten issues.
What are the best side dishes to serve with broccoli cheddar potato skins?
Many sides pair well with these potato skins. Here are some great ideas:
- A fresh garden salad
- Steamed vegetables
- A light soup, like tomato or carrot
- Roasted sweet potatoes
Can I substitute other vegetables in this recipe?
Yes, feel free to mix in other veggies! Bell peppers, spinach, or corn work well. Just make sure to chop them finely. This adds more color and flavor to your potato skins. Be creative and have fun with it!
These broccoli cheddar potato skins are simple and fun to make. We covered the ingredients, steps, and tips to ensure your dish turns out great. I shared variations to suit different tastes and storage tips for your leftovers. Remember, you can adjust flavors and fillings to make these skins your own. Enjoy creating this tasty treat that will impress anyone at the table!