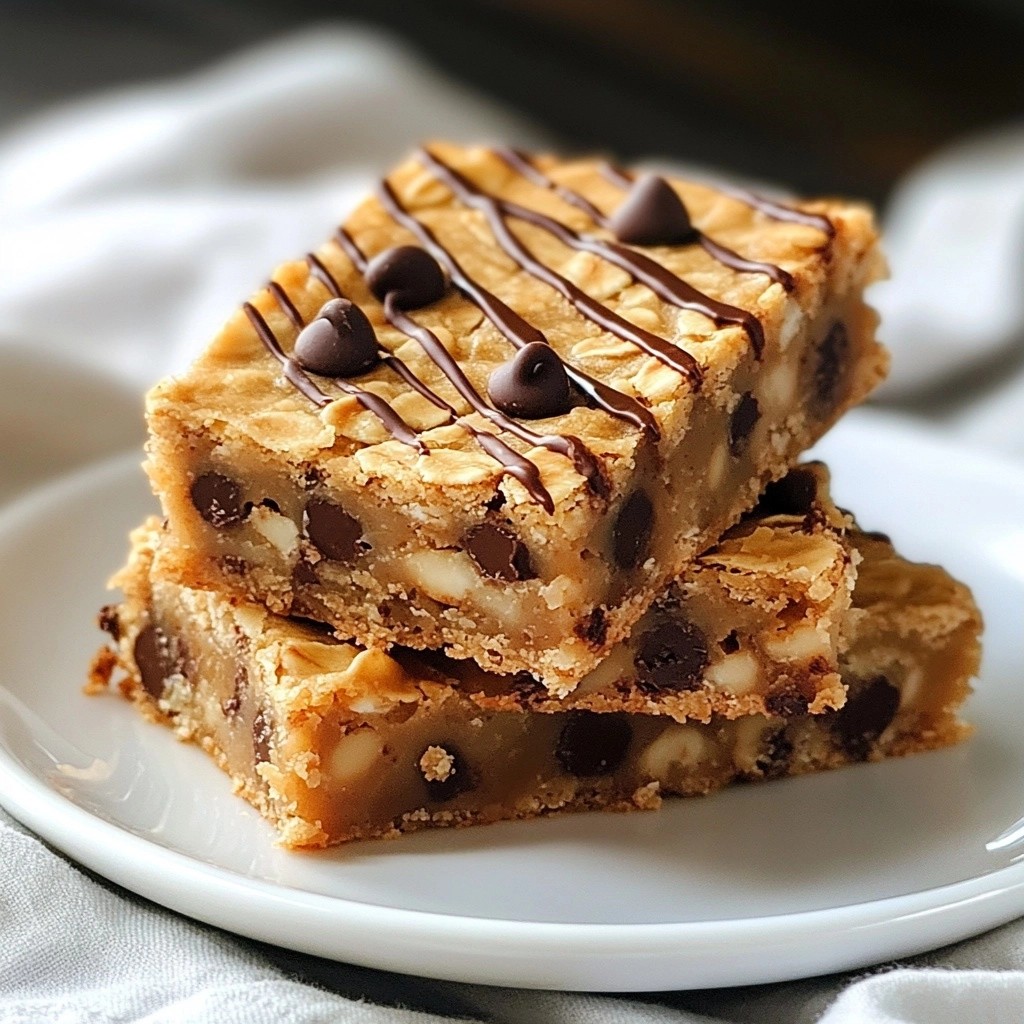
Looking for a quick and tasty breakfast that fuels your day? You’re in the right place! My Chocolate Chip Oatmeal Breakfast Bars are easy to make and perfect for busy mornings. Packed with wholesome ingredients like rolled oats and ripe bananas, these bars are not just delicious but also nutritious. In this post, I’ll share simple steps to create your own batch, along with tips for tasty variations and storage. Let’s dive in!
Why I Love This Recipe
- Healthy Ingredients: These breakfast bars are packed with wholesome ingredients like oats, bananas, and almond butter, making them a nutritious start to your day.
- Quick and Easy: With just 10 minutes of prep time, you can have these delicious bars ready to bake, perfect for busy mornings!
- Versatile Flavor Options: You can customize these bars with your choice of nut butter and add-ins, such as nuts or dried fruits, to suit your taste preferences.
- Great for Meal Prep: These bars store well, making them ideal for meal prep. Just bake a batch and enjoy them throughout the week!
Ingredients
Essential Ingredients
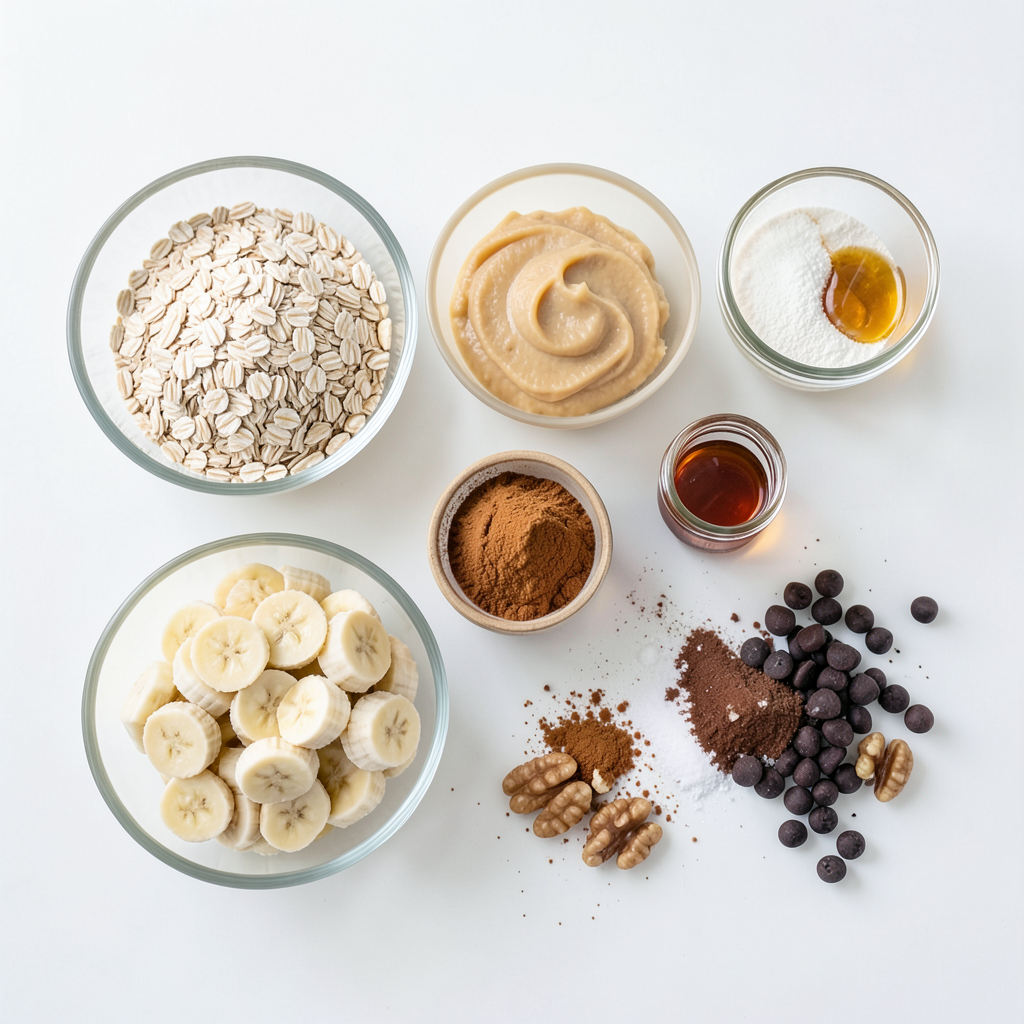
- 2 cups rolled oats
- 1 cup mashed ripe bananas (about 2-3 medium bananas)
- 1/2 cup almond butter (or peanut butter)
- 1/4 cup honey or maple syrup
These main ingredients form the base of your bars. Rolled oats provide fiber and texture. Ripe bananas add natural sweetness and moisture. Almond butter or peanut butter gives healthy fats and creaminess. Honey or maple syrup serves as the sweetener.
Additional Flavor Boosts
- 1 teaspoon pure vanilla extract
- 1/2 teaspoon baking powder
- 1/2 teaspoon ground cinnamon
- 1/4 teaspoon sea salt
These flavor boosts elevate your bars. Vanilla adds warmth and depth. Baking powder helps your bars rise. Cinnamon brings a cozy spice, while sea salt balances the sweetness.
Mix-Ins and Toppings
- 1/2 cup dark chocolate chips
- Optional: 1/2 cup chopped nuts (walnuts or almonds)
Dark chocolate chips provide a rich treat. You can choose dairy-free chips if you want. Chopped nuts add crunch and healthy fats. Feel free to mix and match these to your taste!
Step-by-Step Instructions
Preparation Steps
1. Preheat your oven to 350°F (175°C).
2. Prepare a 9x9 inch baking dish. You can grease it lightly or use parchment paper.
Mixing the Batter
3. In a large bowl, combine the rolled oats, mashed bananas, and almond butter.
4. Use a spatula to mix until everything is well blended.
5. Add honey or maple syrup, vanilla extract, baking powder, cinnamon, and sea salt.
6. Stir the mixture until it is smooth and there are no lumps.
7. Fold in the dark chocolate chips and optional nuts. Make sure they are spread evenly.
Baking Process
8. Pour the mixture into the prepared baking dish.
9. Use a spatula to spread the batter evenly in the dish.
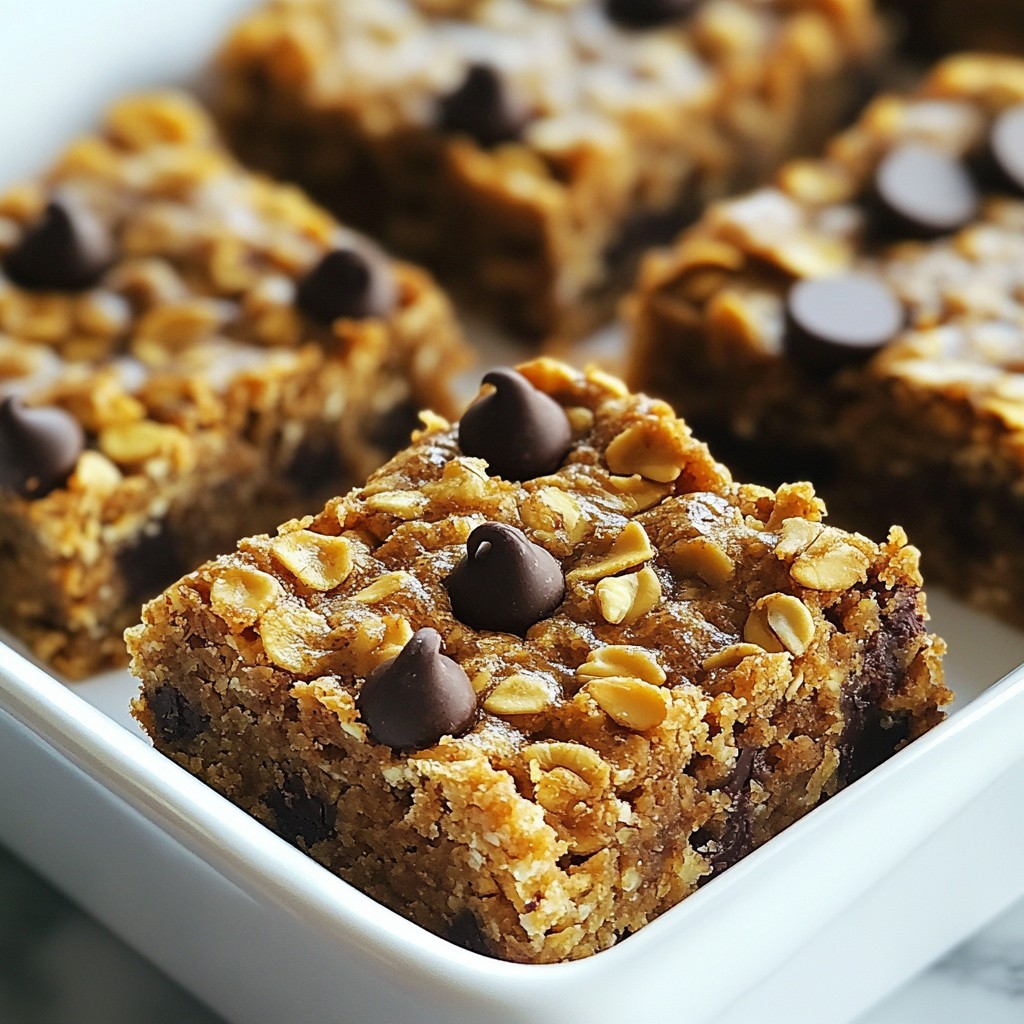
10. Bake for 25-30 minutes. The bars are ready when the edges are golden brown.
11. Check doneness with a toothpick. It should come out clean when inserted in the center.
Tips & Tricks
Achieving the Perfect Texture
To get the best texture for your bars, use ripe bananas. They should be soft and brown. This adds natural sweetness and moisture. If bananas are too firm, your bars may be dry.
Mixing is key. Start with the dry ingredients first. Then, add the wet ingredients. Use a spatula or spoon to combine them well. Make sure the banana blends smoothly into the mix. This helps create a uniform texture.
Customization Ideas
You can easily make these bars fit your needs. For a vegan version, stick to maple syrup. Use almond butter or peanut butter, depending on your taste. If you need gluten-free, look for certified gluten-free oats. This keeps your treat safe and tasty.
Want to change the flavor? You can swap nut butters. Try cashew or sunflower butter for a twist. You can also use agave syrup instead of honey. Each choice gives the bars a new taste.
Serving Ideas
When serving, make your bars look great. Cut them into squares or rectangles. You can drizzle almond butter on top for style and flavor. A sprinkle of chocolate chips adds a fun touch too.
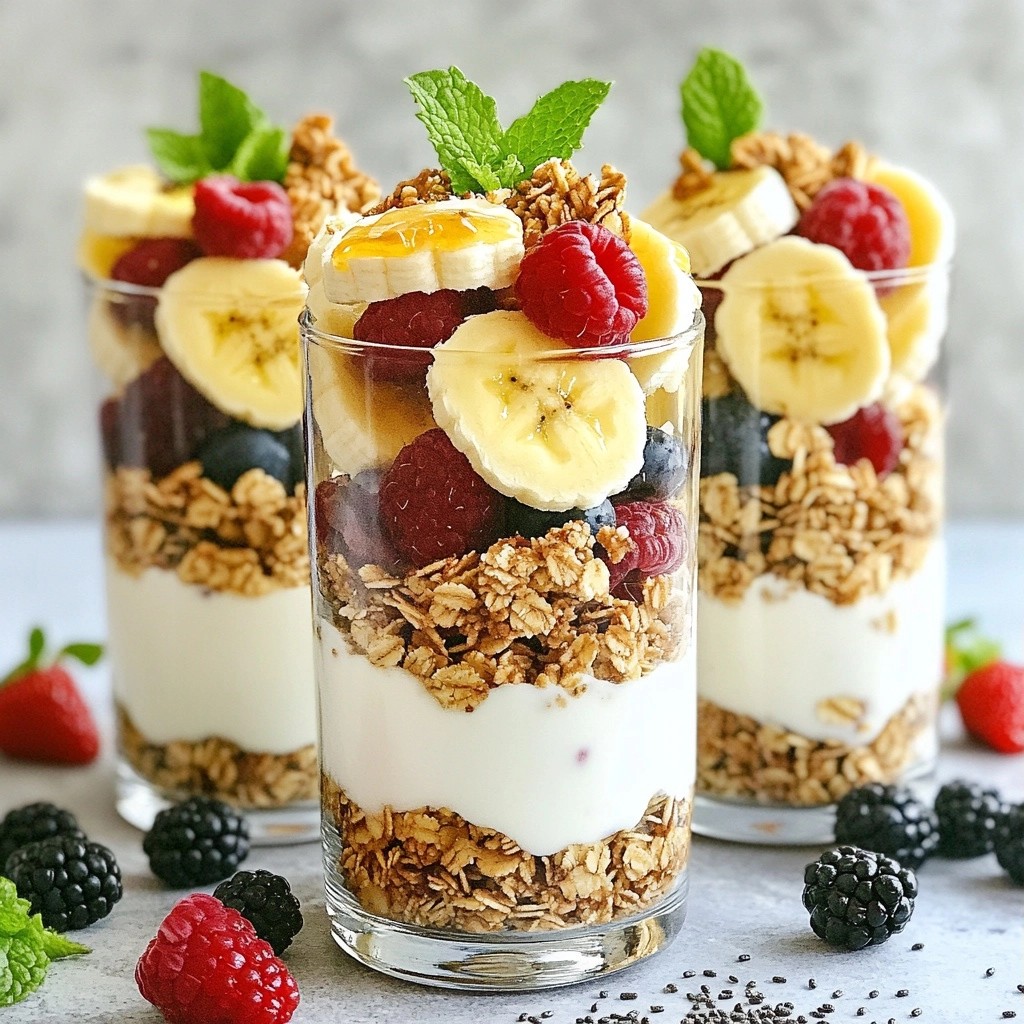
These bars pair well with yogurt or fresh fruit. A side of sliced bananas or berries adds freshness. Enjoy these bars warm or at room temperature for the best taste.
Pro Tips
- Use Ripe Bananas: The riper the bananas, the sweeter and more flavorful your bars will be. Look for bananas with brown spots for the best results.
- Experiment with Nut Butters: While almond butter is delicious, feel free to try other nut butters like cashew or sunflower seed butter for a unique twist.
- Chill Before Cutting: For cleaner cuts, refrigerate the bars for about an hour after cooling. This will firm them up and make slicing easier.
- Add Extra Flavor: Enhance your bars by adding a pinch of sea salt on top before baking or incorporating dried fruits like cranberries or raisins into the mix.
Variations
Gluten-Free Options
You can easily make these bars gluten-free. Instead of rolled oats, use certified gluten-free oats. These oats ensure you avoid any gluten cross-contamination. Always check labels when buying. This step keeps your treats safe and tasty.
Vegan Friendly Adjustments
To make these bars vegan, choose dairy-free chocolate chips. Many brands offer great options. You can swap almond butter for sunflower seed butter too. This change works well for nut allergies. Maple syrup is a great choice for sweetening.
Flavor Variations
Feel free to play with flavors! Try different nut butters like cashew or sunflower. They add unique tastes. You can also add dried fruits like cranberries or raisins. A sprinkle of cinnamon or nutmeg gives warmth. These tweaks keep your bars exciting and fun!
Storage Info
How to Store
To keep your chocolate chip oatmeal breakfast bars fresh, store them in an airtight container. Use a container that fits the bars snugly. This keeps air out and helps avoid drying out. Place the bars at room temperature for short-term storage. If you want them to last longer, keep them in the fridge.
Freezing Instructions
To freeze your bars, first let them cool completely. Then, wrap each bar in plastic wrap. Place the wrapped bars in a freezer-safe bag or container. Squeeze out any extra air before sealing. This helps prevent freezer burn. When you want to eat one, take it out and let it thaw on the counter. You can also warm it in the microwave for a few seconds for a cozy snack.
Shelf Life
In the pantry, these bars last about a week. If you store them in the fridge, they can stay good for up to two weeks. Freezing extends their life to about three months. This means you can prepare a batch and enjoy them over time!
FAQs
Can I use quick oats instead of rolled oats?
Yes, you can use quick oats. Quick oats will make the bars softer. However, rolled oats give better texture. They hold their shape well and provide a hearty bite.
How do I know when my bars are done baking?
Check the edges. They should be golden brown. Insert a toothpick into the center. If it comes out clean, your bars are ready. You can also press lightly on the top. It should feel firm but springy.
Can I substitute the mashed bananas with applesauce?
Yes, applesauce works well as a substitute. Use the same amount as bananas. It will keep the bars moist and add sweetness. However, the flavor will change slightly.
Are these breakfast bars suitable for kids?
Absolutely! Kids love these bars. They are sweet, chewy, and filled with chocolate. You can also add nuts for extra crunch. They make a great snack or breakfast option.
What can I add for extra protein?
You can add protein powder, nut butter, or Greek yogurt. Chopped nuts also boost protein content. Consider adding seeds like chia or hemp for more nutrition.
In this post, we explored how to make delicious breakfast bars with simple ingredients. We covered essential items like rolled oats and ripe bananas, plus fun mix-ins like dark chocolate chips. You learned step-by-step how to prepare, mix, and bake your bars. Customization tips let you modify recipes for dietary needs. Remember, you can store them safely and enjoy various flavors by experimenting with nut butters or spices. Now, it’s time to make your own amazing breakfast bars! Enjoy every bite!