Looking for a fun treat that kids will love? You’ll adore these Sweet Kids-Friendly Chocolate Dipped Apple Slices! This simple and tasty recipe turns crunchy apples into a delightful snack. Whether for a party or a quick after-school treat, these chocolate-covered slices are a hit. With easy steps, fun toppings, and helpful tips, you’ll create a delicious experience that your kids can help with too. Let's dive in and start creating!
Why I Love This Recipe
- Healthy Treat: This recipe combines the natural sweetness of apples with rich chocolate, making it a satisfying and nutritious snack.
- Customizable: You can easily adjust the toppings to your liking, whether you prefer nuts, coconut, or sprinkles for a festive touch.
- Quick and Easy: With minimal prep time, these chocolate-dipped apple slices can be ready in just 40 minutes, perfect for last-minute gatherings.
- Kid-Friendly: This fun recipe is a great way to get kids involved in the kitchen, allowing them to personalize their own apple slices!
Ingredients
List of Ingredients
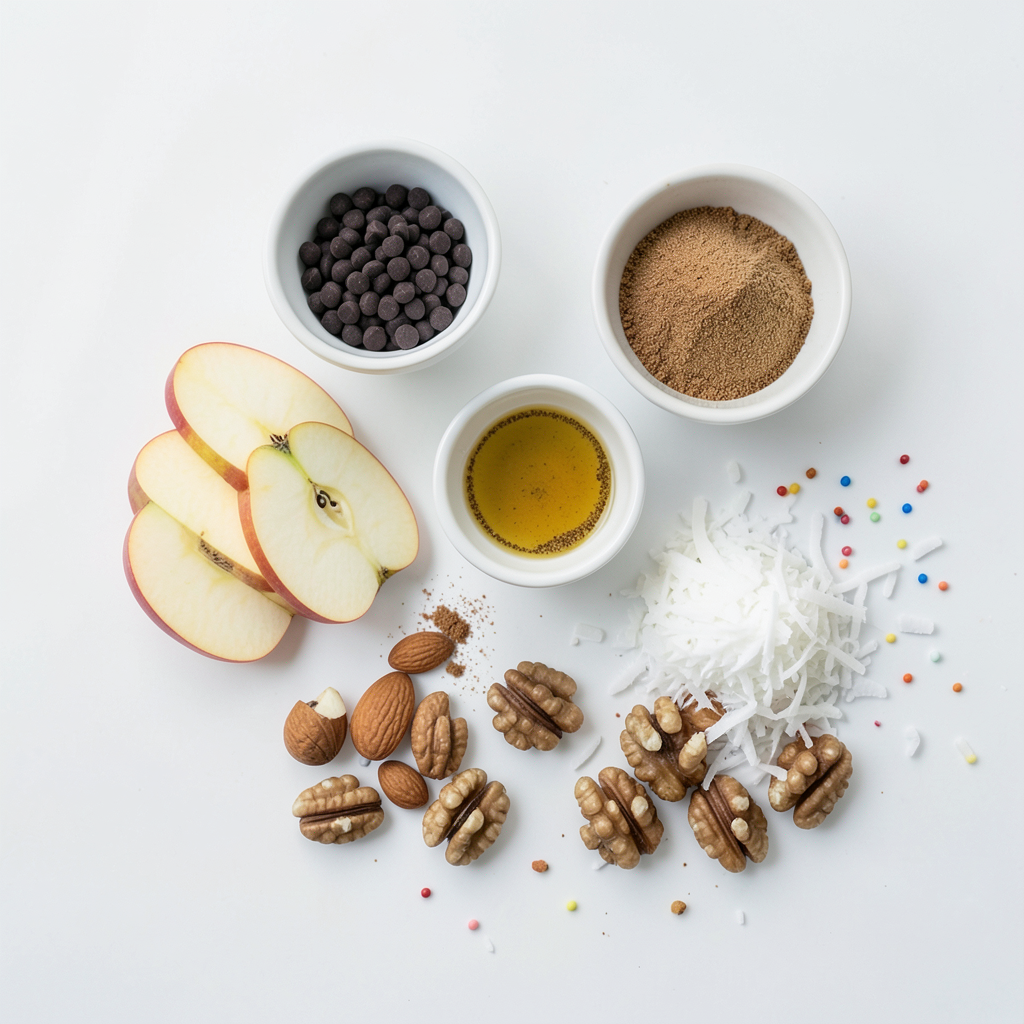
- 2 medium-sized apples (like Granny Smith or Honeycrisp)
- 1 cup dark chocolate chips or milk chocolate chips
- 1 tablespoon coconut oil (optional, for smoothness)
- 1/2 teaspoon ground cinnamon (optional, for flavor)
- 1/4 cup chopped nuts (like almonds or walnuts)
- 1/4 cup unsweetened shredded coconut
- Sprinkles (optional, for fun)
Ingredient Substitutions
You can swap the apples for other varieties, like Fuji or Gala. If you prefer white chocolate, feel free to use that instead of dark or milk chocolate. For a nut-free option, leave out the nuts or use seeds like pumpkin seeds. You can also use a nut butter instead of chocolate for a different taste.
Tips for Choosing Apples
Look for firm apples without bruises or soft spots. Fresh apples should feel heavy for their size. Granny Smith apples offer a nice tartness that pairs well with sweet chocolate. Honeycrisp apples are sweet and add a great crunch. Always wash the apples well to remove any wax or dirt before slicing. Keep them cold to make dipping easier!
Step-by-Step Instructions
Preparing the Apples
Start by washing the apples well under running water. Use a clean towel to pat them dry. Slice the apples into wedges or rings. Make sure to remove the core from each piece. This makes it safe and easy for kids to eat. You can use any sweet apple like Granny Smith or Honeycrisp. These apples go great with chocolate!
Melting the Chocolate
Grab a microwave-safe bowl and add the chocolate chips. If you want smooth chocolate, add coconut oil. Heat the bowl in the microwave for 30 seconds. After each time, take it out and stir. Repeat this until the chocolate is melted and smooth. If you like, you can mix in ground cinnamon for extra flavor. This makes the chocolate taste even better!
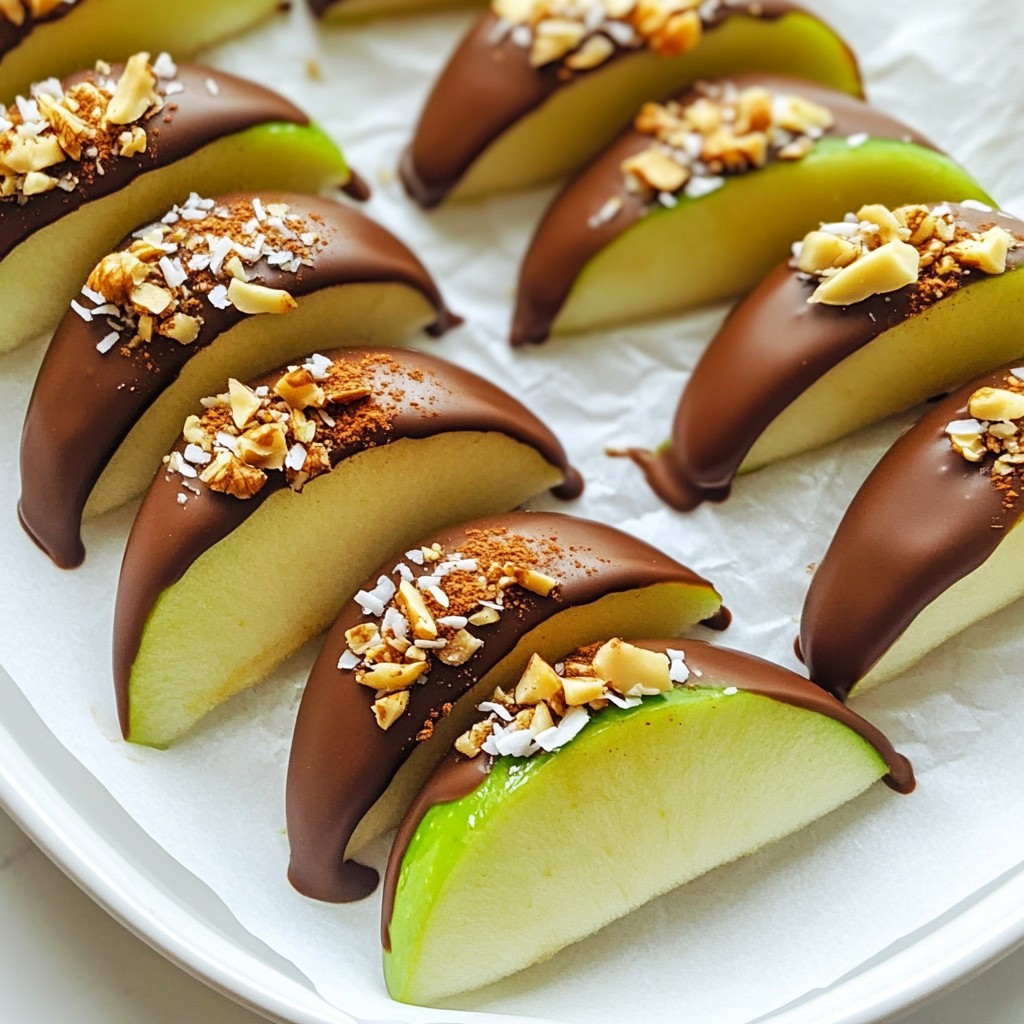
Dipping and Decorating the Apple Slices
Now, take each apple slice and dip it into the melted chocolate. Make sure it’s fully coated. Let any extra chocolate drip back into the bowl. Place the dipped slices on a baking sheet lined with parchment paper. This stops them from sticking. Before the chocolate hardens, sprinkle on your chopped nuts, shredded coconut, or colorful sprinkles. These toppings add a fun and tasty touch! Finally, put the baking sheet in the fridge for about 30 minutes. This helps the chocolate set and get firm. Once done, take them out and enjoy your sweet treat!
Tips & Tricks
Ensuring Smooth Chocolate Coating
To get a smooth chocolate coating, choose good chocolate chips. Dark or milk chocolate work great. Adding one tablespoon of coconut oil helps the chocolate melt evenly. Heat it in the microwave in short bursts. Stir after each burst until it melts. This keeps the chocolate silky and easy to dip. Mixing in ground cinnamon adds a warm flavor too.
Making the Experience Fun for Kids
Make this a fun project for kids! Let them wash the apples and choose toppings. Set up a dipping station with all the toppings laid out. Kids love to sprinkle on nuts, coconut, and colorful sprinkles. You can even create fun patterns with the toppings. This turns making the treat into a fun activity. Enjoying it together makes it even sweeter!
Common Mistakes to Avoid
Avoid using cold apples straight from the fridge. Room temperature apples help the chocolate stick better. If the chocolate hardens too fast, try melting it again. Don’t rush dipping; take your time to coat each slice well. Also, make sure to use parchment paper on the baking sheet. This keeps the chocolate from sticking, making clean up easy.
Pro Tips
- Choose the Right Apples: Select apples that are firm and crisp for the best texture. Granny Smith apples add a tart contrast to the sweet chocolate, while Honeycrisp offers a sweeter flavor profile.
- Melting Chocolate Tips: When melting chocolate, add a teaspoon of coconut oil to achieve a smoother consistency and prevent the chocolate from seizing up.
- Chill Time Matters: Allow the apple slices to chill for at least 30 minutes. This helps the chocolate set properly, ensuring a clean bite without the chocolate sliding off.
- Creative Toppings: Experiment with different toppings like crushed cookies, dried fruits, or even a drizzle of white chocolate for an extra layer of flavor and visual appeal.
Variations
Different Chocolate Options
You can pick different types of chocolate for your apple slices. Dark chocolate adds a rich taste. Milk chocolate gives a sweeter flavor. You can also try white chocolate for a creamy touch. Each type pairs well with apples. You may prefer to mix chocolates for a fun look.
Custom Toppings and Add-Ins
Get creative with toppings! Chopped nuts add a nice crunch. You can use almonds, walnuts, or even peanuts. Shredded coconut brings a tropical vibe. Sprinkles make everything festive and fun. You can also use mini chocolate chips for extra sweetness. Let your kids choose their favorite toppings for a fun twist!
Seasonal Theme Ideas
Make your chocolate-dipped apples fit the season. For fall, add pumpkin spice or cinnamon. You can drizzle caramel for a cozy touch. In winter, use crushed peppermint for a fresh taste. For summer, try colorful sprinkles and fruity toppings. You can even shape the slices like hearts for special occasions!
Storage Info
Best Ways to Store Chocolate-Dipped Apple Slices
To keep your chocolate-dipped apple slices fresh, place them in a container. Use a shallow, airtight container. Layer the apple slices with parchment paper. This prevents them from sticking together. Store the container in the fridge. This will help them stay crisp and tasty.
Freezing for Later Use
You can freeze chocolate-dipped apple slices for later. First, let them cool completely. Then, place them on a baking sheet. Make sure they are in a single layer. Freeze them for about an hour. Once frozen, transfer them to a freezer bag. Squeeze out as much air as you can before sealing. They can stay in the freezer for up to three months.
Shelf Life and Freshness Tips
Chocolate-dipped apple slices are best enjoyed fresh. They will stay good in the fridge for about three days. After that, the apples may get soft. To keep them fresh longer, avoid adding toppings right away. Add nuts or sprinkles right before serving. This keeps everything crunchy and delicious.
FAQs
Can I use white chocolate instead of dark or milk chocolate?
Yes, you can use white chocolate. It adds a sweet and creamy taste to your apples. Just melt it in the same way as dark or milk chocolate. The kids will love the look and taste!
How do I make sure the chocolate doesn’t harden too quickly?
To keep the chocolate smooth, work in small batches. Melt only what you need at first. If it starts to harden, you can reheat it gently in the microwave. Adding a little coconut oil helps too.
What other fruits can I dip in chocolate?
You can dip many fruits! Try bananas, strawberries, or even orange slices. Each fruit brings a new flavor and fun. Pick fruits that are firm for best results.
How can I get my kids involved in making this recipe?
Kids can help wash apples and slice them. They can also dip the apple slices in chocolate. Let them choose toppings. This makes it fun and personal. Enjoy the time together!
You now have all you need to make chocolate-dipped apple slices. We covered the best ingredients, steps to follow, and helpful tips. Remember, the right apples and toppings make a big difference. Keep your chocolate smooth for a great finish. Also, feel free to use different fruits or seasonal themes to keep it fun. Store your treats well to enjoy them later. Get your kids involved for a fun cooking moment. Enjoy your tasty creations and share them with others!